
Pruning
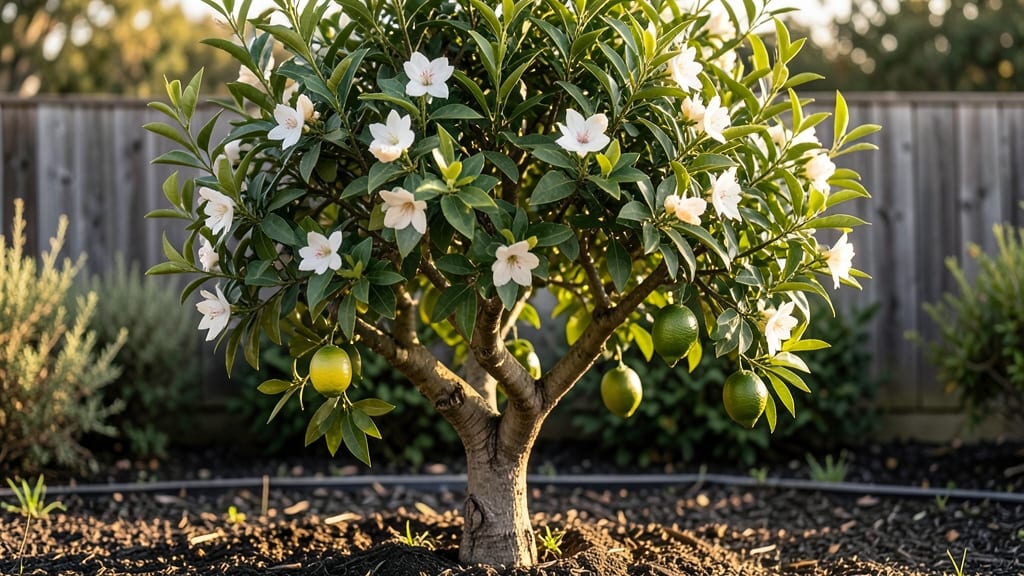
Watching a tree branching out into a sturdy, well-branched giant by spring is one of the most rewarding parts of dormant season trimming. ✂️ I’ve watched my own trees go from scraggly to strong just by cutting at the right time—late winter, before buds swell.
The key is removing dead wood and shaping growth while the tree’s energy is dormant, not fighting new leaves.
You’ll need sharp pruners, rubbing alcohol to sterilize cuts, and a clear day to see the branches. For young trees, aim to remove no more than 25% of the canopy; mature trees can handle up to 30% if done right.
The goal isn’t perfection—it’s encouraging the tree to grow outward, not just upward.
By late spring, you’ll see thick, evenly spaced branches reaching for sunlight, not crowded or crossing each other. The tree’s energy focuses on strong new growth instead of struggling with weak limbs. It’s like giving your tree a fresh start—just in time for the growing season.
Works for fruit trees, shade trees, and even young saplings. The same principles apply, whether you’re shaping a backyard maple or pruning a new apple tree. Here’s how to do it without mistakes.
📚 In This Guide
- What you need
- Instructions
- Tips and common mistakes
- Wrapping up and next steps
What you need
- ● Pruning shears: Bypass pruners (for cuts up to ¾ inch) – 1 pair (look for sharp, ergonomic handles).
- ● Loppers: For branches ½ to 2 inches thick – 1 pair (choose bypass or anvil type, but bypass is gentler on wood).
- ● Pruning saw: For branches 2+ inches thick – 1 saw (curved blade for precision cuts).
- ● Extension pole: Adjustable 6–12 ft pole with saw attachment – 1 pole (for high branches).
- ● Gloves: Heavy-duty, cut-resistant gloves – 1 pair (protects hands from thorns and rough bark).
- ● Disinfectant: 70% rubbing alcohol or bleach solution (1 part bleach to 9 parts water) – small bottle (sanitizes tools between cuts).
- ● Heavy-duty trash bags: For collecting debris – 2–3 bags (or a wheelbarrow for large jobs).
- ● Safety gear: Goggles (to shield eyes from debris) and ear protection (if using a chainsaw).
- ● Ladder: Sturdy, extendable ladder (if branches are too high for a pole).
- ● Tree wound dressing: Pruning sealant (controversial, but some gardeners swear by it for large cuts).
- ● Marking twine: Colored twine to flag branches for removal (great for complex pruning plans).
- ● First-aid kit: Bandages and antiseptic wipes (just in case!).
- ● Check local regulations—some areas require permits for large-scale pruning.
- ● Know your tree species! Research common diseases or pests in your region to avoid spreading them.
- ● Wait for a dry day—wet branches are slippery and harder to cut cleanly.
- ● Gather a buddy for large trees or high branches (safety first! 🚧).
Step-by-step guide to pruning trees for better branching
Here's how to encourage a fuller, healthier tree shape during its dormant season.
✂️ Step 1: Identify and Remove Dead or Diseased Branches
Start by scanning the tree for any branches that are brown, brittle, or oozing sap—these are dead or diseased and need immediate removal. I use sharp, clean pruning shears to make cuts just outside the branch collar (the swollen area where the branch meets the trunk). This prevents unsightly stubs and promotes faster healing.
If a branch is larger than 2 inches in diameter, use a pruning saw instead. Make your cut at a slight angle to avoid water pooling on the wound. You'll know you're doing it right when the cut looks smooth and clean, not jagged. Remove these branches first—they'll take the most effort but create the cleanest foundation for new growth.
✂️ Step 2: Thin Out Crowded Branches for Better Airflow
Next, focus on branches that are rubbing against each other or growing too close together. These compete for sunlight and nutrients, weakening the tree. Look for branches that cross over each other or grow directly opposite one another. Remove about one-third of the crowded branches, cutting them back to their origin point at the trunk or larger branch.
I like to step back every few cuts to visualize the tree's shape. You want sunlight to reach the center of the canopy, so aim for a balanced, open structure. Avoid removing more than 25% of the tree's foliage in one season—this can stress the tree and reduce its ability to produce strong new branches in spring.
✂️ Step 3: Shape the Tree by Pruning Back Overgrown Branches
Now, focus on branches that are growing too long or out of proportion. Cut these back to a lateral branch (a smaller side branch) or a bud that faces the direction you want the branch to grow. For example, if a branch is growing upward, prune it back to a bud that faces outward to encourage a fuller, wider shape.
Use your hand as a guide—if you can't fit it between two branches, they're too close. Prune back to just above a bud that's pointing in the direction you want new growth to go. This ensures the tree grows in the shape you envision. Avoid cutting back more than one-third of any branch's length at once to prevent shock.
✂️ Step 4: Clean Up and Sterilize Your Tools
After pruning, wipe down your shears and saw with rubbing alcohol or a 10% bleach solution to prevent the spread of disease. I also sharpen my tools with a file to ensure clean cuts next time. Store them in a dry place to keep them ready for future pruning sessions.
Rake up and dispose of any fallen branches or debris—this helps keep the area clean and reduces the risk of pests or disease. If you're dealing with a large tree, consider using a tarp to collect debris for easier cleanup. This step might seem small, but it's crucial for maintaining a healthy tree long-term.
Tips & tricks for pruning trees to encourage stronger growth
Let me share the hard-won lessons that'll help you transform your tree into a lush, healthy specimen.
Tool Prep is Everything: Before you even touch a branch, make sure your pruning shears are sharp and clean. Dull blades tear wood instead of making clean cuts, which slows healing and invites disease. I keep a small file in my toolkit to sharpen blades between sessions—this simple step prevents half the problems I've seen from sloppy cuts. Also, never forget to sterilize your tools between cuts, especially when dealing with diseased branches. A quick wipe with rubbing alcohol keeps everything sanitary.
The One-Third Rule: This is the golden rule of pruning that I wish I'd known earlier—never remove more than one-third of a tree's foliage in a single season. That means if you're working on a large tree, spread out your pruning over multiple years. I've seen people over-prune and end up with stressed trees that struggle to recover. When thinning crowded branches in Step 2, focus on removing about one-third of the branches in that area to maintain balance.
Bud Direction Matters: When shaping branches in Step 3, pay close attention to bud direction. You're not just cutting branches—you're directing future growth. If you want a wider tree, cut back to outward-facing buds. For upward growth, choose buds that point upward. I always make a habit of running my hand along the branch to visualize where new growth will emerge before making any cuts. This small step makes a huge difference in the final shape of your tree.
Seasonal Timing Secret: Dormant season pruning (late fall to early spring) is ideal because the tree's energy is focused on root growth rather than healing wounds. However, if you must prune in summer, do it early in the season when the tree can recover before hot weather sets in. I've seen trees pruned too late in summer struggle with heat stress, so timing really does matter for long-term health.
Pro Tips for Tree Branching Out
- Let me share the hard-won lessons that'll help you transform your tree into a lush, healthy specimen.
- Tool Prep is Everything: Before you even touch a branch, make sure your pruning shears are sharp and clean. Dull blad...
- The One-Third Rule: This is the golden rule of pruning that I wish I'd known earlier—never remove more than one-third...
Frequently asked questions
Got questions about dormant-season pruning? You’re not alone! Here are answers to the most common queries about tree branching out for healthier spring growth—plus practical tips to tackle your project with confidence.
When is the best time to trim trees in winter?
The ideal window is late winter to early spring (before buds swell), typically January–March in most climates. This timing minimizes stress on the tree, reduces disease risk, and ensures energy goes toward new growth. Avoid pruning during extreme cold snaps or right before spring rains.
Can I prune a tree in winter if it’s still blooming?
If your tree is evergreen (like pine or spruce) or late-blooming (e.g., dogwood), winter pruning is safe. But for spring-flowering trees (like magnolias or lilacs), wait until after they bloom to avoid cutting off next year’s flowers. Always research your specific species!
What if I see sap oozing after pruning? Is that normal?
Yes! A small amount of sap (called bleeding) is normal and harmless—it’s the tree’s way of sealing wounds. If you notice large amounts of sticky sap, mold, or foul smells, it could signal infection. Clean cuts with pruning sealant (optional) and monitor for pests or disease.
Do I need to sterilize my tools between cuts?
Absolutely!
Sterilizing tools with rubbing alcohol (70%+) or a 10% bleach solution between trees prevents spreading fungal/bacterial diseases (like anthracnose). Skip this only if pruning healthy, disease-free trees in one session—but it’s a pro move for long-term tree health.
How much of a branch can I safely remove?
Follow the 3-cut method for large branches: Never remove more than 25% of the tree’s canopy in one season. For small branches, aim to cut just outside the branch collar (the swollen area where the branch meets the trunk). Over-pruning stresses trees—think quality over quantity!
Wrapping up and next steps
Tree branching out isn’t just about aesthetics—it’s about nurturing resilience and future growth! 🌱 By mastering dormant-season pruning, you’re giving your trees the best chance to thrive in spring, with stronger branches, better airflow, and vibrant foliage. Think of this as a gift to your green companions, setting them up for years of health and beauty.
Ready to put your new skills to work? Grab those tools, step outside, and start trimming with confidence. Your trees—and your future garden—will thank you! 🌿✨
- Next step: Pick a calm, dry day and begin with just one tree to build your confidence.
- Bonus tip: Document your progress with photos—it’s rewarding to see the transformation!