
Planting
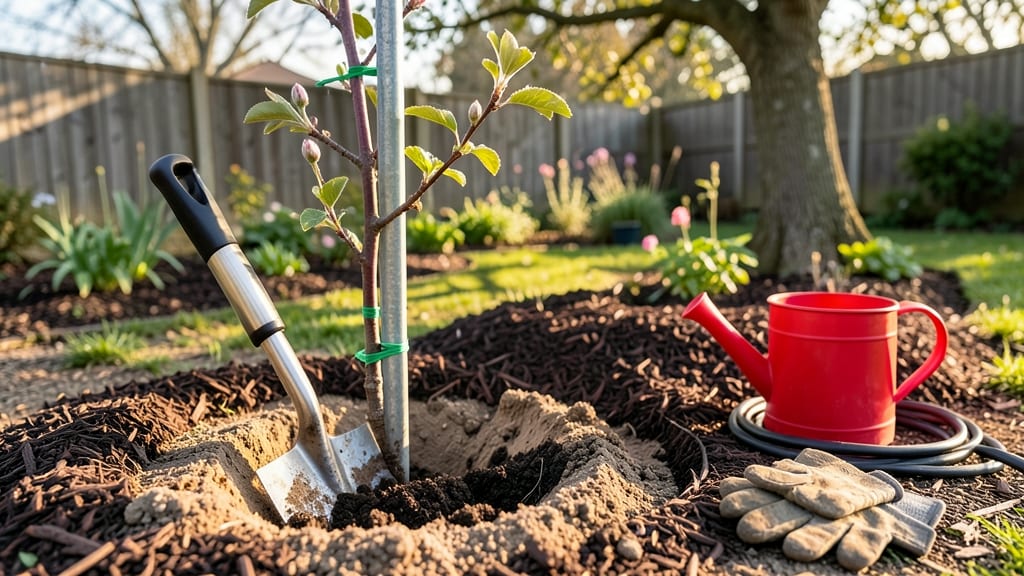
Learning how to plant an apple tree step by step gives it a strong start—and I’ve learned the hard way that timing matters more than most beginners realize. 🌳 The crisp air of late fall or early spring is the perfect window to get roots established before summer’s heat stress.
Skip this, and you’ll watch your tree struggle to catch up, no matter how healthy it looks above ground.
You’ll need a few basics: a bare-root or container-grown tree (check local nurseries for varieties that thrive in your zone), a shovel, compost, and a 5-gallon bucket of water for the first soak.
The hole should be twice as wide as the root ball but only as deep—planting too deep smothers the tree. Loosen the soil at the bottom of the hole to encourage root spread, and mix in compost for nutrients.
Once planted, water deeply to settle the soil and remove air pockets, then mulch around the base (but not touching the trunk) to retain moisture. Within 3-4 weeks, you’ll see new shoots—proof your tree is settling in.
The key is patience: it takes 2-3 years for roots to fully establish, but the payoff is a tree that bears fruit reliably for decades.
Here’s the secret no one tells you: prune only dead or crossing branches in the first year—let the tree focus on root growth. And if you’re planting just one tree, choose a self-pollinating variety like ‘Liberty’ or ‘Enterprise’ to avoid disappointment.
Now grab your gloves—this is where the real work begins.
📚 In This Guide
- What you need
- Instructions
- Tips and common mistakes
- Wrapping up and next steps
What you need
- ● Apple tree sapling: Choose a dormant-season (bare-root or container-grown) variety suited to your climate zone (e.g., Honeycrisp, Fuji, or Granny Smith). Check the root system—bare-root trees should have 3-5 healthy roots (2-3 inches long), while container-grown trees need well-developed root balls.
- ● Shovel or spade: A round-point shovel (18-24 inches wide) for digging the planting hole.
- ● Garden trowel: For loosening soil and adjusting roots.
- ● Measuring tape or ruler: To ensure the hole is the correct depth (typically twice as wide as the root ball and 2-3 inches deeper than the tree’s base).
- ● Native soil or compost mix: A blend of 60% native soil and 40% compost or well-aged manure to improve drainage and fertility.
- ○ Mulch (optional but recommended): 2-4 inches of organic mulch (e.g., wood chips, straw, or pine needles) to retain moisture and suppress weeds. Keep mulch 3-4 inches away from the trunk!
- ● Watering can or hose with a gentle spray nozzle: For thorough watering after planting.
- ○ Planting hole support (optional but helpful): A stake (4-6 feet tall) and soft tree tie to secure the tree if needed (especially for young or windy areas).
- ● Root stimulator: A mycorrhizal fungi or rooting hormone to encourage root growth.
- ● Soil test kit: To check pH and nutrient levels (ideal pH for apple trees: 6.0-7.0).
- ● Fertilizer (low-nitrogen, balanced formula): Apply 10-10-10 or 5-10-10 fertilizer sparingly (follow package instructions).
- ● Tree guard or protective barrier: To deter animals or pests from young bark.
- ● Pruning shears: For trimming any damaged roots or branches during planting.
Step-by-Step instructions for planting an apple tree
Here's the method I trust to establish apple trees with roots that thrive for decades.
🌱 Step 1: Choose and Prepare the Planting Site
Select a location with full sun exposure (6-8 hours daily) and well-draining soil. I dig a hole twice as wide as the root ball but only as deep—planting too deep suffocates the graft union. The site should be at least 20 feet from other fruit trees to prevent cross-pollination issues later.
Test your soil's drainage by digging a 12-inch deep hole and filling it with water. If it doesn't drain within 4-6 hours, amend with 2-3 inches of compost mixed into the native soil. Apple trees hate soggy roots, so this check saves years of potential problems.
🪴 Step 2: Handle the Tree and Amend the Soil
Remove the tree from its container and gently loosen the roots if they're circling. I always soak the root ball for 15-20 minutes before planting—this prevents transplant shock by keeping roots hydrated during the move. Never let the root ball dry out completely before planting day.
Mix 1-2 gallons of compost into the bottom of the planting hole. This improves nutrient availability right where new roots will grow most actively. For heavier clay soils, add 5 gallons of coarse sand to the mix to prevent compaction around the roots.
☀️ Step 3: Position and Plant the Tree
Place the tree in the center of the hole so the graft union (the bulge near the base) sits 2-3 inches above soil level. This prevents water from pooling at the graft point and rotting the tree. I use a level to ensure the tree stands perfectly upright—crooked planting leads to uneven growth and weak structure.
Backfill the hole with native soil, tamping gently every 4-6 inches to remove air pockets. Water deeply after each layer to settle the soil naturally. The finished planting should have a slight depression around the base to help water retention without creating a saucer that causes rot.
💧 Step 4: Mulch and Water Thoroughly
Spread 3-4 inches of organic mulch (wood chips or straw) in a 3-foot diameter circle around the tree, keeping it 6 inches away from the trunk. This conserves moisture and regulates soil temperature. I always water immediately after mulching to help the mulch settle and make contact with the soil.
Give the tree 10-15 gallons of water spread evenly over the root zone. You'll know you've watered enough when water runs out the bottom of the hole—this ensures roots establish contact with moist soil. After watering, the top 2-3 inches of soil should feel damp but not saturated.
⏰ Step 5: Stake and Protect for First Season
Install 2 stakes on opposite sides of the tree, 6 inches from the trunk, and tie the tree loosely with soft fabric strips. This provides support without restricting growth. I check the ties monthly—they should be snug enough to prevent swaying but loose enough to allow trunk expansion.
Install a tree guard or wire cage around the trunk to protect against rodents and rabbits. These pests will gnaw young bark, and once established, trees rarely recover. Water weekly during dry spells, aiming for 1-2 inches of water per week. You'll see strong new growth in spring—that's your sign the roots have taken hold.
Tips & tricks for planting an apple tree
These small details make all the difference between a tree that thrives and one that struggles.
Soil Test Tip: That 4-6 hour drainage test in Step 1 is non-negotiable. I've seen too many trees fail because people skipped this step. If your soil drains too quickly, add a bit of peat moss to the compost mix—it holds moisture without suffocating roots. The goal is soil that drains freely but holds enough moisture to keep roots hydrated during dry spells.
Root Care Secret: When loosening circling roots in Step 2, focus on the outer edges—you don't need to disturb the center. I use my fingers to gently separate roots, never pull or tear them. The 15-20 minute soak is crucial, but don't let the root ball sit in standing water—just enough to thoroughly moisten the roots. Think of it like giving your tree a drink before the big move.
Positioning Precision: The 2-3 inch height for the graft union in Step 3 is critical. Use a pencil to mark this level on your planting stick before lowering the tree. If you plant too deep, the graft union can rot; too shallow and the tree becomes vulnerable to temperature swings. A level isn't just for walls—it's your best friend when planting trees. I've used a carpenter's level and even a smartphone app with level function in a pinch.
Watering Wisdom: After planting, that 10-15 gallons of water in Step 4 should be spread slowly over 20-30 minutes. Use a soaker hose or watering can with a gentle flow to avoid creating channels in the soil. The goal is to saturate the entire root zone, not just the surface. I check by inserting a screwdriver—if it goes in easily, you've watered enough. The top 2-3 inches should feel damp like a wrung-out sponge, not soggy.
Pro Tips for Plant An Apple Tree Step By Step
- These small details make all the difference between a tree that thrives and one that struggles.
- Soil Test Tip: That 4-6 hour drainage test in Step 1 is non-negotiable. I've seen too many trees fail because people ...
- Root Care Secret: When loosening circling roots in Step 2, focus on the outer edges—you don't need to disturb the cen...
Frequently asked questions
Got questions about planting your apple tree? You’re not alone—here are some of the most common concerns with clear, actionable answers to keep your orchard thriving!
When is the best time to plant an apple tree?
The ideal time is late fall or early winter (dormant season), when the tree isn’t actively growing. This lets roots establish before spring. If you miss that window, plant in early spring before buds swell. Avoid planting in summer heat or extreme cold.
Can I plant an apple tree from a grocery store apple?
Nope! Store-bought apples are grafted or treated to prevent sprouting. For success, buy a bare-root or container-grown tree from a nursery. Look for disease-resistant varieties like ‘Honeycrisp’ or ‘Fuji’ for your climate zone.
How do I protect my young apple tree from frost or cold?
Newly planted trees need extra care! Mound soil or mulch (6–8 inches deep) around the base to insulate roots. Wrap the trunk with tree guard or burlap to prevent sunscald. In extreme cold, drape a frost cloth loosely over the canopy for added protection.
What should I do if my tree’s leaves turn yellow or wilt?
Yellowing leaves often signal overwatering or nutrient deficiency. Check soil moisture—roots need well-draining soil. Wilted leaves could mean underwatering or pests like aphids. Treat with neem oil or prune affected branches to improve airflow.
Do I need more than one apple tree to get fruit?
Yes! Most apple varieties are self-pollinating, but cross-pollination boosts yields. Plant at least two different varieties (e.g., ‘Gala’ + ‘Granny Smith’) within 50 feet of each other. Bees will do the rest! Check your tree’s tag for compatible pollinators.
Wrapping up and next steps
Planting an apple tree is a rewarding journey that starts with patience and the right steps! By choosing the perfect variety, preparing your soil, and nurturing young roots, you’re setting the stage for years of fresh, homegrown apples. Remember: healthy roots today mean a bountiful harvest tomorrow!
Now that you’re ready to dig in, why not explore companion plants to boost your orchard’s success? Or, if you’re eager to dive deeper, check out our guide on pruning techniques for young trees—your future fruit depends on it! 🌱🍏