
Pruning
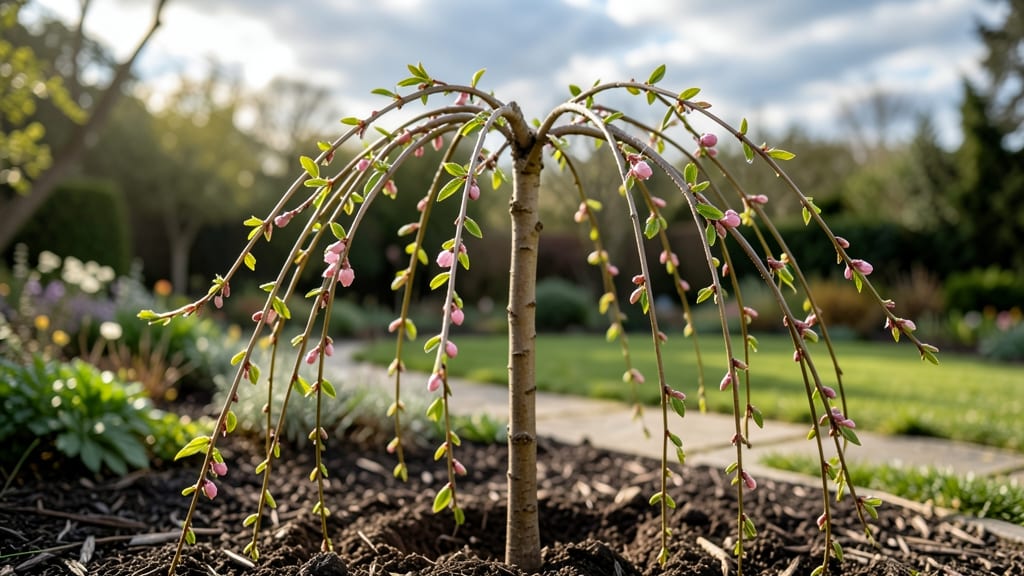
Your weeping cherry tree sapling needs dormant season pruning to create that dreamy, cascading shape—before buds even swell. 🌸 I learned the hard way that skipping this step means lopsided branches and fewer blooms, but once you master it, your tree becomes the showstopper of the yard every season.
Timing is everything—prune in late winter when the tree is still asleep but the ground isn’t frozen. Grab your sharp pruners and focus on removing one-third of last year’s growth, thinning crowded branches to let light filter through.
The goal? A balanced silhouette where every branch has room to stretch gracefully downward.
What you’ll end up with is a tree that looks like a living waterfall, covered in delicate pink blossoms come spring. The pruning scars heal cleanly, and new growth emerges stronger and more uniform—no more awkward stubs or tangled limbs.
Even better? This method works for both young saplings and mature trees.
Fair warning: weeping cherries hate heavy pruning. Stick to light shaping, and avoid cutting into old wood—it rarely regrows. For best results, prune every 2-3 years during dormancy, and your tree will reward you with years of elegant form and stunning seasonal interest.
📚 In This Guide
- What you need
- Instructions
- Tips and common mistakes
- Wrapping up and next steps
What you need
- ● Weeping cherry tree sapling (1–3 years old, ideally 3–6 feet tall)
- ● Pruning shears (bypass type, sharp, and sterilized with rubbing alcohol or bleach)
- ● Loppers (for thicker branches, 10–12 inches in length)
- ● Hand pruners (for precision cuts on small branches, 5–7 inches)
- ● Gloves (gardening gloves, cut-resistant for safety)
- ● Disposable pruning bags (or a bucket for clippings)
- ○ Pruning sealant (optional, for large cuts over ½ inch in diameter)
- ● Measuring tape (for tracking branch length and spacing)
- ● Ladder or step stool (if your sapling is over 6 feet tall)
- ● Safety glasses (to protect eyes from debris)
- ○ Marking twine or flags (optional, for tagging branches to remove)
- ● Sharpie or chalk (to label branches if needed)
- ● Hose or water spray bottle (to clean tools between cuts)
- ● Dormant season timing (late winter or early spring, before buds swell)
- ● Clear, dry day (avoid pruning if rain or frost is forecasted)
- ● Basic pruning knowledge (or a quick refresher on weeping cherry pruning techniques)
- ● Patience and a steady hand (weeping cherries are delicate—take your time!)
Step-by-step instructions for pruning a weeping cherry tree sapling
Transform that wild sapling into a graceful, year-round centerpiece with these simple pruning techniques.
✂️ Step 1: Gather Tools and Assess the Sapling
Start by sharpening your bypass pruners and grabbing a sterilized saw for any thicker branches over ½ inch. Wear gloves—cherry tree saplings have thorns that pack a punch. Examine the sapling's structure carefully, looking for branches that cross, rub against each other, or grow straight upward instead of cascading down.
I always sketch a rough outline of the tree's shape with a pencil on paper first. This helps me visualize where cuts should go. Focus on maintaining that natural weeping form—you want branches to flow downward elegantly, not stick out at odd angles. The goal is to encourage a balanced, open canopy that lets light and air move freely through the branches.
✂️ Step 2: Remove Dead, Diseased, or Damaged Branches First
Scan the entire sapling for branches that are dead (no green bark), diseased (mushy spots, oozing sap), or damaged (broken, split, or cracked). These should be cut out completely at their base using clean, sharp cuts. Make your cuts just outside the branch collar—the swollen area where the branch meets the trunk. This ensures the tree can seal the wound properly and prevents decay from creeping down into the trunk.
Don't worry if you remove more than you expect—this is the foundation for a healthy tree. I always say, "Better to remove too much now than too little later." Once you've cleared out the bad branches, the tree's overall shape will become much clearer, making the next steps easier.
✂️ Step 3: Thin Out Crossing or Rubbing Branches
Look for branches that cross each other or rub against one another as they sway in the wind. These create wounds that invite disease and weaken the tree's structure. When two branches cross, remove the weaker of the two—the one that's smaller in diameter or growing at a less favorable angle. Always make your cut just outside the branch collar to promote quick healing.
This is where your sketch comes in handy. If you see a branch growing straight up instead of cascading down, it's likely competing with the tree's natural weeping form. Cut it out entirely at the base. You'll know you're on the right track when you start seeing more open space between branches and a clearer outline of the tree's graceful shape.
✂️ Step 4: Shape the Weeping Form by Selective Pruning
Now it's time to refine the tree's weeping shape. Focus on the outer branches, cutting back any that grow too upright or outward. Aim to create a balanced, layered look with branches flowing downward in a gentle arc. For each branch you prune, cut just above a outward-facing bud or leaf node. This encourages new growth in the direction you want.
I like to step back every few cuts to assess the tree's overall shape. If one side looks heavier or denser, thin it out a bit more. The goal is symmetry without sacrificing the tree's natural elegance. Remember, weeping cherry trees grow slowly, so you're not rushing anything—just guiding the tree's growth over time. Avoid cutting more than 25% of the tree's foliage in one season to prevent stress.
⏰ Step 5: Clean Up and Monitor the Sapling
After pruning, rake up and dispose of all clippings to prevent disease from spreading. Sterilize your tools with rubbing alcohol or a bleach solution to kill any lingering pathogens. Water the base of the tree deeply to help it recover from the pruning. You'll see new growth emerge from the buds you left behind in just a few weeks.
Keep an eye on the sapling over the next few months. If you notice any branches growing in directions you don't want, don't hesitate to make minor adjustments during the growing season. The key to a stunning weeping cherry tree is patience and consistency. With each pruning session, you'll refine the tree's shape and encourage it to grow in the graceful, cascading form you envision.
Tips & tricks for pruning a weeping cherry tree sapling
Here's what nobody tells you about shaping a weeping cherry sapling—tricks that'll save you headaches and give you that perfect cascading form.
Tool Prep is Non-Negotiable: Before you even touch the sapling, take 5 minutes to sharpen your bypass pruners and sterilize your saw. Dull tools crush branches instead of cutting cleanly, which stresses the tree and invites disease. I use a fine-grit sharpening stone for the pruners and wipe the saw blade with rubbing alcohol between cuts. Clean tools also prevent spreading any pathogens from one branch to another—especially important when dealing with cherry trees that are prone to bacterial canker.
Visualize First, Cut Second: That sketch I mentioned in Step 1 isn't just for fun—it's your pruning blueprint. I've seen people make cuts based on gut feeling, only to realize later they've thrown off the tree's balance. Draw your ideal weeping shape with pencil lines showing where branches should end up. This helps you decide which branches to keep and which to remove before making a single cut. Think of it as your tree's "before and after" makeover plan.
Branch Collar Matters More Than You Think: When you make any cut, always aim just outside the branch collar—the swollen area where the branch meets the trunk. This might seem like a small detail, but it's actually how the tree naturally heals itself. If you cut too close to the trunk or leave a stub, water can pool in the wound, leading to rot. I've seen pruning mistakes create ugly scars that never heal properly—don't make that mistake. Use a ruler if needed to measure exactly where the collar begins.
Less is More During Dormant Season: Remember that 25% foliage limit from Step 4? That's your safety net. Weeping cherry saplings are tough, but they're not invincible. In dormant season, you're already giving the tree a break from growth, so be especially conservative with your cuts. I've seen people over-prune in winter, thinking the tree won't notice, only to have it struggle to recover when spring comes. If you're unsure about a cut, wait and reassess next year—your tree will thank you with better blooms and stronger growth.
Pro Tips for Weeping Cherry Tree Sapling
- Here's what nobody tells you about shaping a weeping cherry sapling—tricks that'll save you headaches and give you th...
- Tool Prep is Non-Negotiable: Before you even touch the sapling, take 5 minutes to sharpen your bypass pruners and ste...
- Visualize First, Cut Second: That sketch I mentioned in Step 1 isn't just for fun—it's your pruning blueprint. I've s...
Frequently asked questions
Got questions about caring for your weeping cherry tree sapling during dormant season pruning? You’re not alone! Here are some of the most common concerns—plus expert tips to keep your tree thriving year-round.
When is the best time to prune a weeping cherry sapling?
Prune your sapling during late winter or early spring (before buds swell) or late fall (after leaves drop). Avoid pruning in summer or extreme cold—this stresses the tree and invites disease. Dormant season is ideal because wounds heal faster, and you can shape the tree without disturbing active growth.
How much can I trim off a young weeping cherry sapling?
For saplings, never remove more than 25% of the foliage in one season. Focus on thinning out crowded branches and shaping the weeping habit—cut back overly long or leggy growth by ⅓ to encourage bushier growth. Avoid heavy pruning; weeping cherries are delicate and may struggle to recover if over-pruned.
What should I do if my sapling bleeds sap after pruning?
Sap bleeding is normal but can be messy! Seal cuts with pruning sealant (or even melted beeswax) to prevent pests and disease. Avoid sealing large wounds—small saplings heal quickly on their own. If bleeding is excessive, check for over-pruning or damaged bark; adjust future cuts to be cleaner and shallower.
Are there alternatives to pruning for shaping a weeping cherry?
While pruning is essential, you can train young branches with soft ties or stakes to guide growth. For saplings, avoid heavy structural changes—weeping cherries rely on natural grace. If you’re unsure, consult an arborist; aggressive shaping (like topiary) can harm the tree’s health.
How do I know if my sapling is too cold-hardy for dormant pruning?
Weeping cherries thrive in USDA Zones 5-8. If you’re in Zone 4 or lower, prune in late spring (after frost risk passes) to avoid winter damage. Watch for brown, brittle branches—a sign of cold stress. Mulch the base in fall to protect roots, and water deeply before the first freeze.
Wrapping up and next steps
Your weeping cherry tree sapling is ready to thrive with its dormant-season pruning—a small effort that yields big rewards in grace and growth! 🌿 By following these steps, you’ve set the stage for a year-round spectacle of elegant branches and vibrant blooms.
Now, all that’s left is to watch your tree flourish and enjoy the beauty it brings to your space.
Ready to take the next step? Consider monitoring your sapling’s progress in early spring, when new growth signals success. If you’re eager to elevate your gardening skills, explore advanced pruning techniques or join local gardening groups for hands-on guidance. Your green thumb is already on its way! 🌸