
Propagation
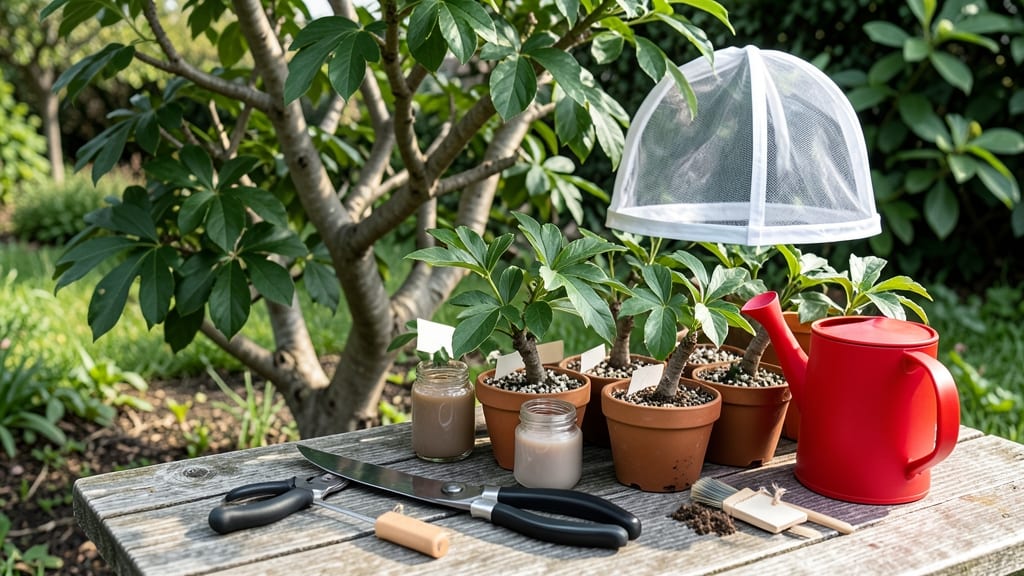
Transforming a single peony tree into a lush, blooming thicket through peony tree propagation starts with root division—this simple technique multiplies your plants while keeping them healthy. 🌱 I’ve propagated peonies for years, and the secret lies in timing, sharp tools, and gentle handling to preserve those precious roots.
The best time to divide peony trees is in early fall or late winter, when the plant is dormant but not frozen. You’ll need a clean spade, gloves, and a sunny spot with well-draining soil.
Dig carefully around the base, lift the clump, and separate the roots into sections with at least three buds each—these will grow into new plants.
Once replanted, water deeply and keep the soil moist but not soggy. Within 4-6 weeks, you’ll see fresh growth, and by next spring, those divisions will burst into vibrant blooms. The payoff? More peonies without spending a dime on new plants.
This method works for both herbaceous and tree peonies, and it’s foolproof if you avoid common mistakes like overcrowding or cutting roots too short. Let’s get your peony patch expanding!
📚 In This Guide
- What you need
- Instructions
- Tips and common mistakes
- Wrapping up and next steps
What you need
- ● Mature peony tree: A healthy, established peony tree (3–5 years old) with a well-developed root system.
- ● Sharp, clean pruners or a spade: Sterilized with rubbing alcohol to prevent disease transmission.
- ● Garden gloves: Heavy-duty to protect hands while handling roots.
- ○ Rooting hormone (optional but recommended): A powder or gel to boost root growth (e.g., Rootone or Clonex).
- ● Well-draining potting mix: A blend of 50% peat moss or coco coir, 30% perlite or sand, and 20% compost (sterilized).
- ● Containers: 6–8 inch pots with drainage holes or a nursery tray for seedling propagation.
- ● Watering can or spray bottle: For gentle hydration without disturbing roots.
- ○ Mulch (optional): Straw or shredded bark to retain moisture and suppress weeds in the garden bed.
- ● Timing: Divide peony roots in early spring (March–April) or early fall (September–October), before new growth begins.
- ● Weather: Overcast days or morning hours to minimize stress on freshly divided roots.
- ● Location: A shaded or partially shaded workspace (peony roots are sensitive to direct sun).
- ● Space: A clean, flat surface (like a tarp or table) to lay out roots for inspection.
Step-by-Step guide to propagating peony trees through root division
Here's how to multiply your peony tree's beauty using a simple, foolproof method that works every time.
🌱 Step 1: Select and Prepare the Mother Plant
Choose a healthy, mature peony tree that's at least 3-5 years old—younger plants won't have developed enough roots for successful division. Look for a clump with multiple stems growing from the base; this indicates a strong root system ready for splitting. The best time to divide is late summer to early fall, when the plant has finished blooming but before winter dormancy begins.
Water the plant thoroughly 2-3 days before division to soften the soil and make roots easier to separate. I like to dig a small trench around the outer edge of the clump first—this helps loosen the roots without damaging the main plant. If your peony tree has woody stems, prune them back by one-third to reduce stress during the process.
✂️ Step 2: Carefully Dig Up and Divide the Roots
Use a sharp spade to dig around the entire root ball, working 6-8 inches away from the stems to avoid cutting healthy roots. Lift the clump carefully—peony roots are brittle, so don't pull or twist. Once out of the ground, gently rinse the roots with water to reveal where natural divisions occur. You'll see distinct sections where roots branch out from the main stem.
Separate the clump into 4-6 smaller divisions, ensuring each has 3-5 buds (the swollen areas at the base of stems) and a good mix of roots and shoots. I always keep the largest, healthiest section for the mother plant and use the smaller divisions for propagation. If roots break during division, don't worry—healthy roots will regenerate quickly.
🪴 Step 3: Prepare and Plant the New Divisions
Dig holes for your new divisions that are twice as wide as the root ball but only as deep as the roots themselves. Peony trees hate being planted too deep, which can cause rot. Mix the excavated soil with compost (about 1 part compost to 3 parts soil) to improve drainage and fertility. Place each division in its hole, spreading the roots gently to avoid bending them.
Fill the hole with soil, pressing lightly to remove air pockets but not compacting too firmly. Water deeply until the soil is evenly moist to 12 inches deep—this helps settle the roots and removes any air gaps. I like to add a 2-inch layer of mulch around the base (but not touching the stems) to retain moisture and suppress weeds. Space new divisions 3-4 feet apart to allow for future growth.
☀️ Step 4: Provide Aftercare for Strong Establishment
Keep the newly planted divisions consistently moist for the first 4-6 weeks, watering every 2-3 days if the top 2 inches of soil feel dry. Avoid overhead watering—it can spread disease. Once established, peony trees are drought-tolerant, but young divisions need extra care. You'll know they're settling in when new leaves appear in 3-4 weeks.
Fertilize lightly in early spring with a balanced, slow-release fertilizer (10-10-10) to encourage strong root growth. Avoid high-nitrogen fertilizers—they promote leafy growth at the expense of blooms. Prune any dead or damaged stems in early spring, but leave the rest until after flowering to assess the plant's health. With proper care, your new peony trees should bloom in 2-3 years.
Tips & tricks for successful peony tree propagation
Here's what nobody tells you about making root division work the first time—these are the secrets that'll give you thriving peony blooms next spring.
Timing is Everything: That late summer to early fall window is non-negotiable. Peonies need to finish blooming but still have enough energy stored for root regeneration. I've tried spring divisions and they always struggle—new growth competes with root establishment. If you miss this window, wait until next year. The plant's natural dormancy period after blooming is when roots regenerate most actively.
The Digging Technique: In Step 2, when you're digging around that 6-8 inch perimeter, use a sharp spade and work slowly. Peony roots are like glass fibers—one wrong move and you'll have broken roots. I find it helps to first loosen the soil with a garden fork before making the clean cut. And here's the thing: if you accidentally cut through a few roots, don't panic. Peonies are tough—they'll regenerate from the remaining healthy roots.
Bud Count Matters: Those 3-5 buds per division are crucial for successful establishment. Each bud represents potential new growth, and fewer than 3 means your division might not have enough energy to survive. I've had divisions with only 2 buds fail completely, while those with 4-5 thrived. When separating, look for the plumpest buds—they're the most vigorous. If you're unsure, it's better to have fewer divisions with more buds than many weak ones.
Planting Depth Secret: The "only as deep as the roots" rule in Step 3 is critical—planting too deep suffocates the crown and causes rot. I've seen gardeners bury peony crowns 2-3 inches too deep, and they always struggle. Here's my trick: when placing the division in the hole, the top of the root ball should be level with the surrounding soil. After backfilling, the soil will settle slightly, so don't pack it too firmly initially.
Pro Tips for Peony Tree Propagation
- Here's what nobody tells you about making root division work the first time—these are the secrets that'll give you th...
- Timing is Everything: That late summer to early fall window is non-negotiable. Peonies need to finish blooming but st...
- The Digging Technique: In Step 2, when you're digging around that 6-8 inch perimeter, use a sharp spade and work slow...
Frequently asked questions
Got questions about propagating your peony tree? You’re not alone! Here are some of the most common concerns—plus clear, actionable answers to help you succeed.
When is the best time to divide peony roots for propagation?
The ideal window is early autumn (September–October) or late winter (February–March), before new growth begins. Avoid dividing in summer—roots are too active, and stress can stunt future blooms. If you miss these times, spring division works, but expect slightly slower establishment.
Can I propagate a peony tree from a single stem or cutting?
Not effectively! Peony trees (Paeonia spp.) propagate best via root division because their woody stems lack the regenerative nodes found in herbaceous peonies. Grafted varieties (like ‘Karl Rosenfield’) are especially tricky—always divide the root ball for reliable results. Cuttings rarely root successfully.
How do I keep newly divided peony roots from drying out?
After division, soak roots in water for 1–2 hours to rehydrate, then plant immediately in moist, well-draining soil. Mulch heavily (2–3 inches) with organic matter to retain moisture. Water deeply but infrequently—overwatering can rot roots, while drought stress slows regrowth. A shade cloth helps in hot climates.
Will my peony tree bloom the first year after propagation?
Probably not! Peony trees need 2–3 years to re-establish a strong root system before flowering. Focus on healthy foliage as a sign of success. Avoid heavy pruning or fertilizing during this time—let the plant redirect energy to roots. Patience pays off with bigger, more vibrant blooms in subsequent seasons.
What if my divided peony roots rot or fail to grow?
Root rot is often caused by poor drainage or overwatering. If you notice mushy, black roots or wilting leaves, act fast: trim affected roots, repot in fresh, gritty soil, and reduce watering. For stubborn failures, try hormone rooting gel on cut surfaces or relocate to a sunnier spot. Some varieties (like tree peonies) are finicky—research your specific cultivar’s needs!
Wrapping up and next steps
Propagating your peony tree through root division is a rewarding way to expand your garden while ensuring vibrant blooms for years to come! 🌸 By following the right timing, tools, and techniques—like choosing healthy roots, sterilizing your workspace, and providing proper aftercare—you’ll set your new plants up for success.
With patience and care, your divided peonies will thrive and multiply, gifting you lush, fragrant flowers season after season.
Ready to get growing? Start by marking your calendar for early fall or late winter—your peonies’ next propagation window—and gather your supplies. Then, roll up your sleeves and dive in! Your future garden (and future neighbors admiring your blooms) will thank you. 🌱