
Propagation
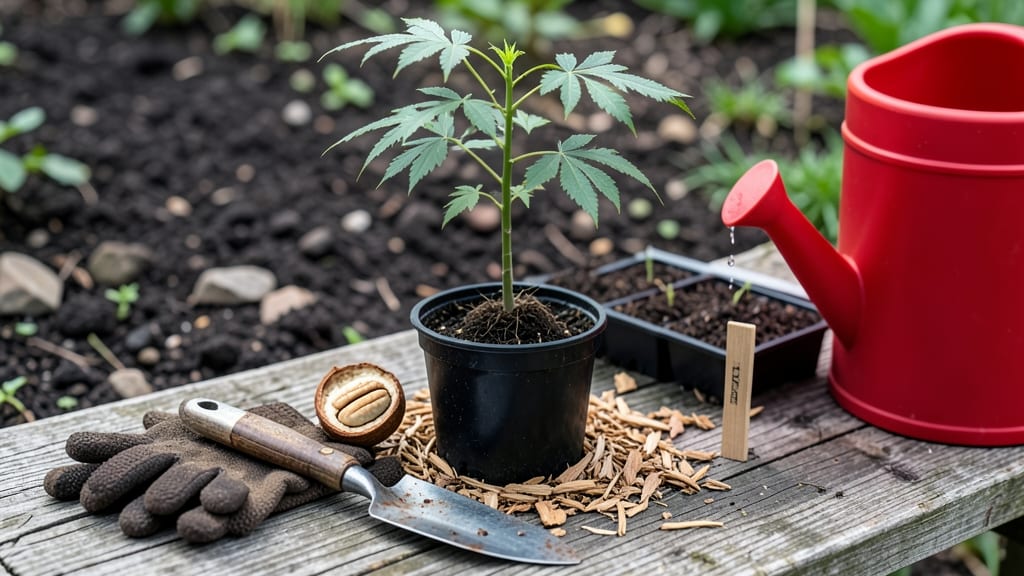
Starting a pecan tree from a nut is like unlocking a legacy—your future backyard giant begins with a single cold-stratified sprout. 🌱 The key isn’t forcing it to grow fast, but giving it the right winter chill to break dormancy, just like its wild ancestors.
I’ve watched my own pecan nuts crack open after six weeks of patience, revealing tiny roots ready to take hold.
You’ll need fresh, plump pecans (no shriveled ones!), a damp paper towel or peat moss, and a sealed container for stratification. The magic happens at 34–40°F—your fridge works perfectly. After six weeks, you’ll transfer sprouted nuts to pots with well-draining soil, keeping them moist but never soggy.
This isn’t a quick fix; it’s a 10-year investment in shade, nuts, and wildlife.
By spring, you’ll see your first true leaves—proof the tree’s future. The real payoff? A mature pecan tree produces hundreds of pounds of nuts per year, but the journey starts with this one small, patient step. Mistakes happen (like overwatering or mold), but even those teach you what works.
This method works for any pecan variety, whether you’re in the South or a warmer zone with adjusted timing. The hardest part? Waiting. But that’s where the reward hides—a tree that could outlive you, standing tall with every harvest.
📚 In This Guide
- What you need
- Instructions
- Tips and common mistakes
- Wrapping up and next steps
What you need
- ● Fresh, high-quality pecan nuts: 3–5 mature, disease-free nuts (harvested in fall, ideally from a local source). Pro tip: 💡 Choose plump, unblemished nuts—they’re more likely to sprout!
- ● Cold stratification supplies: 1 small plastic bag or container with a secure lid (e.g., a ziplock bag or silicone storage container)
- ● Moist peat moss or coco coir (about ½ cup per nut)
- ○ Paper towels or vermiculite (optional, for extra moisture retention)
- ● Planting container: 1 small pot (4–6 inches deep) with drainage holes or a seedling tray (for multiple nuts)
- ● Well-draining potting mix (e.g., a blend of 50% peat moss, 30% perlite, and 20% sand)
- ● Refrigerator or cold stratification setup: Access to a refrigerator (34–40°F) for 6–8 weeks or a cool, dark basement (if no fridge is available)
- ● Basic gardening tools: 1 spoon or small trowel (for planting)
- ● 1 spray bottle (for gentle watering)
- ○ 1 humidity dome or plastic wrap (optional, to retain moisture)
- ● Timing: Start stratification in late fall or winter (6–8 weeks before last frost) to plant outdoors in spring.
- ● Location: A sunny spot (6+ hours of sunlight daily) for transplanting seedlings. Pecans thrive in USDA Zones 6–9.
- ● Patience: Germination can take 4–12 weeks—don’t rush it! 🐢
- ○ Optional extras: Soil test kit (to check pH/fertility before planting outdoors)
- ● Slow-release fertilizer (e.g., 10-10-10, for young seedlings)
- ● Mulch (e.g., pine straw or wood chips for moisture retention)
Step-by-step instructions for growing pecan trees from nuts
Here's how to turn store-bought pecans into thriving saplings in just six weeks.
🌱 Step 1: Select and Prepare Healthy Nuts
Start with fresh, raw pecans from the grocery store—avoid salted or roasted nuts, as they won't germinate. Look for plump, intact nuts without cracks or holes. I like to soak them in lukewarm water for 24 hours first to soften the shell slightly and speed up the process.
After soaking, drain the nuts and let them dry completely on a paper towel. This prevents mold while keeping them hydrated enough for germination. Place them in a single layer in a shallow container—don't stack them, or they'll rot before sprouting. You'll need about 4 nuts per pot if you're planning to grow multiple trees.
❄️ Step 2: Cold-Stratify for 6 Weeks
Pecans need a cold period to break dormancy, just like apple seeds. Fill a plastic bag with the soaked pecans and moistened peat moss or perlite (enough to surround them completely). Seal the bag loosely—you want airflow but not drying out. Place it in your refrigerator's crisper drawer where temperatures stay around 35-40°F.
Check the nuts weekly. The peat moss should stay damp but not soggy—squeeze it gently; if water drips out, it's too wet. After 6 weeks, you'll see tiny white roots emerging from the shell. This is your signal that stratification worked! If nothing happens, extend the cold period by another 2 weeks—some varieties need longer.
🪴 Step 3: Plant in Containers with Well-Draining Soil
Fill 4-inch pots with a mix of 50% potting soil and 50% perlite or coarse sand—this prevents root rot, which is the #1 killer of young pecan seedlings. Plant each stratified nut 1 inch deep, shell-side down, in its own pot. Gently press the soil around it to secure it without compacting.
Place the pots in a warm, bright spot with indirect light (a north-facing window works best). Avoid direct sun at first—young seedlings can scorch. Keep the soil evenly moist by misting lightly every 2-3 days. You'll know you're doing it right when the soil feels like a wrung-out sponge: damp but not dripping.
☀️ Step 4: Gradually Acclimate to Sunlight
Once you see green sprouts breaking through the soil (usually within 2-4 weeks after planting), it's time to introduce them to more light. Move the pots to a south-facing window or under a grow light for 12-14 hours daily. If you notice the seedlings stretching toward the light with long, thin stems, they're not getting enough intensity—adjust the grow light to within 4 inches of the tops.
After another 2 weeks of growth, when the seedlings have 2-3 sets of true leaves (not the initial seed leaves), you can start hardening them off. Place them outside in a sheltered, shaded spot for 1 hour daily, gradually increasing time over 7-10 days. Watch for wilting—if it happens, bring them back inside and extend the acclimation period by a few days.
✂️ Step 5: Transplant and Care for Young Saplings
When your seedlings reach 6-8 inches tall and have a sturdy stem, they're ready for their first transplant. Choose a 1-gallon pot and use the same well-draining soil mix. Dig a hole twice as wide as the root ball but only as deep as the original pot—pecan roots are shallow and hate being buried too deep.
Water deeply after transplanting, then let the top inch of soil dry out between waterings. Pecan trees are drought-tolerant once established, but young saplings need consistent moisture. Fertilize lightly with a balanced 10-10-10 formula every 2 months during the growing season. In 2-3 years, these saplings can be planted outdoors in well-draining soil with full sun exposure—just like their mature counterparts.
Tips & tricks for perfect pecan tree sprouting
These little-known tricks will help you turn store-bought pecans into thriving saplings with minimal fuss.
Selection Tip: Don't just grab any pecans—look for ones that feel heavy for their size, with smooth shells and no visible cracks. I've found that pecans from the grocery store's bulk section often have better germination rates than pre-packaged varieties. Store your selected nuts in a cool, dark place until you're ready to start the process, and avoid refrigeration since cold temperatures can actually damage the nuts before stratification.
The Cold-Stratification Secret: That 6-week cold period in the refrigerator is non-negotiable, but here's what nobody tells you—some pecan varieties need up to 8 weeks. If you're impatient, check your refrigerator's temperature with a thermometer; it should stay consistently between 35-40°F. I've had better success using the crisper drawer rather than the main fridge compartment because it maintains more stable humidity levels. Place a small piece of paper towel in with your nuts to help absorb any excess moisture that might develop during the process.
Planting Technique: When it's time to plant your stratified nuts in Step 3, make sure the shell is facing downward—this is crucial because the root will emerge from the bottom where the nut was attached to the tree. Use a small spoon or your finger to create a hole that's just slightly larger than the nut, then gently press the soil around it to eliminate air pockets. I've found that using a mix of 50% potting soil and 50% perlite not only prevents root rot but also helps maintain that perfect moisture balance we're aiming for.
Lighting Strategy: The transition from indirect to direct light in Step 4 can be tricky. If you don't have a south-facing window, a simple LED grow light on a timer works wonders. Position it about 6 inches above the seedlings initially, then gradually raise it as they grow. Watch for those telltale signs of light deprivation—long, thin stems reaching upward—this means your seedlings need more light intensity. Remember, pecan seedlings are tough but they won't tolerate being "sunburned" during their first exposure to direct sunlight.
Pro Tips for Start A Pecan Tree From Nut
- These little-known tricks will help you turn store-bought pecans into thriving saplings with minimal fuss.
- Selection Tip: Don't just grab any pecans—look for ones that feel heavy for their size, with smooth shells and no vis...
- The Cold-Stratification Secret: That 6-week cold period in the refrigerator is non-negotiable, but here's what nobody...
Frequently asked questions
about growing a pecan tree from a nut—your burning questions answered!How long does it take for a pecan nut to sprout?
A cold-stratified pecan nut typically sprouts in 6–12 weeks after planting. Patience is key—some varieties may take longer, especially if stratification conditions (like moisture and temperature) aren’t ideal. Keep the soil consistently moist and monitor for tiny green shoots!
Can I skip cold stratification and plant the nut directly?
While possible, skipping stratification drastically reduces success rates. Pecans require this dormancy-breaking process to mimic winter conditions. If you’re impatient, try refrigerating the nut for 3–4 weeks before planting—better odds than no stratification at all!
What’s the best time of year to plant stratified pecan nuts?
Plant your stratified nuts in early spring (just before last frost) or late summer (after harvest). Avoid planting in freezing temps—roots are delicate! If you’re in a warm climate, late summer gives nuts time to establish before winter.
Why isn’t my pecan nut sprouting? Troubleshooting tips.
No sprouts yet? Check these common issues:
- Dry soil: Pecans need consistent moisture—not soggy, not bone-dry.
- Poor stratification: Ensure the nut was moist and cold (34–40°F) for 6–8 weeks.
- Low viability: Some nuts are non-viable—test a few to confirm.
- Pests/disease: Inspect for mold or critters (like rodents) digging near your planting spot.
How tall will my homegrown pecan tree get?
Pecan trees are majestic giants! Mature trees reach 70–100 feet tall with a sprawling canopy. Dwarf varieties (like ‘Pawnee’) stay under 30 feet—perfect for smaller yards. Plan ahead: These trees need space, sunlight, and deep roots!
Wrapping up and next steps
Starting a pecan tree from a nut is a rewarding journey that combines patience, care, and a touch of nature’s magic. 🌱 By following these steps—from cold stratification to transplanting—you’re not just growing a tree; you’re nurturing a future source of delicious pecans and shade. Your next step? Gather your supplies, pick the perfect nut, and dive into this green adventure with confidence!
Remember, every expert gardener started with their first seed. Happy growing!