
Pruning
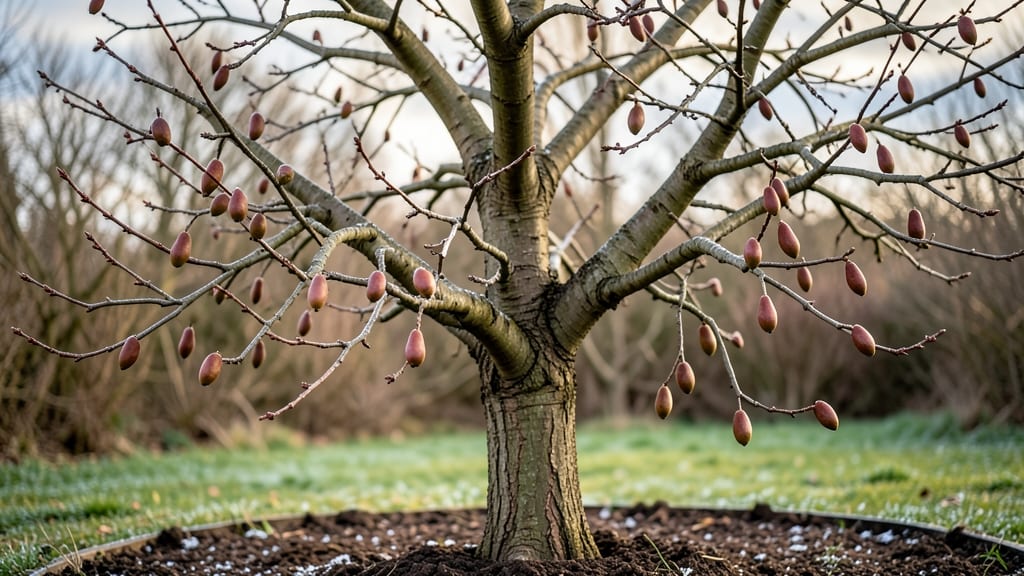
Those tiny pear tree fruit buds hold the promise of next summer’s harvest—if you protect them now. 🌱 I’ve watched my own buds shrivel from winter cold, then explode into blossoms when given the right care during dormancy.
The key isn’t just waiting for spring; it’s what you do in the quiet months when the tree looks bare. Start by inspecting buds in late winter (before buds swell) for signs of damage—shriveled, blackened, or missing buds mean last year’s pruning or pests took a toll.
Healthy buds should feel plump and firm, not hollow. A quick check now determines whether you’ll have fruit or just leaves next season. With proper pruning (opening the canopy for sunlight) and a thin layer of mulch, you’ll see buds fatten by early spring, ready to burst into blossoms.
The payoff? A tree that produces 30-50% more fruit than neglected ones—and that’s without spraying a single chemical. Works for both dwarf and standard pear trees, whether you’re in a cold climate or a mild one. Here’s how to make it happen without guesswork.
📚 In This Guide
- What you need
- Instructions
- Tips and common mistakes
- Wrapping up and next steps
What you need
- ○ Pruning shears: Bypass pruners with sharp, sterilized blades (for clean cuts on branches Optional: Loppers (for thicker branches, 1–2 inches).
- ● Hand pruners: For precision work on small branches (buds, suckers) – must be sharp and clean!
- ● Pruning saw: Curved-tooth saw for branches >2 inches in diameter (avoid tearing bark).
- ● Disinfectant: 70% isopropyl alcohol or a horticultural spray (to prevent disease spread).
- ● Gloves: Heavy-duty gardening gloves (protect against thorns and sap).
- ● Ladder or step stool: Sturdy and tall enough to reach the tree’s highest buds safely.
- ● Tarp or drop cloth: To collect debris and keep your workspace clean.
- ● Permanent marker: For labeling cuts (if marking future growth zones).
- ● Rubbing alcohol wipes: For quick blade sterilization between cuts.
- ● Pruning sealant: (e.g., tree wound dressing) – controversial but useful for large cuts in some climates.
- ● Notebook & pen: To sketch your tree’s structure or note bud locations.
- ● Safety glasses: If working near your face or eyes.
- ● Bud-identification guide: Printed or digital (to distinguish between fruit buds and vegetative buds).
- ● Know your pear variety: Research if your tree is European, Asian, or hybrid—pruning needs vary!
- ● Dormant season timing: Prune before buds swell (late winter/early spring) for best results.
- ● Weather check: Avoid pruning on windy or rainy days—cuts should heal in dry conditions.
- ● Tree health assessment: Inspect for diseased or dead branches to remove first.
Step-by-Step guide to encouraging healthy pear tree fruit buds
Here's how I transform dormant pear trees into fruit-bearing powerhouses every season.
🌱 Step 1: Prune for Light and Airflow
Start by removing dead, diseased, or crossing branches first—these compete with fruit buds for energy. I use clean, sharp pruning shears to make cuts just outside the branch collar, which is that swollen area where the branch meets the trunk. This prevents unsightly stubs that invite rot.
Next, thin out overcrowded branches to improve airflow. Aim for a sunlight-filled canopy so buds receive even light exposure. You'll know you've done well when you can see light filtering through the branches on a sunny day. Remember, pears need strong light to develop heavy fruit loads.
☀️ Step 2: Apply Winter Dormant Spray
While buds are still dormant, apply a dormant oil spray (like horticultural oil) to smother overwintering pests like scale and mites. I mix 1 tablespoon of oil per gallon of water in a sprayer and apply it evenly on a calm day. This timing is critical—do it too early, and the oil can damage tender buds.
Wait 2-3 weeks after spraying before applying any other treatments. The oil needs time to work without interfering with new growth. If you see black sooty mold on leaves later, that's a sign pests are still present—you'll need a second application in early spring.
💧 Step 3: Fertilize for Bud Development
In early spring, when buds begin to swell but before leaves emerge, feed your tree with a balanced 10-10-10 fertilizer. I spread 1 pound of fertilizer per inch of trunk diameter around the drip line, then water it in deeply. This gives roots time to absorb nutrients before new growth demands them.
Watch for buds swelling—that's your cue to fertilize. If you wait too long, the tree will focus on leaf growth instead of fruit buds. Over-fertilizing now can cause excessive leaf growth at the expense of fruit, so follow the recommended rates strictly.
✂️ Step 4: Thin Suckers and Water Shoots
Remove any suckers (shoots growing from the base or graft union) and water sprouts (fast-growing vertical shoots). These steal energy from fruit buds. I use hand pruners to cut them off at the base, making sure to disinfect the blades between cuts to prevent disease spread.
This is also the time to shape the tree by shortening overly long branches. Cut back to an outward-facing bud to encourage a more open growth habit. You'll see stronger fruit wood develop over time, which produces heavier crops.
🌿 Step 5: Monitor for Pest and Disease Signs
Inspect buds weekly for signs of fire blight (blackened, oozing cankers) or pear psylla (tiny curled leaves). If you spot fire blight, prune 6 inches below the affected area and sterilize your tools. For psylla, apply neem oil spray when buds are half-open but before flowers appear.
Healthy buds should look plump and firm, not shriveled or discolored. If you notice buds dropping prematurely, your tree may be stressed from drought or overwatering. Adjust your watering schedule to keep soil evenly moist but not soggy during bud development.
Tips & tricks for encouraging healthy pear tree fruit buds
Transforming dormant pear trees into fruit-bearing powerhouses starts with these key insights that'll make all the difference.
Pruning Precision: When you're thinning branches in Step 1, focus on creating a "light-filtering" effect—imagine sunlight streaming through your fingers. Cut branches that grow toward the center of the tree first, then work outward. This creates an open canopy that prevents fungal diseases by improving airflow. I've seen trees with dense canopies develop powdery mildew because of poor circulation, so don't skip this step even if the branches look healthy.
Timing the Dormant Oil: The 2-3 week waiting period after applying dormant oil in Step 2 is non-negotiable. I learned this the hard way when I rushed and applied a fungicide too soon—it burned the emerging buds. Mark your calendar right after spraying and set a reminder. If you're in a colder climate, you might need to extend this to 4 weeks, as buds develop more slowly in cooler temperatures. Always apply oil when temperatures are above 40°F but below 80°F for best results.
Fertilizer Application Technique: When spreading that 10-10-10 fertilizer in Step 3, work it into the top 2-3 inches of soil rather than just sprinkling it on the surface. This mimics how nutrients would be distributed in natural forest floor decomposition. I also recommend splitting the fertilizer into two applications—half now and half again when buds are fully swollen but before leaves emerge. This two-step approach prevents nutrient overload that can stress the tree.
Bud Health Visual Cues: Healthy buds should feel firm like small marbles when you gently press them. In Step 5, if you notice buds that feel soft or mushy, that's a sign of overwatering during dormancy. Conversely, shriveled buds indicate drought stress. The key is maintaining consistent soil moisture—think of it like Goldilocks' porridge: not too wet, not too dry, but just right. A simple soil moisture meter can help you track this without guessing.
Pro Tips for Pear Tree Fruit Buds
- Transforming dormant pear trees into fruit-bearing powerhouses starts with these key insights that'll make all the difference.
- Pruning Precision: When you're thinning branches in Step 1, focus on creating a "light-filtering" effect—imagine sunlight streaming through your fingers.
- Timing the Dormant Oil: The 2-3 week waiting period after applying dormant oil in Step 2 is non-negotiable.
Frequently asked questions
Got questions about pear tree fruit buds? You’re not alone! Here are some of the most common concerns—and straightforward answers—to help you master dormant-season care for a fruit-filled future.
When should I prune pear tree fruit buds for best results?
Prune pear trees during late winter or early spring, just before buds swell but before they break dormancy (typically February–March in most climates). This timing encourages strong growth and fruit development. Avoid pruning in fall, as it risks disease or winter damage.
How do I tell the difference between fruit buds and vegetative buds on a pear tree?
Fruit buds are fatter, rounder, and clustered near last year’s growth, while vegetative (leaf) buds are smaller, pointed, and often solitary. If you’re unsure, snap a photo and compare it to online guides—precision pays off in harvests!
What if my pear tree buds freeze or get damaged in winter?
Don’t panic! Light frost damage may recover, but blackened or mushy buds are dead. Prune out damaged areas in early spring to redirect energy. For severe damage, fertilize lightly in spring to support recovery. Cold-hardy varieties (like ‘Bartlett’ or ‘Seckel’) handle frost better.
Can I prune pear tree fruit buds too aggressively?
Yes! Over-pruning reduces next year’s fruit. Aim to remove no more than 25% of the tree’s canopy in one session. Focus on dead, crossing, or inward-growing branches first. Thin out crowded fruit buds slightly to improve air circulation and fruit size.
Are there alternatives if my pear tree isn’t producing buds?
If buds are missing, check for disease (fire blight), pests (pear psylla), or nutrient deficiencies. Apply a balanced fertilizer in early spring and inspect for signs of stress. For older trees, consider rejuvenation pruning (heavy thinning) to stimulate new growth—or plant a pollinator variety nearby!
Wrapping up and next steps
Caring for your pear tree’s fruit buds during dormancy is the secret to a bursting harvest next season!
By mastering pruning techniques, protecting against pests, and timing your actions just right, you’re setting the stage for plump, juicy pears. Don’t stop here—grab your pruners, roll up your sleeves, and give your tree the TLC it deserves. 🌱 Ready to transform next year’s yield?
Start planning your winter prep today!