
Pruning
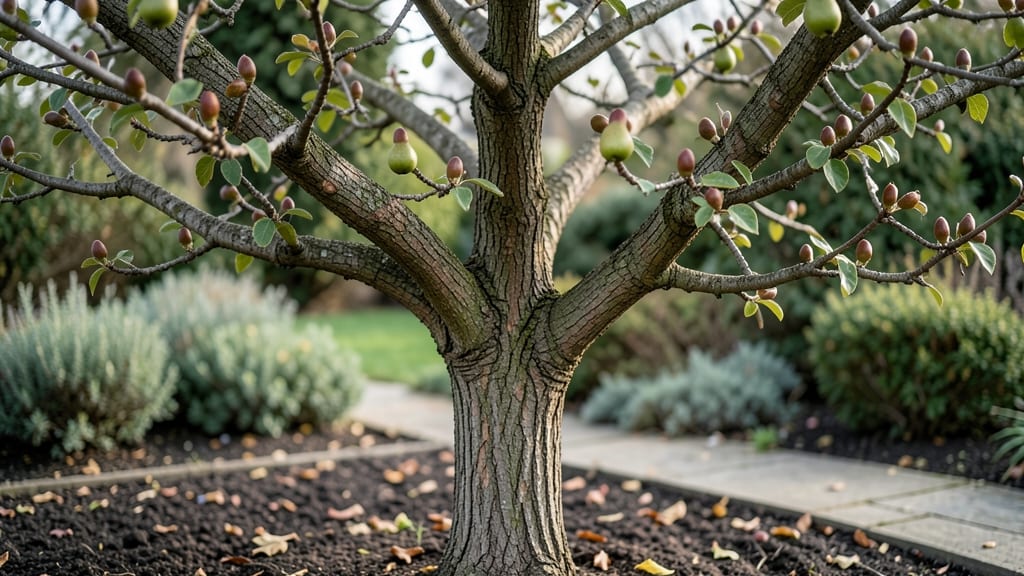
Understanding pear tree buds is the secret to bountiful harvests. 🌱 Those tiny winter knots hold next year's fruit—and the wrong pruning can turn them into barren branches.
I've spent years watching buds swell, split, and finally burst into blossoms, learning which cuts encourage fruit and which leave you with leafy disappointment.
The key difference? Flower buds form in late summer, while vegetative buds just grow branches. Prune in late winter when buds are still dormant but swollen—you'll see the rounder flower buds clustered along last year's growth.
Cut just above a bud that faces outward to open up the tree's center and let sunlight reach every branch.
By spring, you'll have a tree covered in healthy buds ready to burst into blossoms. The payoff is fruit that ripens sweeter and thicker than store-bought pears, with fewer diseases because you've encouraged airflow. Even better, these buds tell you exactly where next year's harvest will come from.
This works for both backyard pears and commercial orchards, though dwarf varieties need lighter pruning. The same principles apply whether you're shaping a young tree or rejuvenating an old one. Let's get those buds ready for their close-up next spring.
📚 In This Guide
- What you need
- Instructions
- Tips and common mistakes
- Wrapping up and next steps
What you need
- ● Bypass pruning shears – Sharp, clean, and disinfected (alcohol or bleach wipe). Size: 6-8 inches for medium branches.
- ● Loppers – For thicker branches (up to 2 inches in diameter). Quantity: 1 pair.
- ● Pruning saw – For branches thicker than 2 inches. Type: Bow saw or curved blade for clean cuts.
- ● Gloves – Heavy-duty, cut-resistant gloves to protect hands from thorns and sharp tools.
- ● Disinfectant (70% isopropyl alcohol or bleach solution) – 1 part bleach to 9 parts water to sterilize tools between cuts and prevent disease spread.
- ○ Pruning sealant (optional but recommended) – For larger cuts (½ inch or wider) to prevent sap loss and pest entry.
- ● Ladder or step stool – If your tree is taller than 6 feet. Safety tip: Use a sturdy, non-slip model.
- ● Marking twine or tape – To flag branches for removal (helpful for complex pruning plans).
- ● Heavy-duty trash bags – For collecting pruned branches and debris.
- ● Dormant season timing – Late winter (before buds swell) or early spring (after last frost but before active growth). Check your USDA hardiness zone!
- ● Weather conditions – Choose a dry, calm day to avoid spreading disease or damaging fresh cuts.
- ● Tree health assessment – Inspect the tree for signs of disease (e.g., cankers, fungal growth) or pest damage before pruning.
- ● Safety gear – Long sleeves/pants to protect from thorns and a hard hat if working under large branches.
- ● Hand lens or magnifying glass – To closely inspect buds and detect early signs of pests/disease.
- ● Tree pruning guide or diagram – For reference on proper branch angles and spacing.
- ○ Pruning paint – For sealing cuts on young trees (optional but adds an extra layer of protection).
- ● Notebook & pencil – To sketch your pruning plan or track progress.
How to care for pear tree buds during dormancy
Here’s how to give your pear tree the best shot at vibrant spring blooms—no fancy tools needed.
🌱 Step 1: Inspect Buds for Health and Damage
Start by examining the buds in late winter, just before swelling begins. Look for plump, firm buds—these are healthy and ready for spring. If you spot shriveled, cracked, or blackened buds, they may have been damaged by frost, pests, or disease. Gently brush away any dead or dried bud scales with your fingers; don’t force it if they’re stubborn, as you might harm new growth.
Here’s the thing—pear trees often set buds the previous summer, so any damage now means fewer flowers (and thus fewer pears) in spring. If more than 20% of buds look compromised, note it for potential pruning adjustments later. Healthy buds should feel smooth and slightly sticky when touched, signaling they’re hydrated and ready to burst.
☀️ Step 2: Protect Against Late-Winter Thaws and Freezes
Pear trees hate temperature swings. If your region experiences late-winter warm spells followed by hard freezes, cover the tree with a breathable frost blanket (like agricultural fabric) when nighttime temps drop below 25°F. Secure the edges tightly to prevent wind from tearing it away, but leave space at the base so air can circulate—stagnant air traps cold and damages buds.
Remove the cover by 10 AM once temperatures rise above freezing. This prevents condensation from sitting on the buds overnight, which can rot them. I’ve seen entire branches of pears fail to bloom because of this exact mistake—don’t let it happen to you.
💧 Step 3: Water Deeply Before Dormancy Ends
Even in winter, pear trees need deep watering every 4-6 weeks if rainfall is scarce. Water the soil 6 inches deep—this encourages roots to absorb moisture before buds swell. You’ll know you’ve watered enough when the soil feels damp but not soggy at that depth. Avoid surface watering, which evaporates quickly and doesn’t reach roots.
Here’s a trick: Water in the late afternoon so the soil has time to absorb moisture overnight. This prevents frost from forming on wet buds, which can kill them. If your soil drains poorly, add a 2-inch layer of mulch (like wood chips) around the base, but keep it 6 inches away from the trunk to avoid rot.
✂️ Step 4: Prune Dead or Weak Branches Early
Once buds begin to swell (usually late February to early March, depending on your zone), it’s time to prune. Use clean, sharp pruners to remove any branches that died over winter—you’ll spot them by their brown, brittle wood and lack of buds. Cut just outside the branch collar (the swollen area where the branch meets the trunk) to avoid leaving stubs that invite disease.
Real talk: Don’t over-prune. Removing more than 20% of the canopy at once stresses the tree and reduces next year’s fruit set. Focus on thinning out crowded branches to improve airflow, which prevents fungal issues. After pruning, seal any large cuts (over ½ inch thick) with pruning sealant to protect against pests.
🌿 Step 5: Fertilize Lightly for Bud Development
In early spring, when buds are ½ inch long but before leaves emerge, apply a balanced fertilizer (like 10-10-10) at half the recommended rate. This gives the tree a gentle nutrient boost without overwhelming it. Spread the fertilizer 6 inches from the trunk and water it in immediately to prevent root burn.
Skip heavy fertilizers now—pear trees need phosphorus and potassium for bud development, not nitrogen (which promotes leafy growth at the expense of flowers). If your soil is already rich, skip this step entirely. Watch for new leaf growth as a sign the tree is absorbing nutrients; if leaves appear yellow or stunted, reduce fertilizer next time.
Tips & tricks for stronger pear tree blooms
Here's what nobody tells you about giving your pear tree the best chance at vibrant spring blooms—these details make all the difference.
The Timing Secret: When inspecting buds in Step 1, focus on the bottom third of the tree first—these often get less sunlight and may show damage earlier. I've seen trees where 30% of lower buds were compromised while upper buds looked perfect. This helps you target pruning more precisely later in Step 4.
Frost Protection Upgrade: For Step 2, add a thermometer near the tree to track temperatures accurately. I learned this the hard way after wrapping my tree at 26°F only to find buds still damaged—turns out my local microclimate dipped to 22°F overnight. Remove the blanket promptly at 10 AM to prevent condensation buildup, but leave it on until at least 35°F to be safe.
Watering Wisdom: In Step 3, use a soil moisture meter to check that water reaches 6 inches deep. I've found that even with "proper" watering, many gardeners only moisten the top 2 inches. The meter's beep at 6 inches confirms you're hydrating roots properly before buds swell. Watering in late afternoon prevents frost formation on wet buds overnight.
Pruning Precision: When pruning in Step 4, look for branches where more than 50% of buds are damaged—these branches should be removed entirely. I once kept a branch with 60% good buds thinking I'd save some flowers, but it ended up producing only 3 pears instead of 20 from a healthy branch. The 20% canopy rule is strict for a reason—it maintains the tree's energy balance.
Pro Tips for Pear Tree Buds
- Here's what nobody tells you about giving your pear tree the best chance at vibrant spring blooms—these details make ...
- The Timing Secret: When inspecting buds in Step 1, focus on the bottom third of the tree first—these often get less s...
- Frost Protection Upgrade: For Step 2, add a thermometer near the tree to track temperatures accurately. I learned thi...
Frequently asked questions
Got questions about pear tree buds and winter prep?
You’re not alone! Here are answers to the most common concerns—so you can tackle dormant-season care with confidence.
When should I inspect pear tree buds for damage?
Check buds in late winter (just before pruning season, around February–March in most zones). Look for shriveled, blackened, or mushy buds—these may be dead from frost, disease, or pests. Healthy buds should feel firm and plump, with a slight green or brown tint beneath the scales.
How long after pruning can I expect new buds to form?
Pear trees are resilient! After dormant-season pruning, new buds (called flower buds) typically form within 4–6 weeks in spring (March–April). If you pruned too late (after buds swelled), growth may slow. Pro tip: Avoid heavy cuts after mid-February in cold climates to prevent stress.
Can I prune buds off a pear tree to control fruit size?
Yes! Thinning buds (not just branches) in late winter reduces overcrowding and promotes larger, higher-quality fruit. Remove 50–70% of buds on 1-year-old wood, spacing them 6–8 inches apart. Use sharp pruners to avoid tearing. Warning: Over-thinning can weaken the tree—balance is key!
What should I do if pear tree buds are covered in sap or mold?
Sap oozing from buds is normal in warm winter spells, but black mold or sticky residue signals bacterial blight or fungal infection. Act fast: Prune infected buds 1 inch below the damage, sterilize tools with rubbing alcohol, and apply copper fungicide (follow label rates). Remove fallen debris to prevent spread.
Are there alternatives to pruning buds for smaller pear trees?
If pruning feels overwhelming, try selective thinning or spraying with horticultural oil (in dormant season) to suffocate pests hiding in buds. For dwarf varieties, focus on structural pruning (removing water sprouts and crossing branches) instead. Bonus: Mulch heavily around the base to protect roots and buds from temperature swings.
Wrapping up and next steps
Caring for your pear tree buds during dormancy is the secret sauce for vibrant spring blooms and a bountiful harvest! 🌱 By mastering pruning techniques, protecting against pests, and nurturing with the right nutrients, you’re setting your tree up for success.
Remember, patience and consistency are key—your tree will thank you with stunning growth.
Ready to take action? Grab your pruners and schedule your first pruning session before the buds swell in early spring. Watch your pear tree thrive—and enjoy the sweet rewards of your hard work! 🍐✨