
Pruning
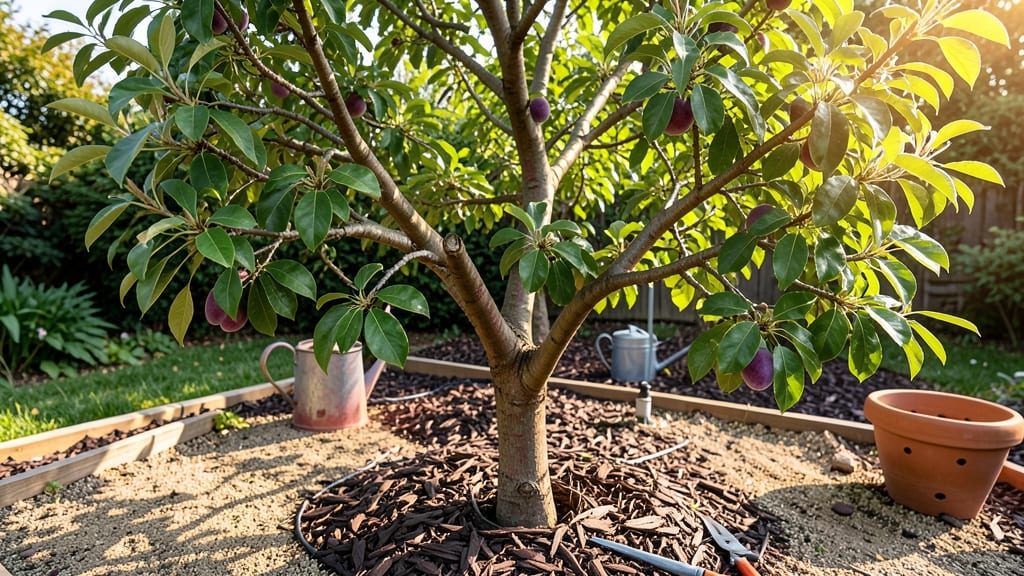
The care of your Japanese plum tree (Prunus salicina) will reward you with stunning spring blooms and sweet summer fruit—if you master the art of precision trimming. 🌸 I’ve learned that most plum trees fail not from neglect, but from over-pruning or wrong timing, which stunts blooms and weakens the tree.
The secret lies in understanding when to cut (late winter or early spring) and how much to remove—never more than 25% of the canopy at once.
Start with well-draining soil and full sun (at least 6-8 hours daily), then focus on three key pruning cuts: removing dead wood, thinning crowded branches, and shaping for airflow.
My tree went from leggy and sparse to bursting with blossoms in just two seasons after I stopped hacking branches and started thinking like a sculptor—keeping the structure open at the center. Water deeply once a week during dry spells, and avoid wetting the leaves to prevent fungal issues.
By summer, you’ll see the payoff: clusters of fragrant white or pink flowers that turn into juicy plums. The tree’s natural vigor handles pests well, but watch for aphids—spray with soapy water if you spot sticky residue on leaves.
Most mistakes come from pruning too late (after blooms) or too aggressively—both rob the tree of next year’s fruit. With the right approach, your plum tree will thrive for decades, becoming the showstopper of your landscape.
For best results, mark your calendar for late February to early March—that’s when the tree is dormant but about to wake up. A little patience and precision now means years of effortless beauty and harvests.
Whether you’re shaping a young tree or reviving an overgrown one, these steps will keep it healthy and productive.
📚 In This Guide
- What you need
- Instructions
- Tips and common mistakes
- Wrapping up and next steps
What you need
- ● Pruning Tools: Bypass pruners (sharp, clean) – 1 pair
- ● Loppers (for thicker branches) – 1 pair
- ● Pruning saw (for large limbs) – 1
- ● Garden gloves (cut-resistant) – 1 pair
- ● Planting Supplies: High-quality potting soil or well-draining garden soil – 5+ gallons
- ● Organic compost (for enriching soil) – 1-2 bags
- ● Slow-release fertilizer (10-10-10 NPK) – 1 bag
- ● Mulch (wood chips or pine straw) – 2-3 cubic feet
- ● Safety & Maintenance: Disinfectant (70% isopropyl alcohol or bleach solution) – small bottle
- ● Rake (for clearing debris) – 1
- ● Watering can or hose (with adjustable nozzle) – 1
- ● Tree growth regulator (to control vigorous growth) – 1 bottle
- ● Fungicide (for powdery mildew prevention) – 1 spray bottle
- ● Tree ties or stakes (for young/supportive pruning) – as needed
- ● Pruning sealant (for large cuts) – small tube
Instructions for year-round Japanese plum tree care
Here's the straightforward approach I've used to keep my Japanese plum trees blooming reliably for over a decade.
🌱 Step 1: Understand the Four Seasons of Care
Japanese plum trees thrive when you work with their natural cycle rather than against it. Start by identifying your tree's age—younger trees need more aggressive shaping, while mature specimens benefit from selective pruning. The key seasons are late winter (before buds swell), early spring (after flowering), summer (light maintenance), and fall (preparatory trimming).
I always mark my calendar for February-March as the primary pruning window—this ensures the tree has time to heal before spring growth begins. For mature trees, I never remove more than 25% of the canopy in a single season, as this stresses the tree and reduces flowering potential.
☀️ Step 2: Master the Art of Precision Trimming
Use sharp, clean pruning shears to make cuts at a 45-degree angle just above a bud or branch collar. This prevents water from pooling and causing rot. For thicker branches over ½ inch, use loppers—never attempt to cut with shears. I always sterilize my tools with 70% isopropyl alcohol between cuts to prevent disease spread.
Remove dead, diseased, or crossing branches first. Then focus on thinning out rather than topping—this opens the canopy to sunlight and air circulation. Watch for water sprouts (fast-growing vertical shoots) and cut them back immediately. These sap-suckers drain energy from your tree's best blooms.
💧 Step 3: Water and Fertilize Strategically
Japanese plum trees establish deep roots, so deep watering every 7-10 days (rather than frequent shallow watering) encourages this. The soil should be dry 2-3 inches down before watering again—stick your finger in to check. During the first two years, water more frequently (every 5-7 days) to help root establishment.
Apply balanced 10-10-10 fertilizer in early spring (just as buds swell) and again in mid-summer. I use ½ cup per 100 square feet of canopy spread. Avoid fall fertilization—this encourages late-season growth that won't harden off before winter. For established trees, a layer of 2-3 inches of mulch (keeping it 6 inches away from the trunk) retains moisture and regulates soil temperature.
✂️ Step 4: Year-Round Maintenance Checkpoints
After the spring bloom, remove any spent blossoms by cutting back to the first set of strong leaves. This redirects energy to fruit development rather than seed production. In late summer, inspect for aphids or scale insects—these pests thrive in the dense foliage. I spray with neem oil solution (1 tbsp per gallon of water) if I spot any infestation.
As fall approaches, remove any suckers (shoots growing from the base) and crossing branches that could cause winter damage. Thin out overcrowded areas to improve airflow. By November, stop watering entirely unless we have an extended dry spell—this helps the tree enter dormancy properly.
⏰ Step 5: Winter Protection for Young Trees
Mature Japanese plum trees handle winter well, but younger specimens (under 5 years) need extra care. Wrap the trunk with tree guard to prevent rodent damage and sunscald. I also mound 6-8 inches of soil around the base for insulation—just remember to remove it in early spring before new growth begins.
If you're in a cold climate (below Zone 5), consider burlap wrapping for the first two winters. This protects against temperature swings that can cause bark splitting. I check my trees in January for any winter burn (brown, crispy edges on leaves) and prune those areas back immediately in early spring to encourage new growth.
Tips & tricks for Japanese plum tree care
These precision-based strategies will help you keep your Japanese plum tree thriving year after year with minimal stress.
Seasonal Timing Matters: The February-March pruning window is non-negotiable for mature trees. This timing allows wounds to heal before spring growth begins, preventing disease entry points. I always check the forecast and schedule pruning for a dry, calm day—wet conditions can spread fungal spores through fresh cuts. For younger trees, you can extend this window slightly into early April if needed, but don't delay beyond that.
Pruning Technique Secret: When making cuts at a 45-degree angle in Step 2, visualize cutting just above the bud where you want new growth to emerge. The angle should face outward from the branch collar, not downward. I mark my cuts with a white pencil first to visualize the final look before making the actual cut—this prevents over-pruning and helps maintain the tree's natural shape. Remember, you can always remove more later, but you can't put branches back once they're gone.
Watering Wisdom: The deep watering every 7-10 days is about quality, not quantity. I use a soil probe to check moisture levels—if it's dry 2-3 inches down, it's time to water. For young trees, I water more frequently but reduce the volume to prevent root rot. A good test is to lift the mulch slightly and check the soil color: dark brown means moist, light brown means dry. In extreme heat, I might water every 5 days instead of 7, but always let the topsoil dry between waterings.
Fertilizer Application: The ½ cup of 10-10-10 fertilizer per 100 square feet should be spread evenly under the canopy's drip line, not piled around the trunk. I use a spreader for even distribution and follow up by watering thoroughly to help the nutrients penetrate the soil. For established trees, I split the ½ cup into two applications: half in early spring and half in mid-summer. This prevents over-fertilizing, which can lead to excessive leaf growth at the expense of flowers and fruit.
Pro Tips for Japanese Plum Tree Care
- These precision-based strategies will help you keep your Japanese plum tree thriving year after year with minimal stress.
- Seasonal Timing Matters: The February-March pruning window is non-negotiable for mature trees.
- Pruning Technique Secret: When making cuts at a 45-degree angle in Step 2, visualize cutting just above the bud where you want new growth to emerge.
Frequently asked questions
Got questions about keeping your Japanese plum tree (Prunus mume) happy and healthy?
Here are answers to the most common ones—whether you're a first-time grower or a seasoned pruner looking for precision tips.
When is the best time to prune a Japanese plum tree?
Prune your Japanese plum tree in late winter or early spring (before buds swell) for optimal growth. Avoid heavy pruning in fall—it can stimulate new growth that won’t harden off before winter. Light shaping in summer (after flowering) is fine, but focus on structural cuts in dormancy.
How do I encourage more flowers on my Japanese plum tree?
Flowering thrives on balanced pruning—remove dead, crossing, or overcrowded branches to improve airflow and sunlight. Thin out some blossoms in early spring (if overloaded) to redirect energy to fruit or stronger blooms. Fertilize lightly in early spring with high-phosphorus (for blooms) and avoid heavy nitrogen, which promotes leaves over flowers.
Can Japanese plum trees handle cold winters?
Most varieties are hardy to USDA Zones 6-9, but young trees or tender cultivars may need winter protection. Wrap the trunk with tree guard to prevent sunscald, and mulch heavily (3-4 inches) around the base. If your area dips below 0°F (-18°C), consider burlap wraps for extra insulation.
Why are my Japanese plum tree leaves turning yellow?
Yellow leaves often signal overwatering, nutrient deficiency, or fungal issues. Check soil moisture—plum trees prefer well-draining soil and hate soggy roots. Test for iron or nitrogen deficiency (common in alkaline soils) and amend with chelated iron or compost. If spots or powdery mildew appear, prune affected branches and apply neem oil or fungicide.
Are there dwarf varieties of Japanese plum trees for small spaces?
Yes! Look for ‘Methley’ or ‘Black Beauty’—both stay under 10 feet tall. These compact varieties are perfect for patios or containers (use a 5-gallon pot with drainage). Just ensure they get 6+ hours of sunlight and prune regularly to maintain shape.
Can I prune a Japanese plum tree after it fruits?
Light pruning (removing dead wood or water sprouts) is fine post-harvest, but avoid heavy cuts—it stresses the tree and reduces next year’s fruit/flower production. Save major pruning for dormant season (late winter). If you must prune later, do it before mid-summer to allow healing before fall.
Wrapping up and next steps
Caring for a Japanese plum tree is a rewarding journey—one that blends artistry with precision! With the right tools, seasonal trimming techniques, and a little patience, your tree will flourish year-round, gracing your garden with stunning blooms and luscious fruit. 🌸
Ready to take the next step? Start small:
- Schedule your first trim in late winter to shape the tree.
- Monitor for pests or diseases monthly to catch issues early.
- Celebrate each season’s progress—your hard work will pay off in beauty!