
Planting
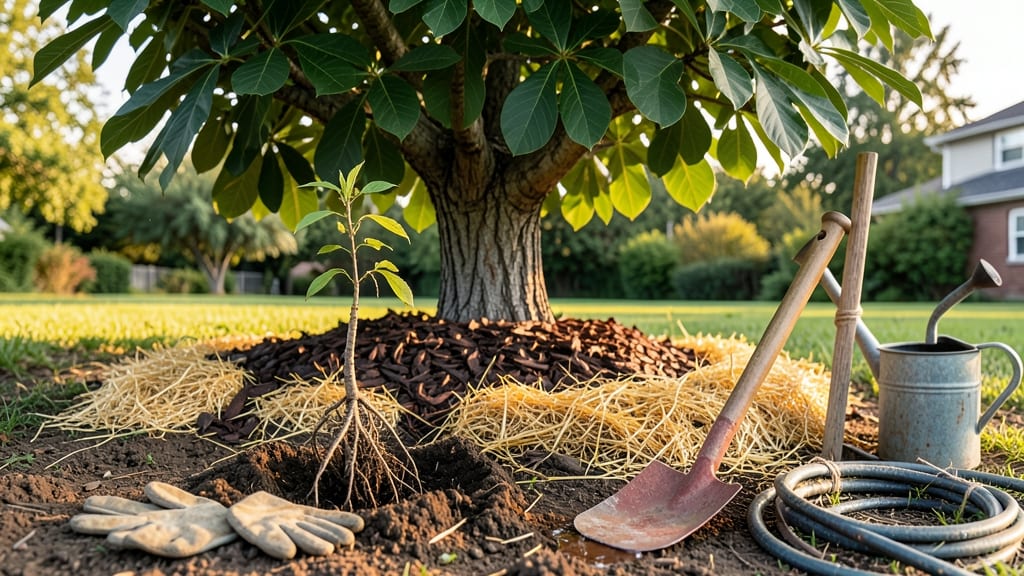
This pawpaw tree planting guide means tropical-flavored fruit in your backyard—if you nail the site and soil. 🌿 These cold-hardy trees thrive in zones 5-9, but they won’t tolerate soggy soil or harsh winds.
The secret to success starts with choosing the right spot and preparing the ground properly, so your tree grows strong and productive from day one.
You’ll need well-draining soil rich in organic matter, a sunny location with at least 6 hours of light daily, and space to spare—20-25 feet between trees for proper airflow and fruit development.
Dig a hole twice as wide as the root ball but no deeper, then mix in compost to give your pawpaw a nutrient boost right from the start. Planting in early spring or fall gives roots time to establish before extreme weather hits.
After planting, water deeply to settle the soil and keep it moist (but not soggy) for the first 6-8 weeks. Mulch around the base to retain moisture and suppress weeds, but keep mulch 3-4 inches away from the trunk to prevent rot.
The first few years are about building a sturdy framework—your tree will reward you with fragrant blossoms and fruit in 3-5 years, if you avoid these common mistakes.
Watch out for overwatering, which leads to root rot, and resist the urge to fertilize heavily in the first year—pawpaws grow best when given time to adapt. Pair your tree with companion plants like black walnut (which improves soil) or wildflowers to attract pollinators.
With patience and the right care, you’ll be harvesting custard-like fruit straight from your own backyard.
📚 In This Guide
- What you need
- Instructions
- Tips and common mistakes
- Wrapping up and next steps
What you need
- ● Pawpaw seedlings or bare-root plants: 1–3 (depending on desired spacing). Choose cold-hardy varieties like Sunflower or Pennsylvania Golden.
- ● Shovel or trowel: 1 medium-sized (for digging holes). A garden fork can also help loosen soil.
- ● Compost or well-aged manure: 5–10 gallons (to enrich planting soil). Aim for a 1:3 ratio of compost to native soil.
- ● Mulch (straw, wood chips, or leaves): 2–3 inches (to retain moisture and suppress weeds). Avoid fresh wood chips near the trunk.
- ● Watering can or hose with a gentle spray nozzle: 1 (for post-planting hydration). Pawpaws need 1–2 inches of water weekly.
- ● Pruning shears: 1 pair (for trimming dead branches post-planting or later in growth). Sterilize blades with rubbing alcohol.
- ● Planting site: A location with partial shade to full sun (6+ hours of light) and well-draining soil (pawpaws hate soggy roots!).
- ● Soil test kit: 1 (to check pH—pawpaws prefer slightly acidic to neutral soil (pH 6.0–7.0)). Adjust with lime or sulfur if needed.
- ● Tree stakes (2–3 ft tall): 1–2 (for young trees in windy areas). Use biodegradable stakes to avoid harming roots.
- ○ Epsom salt (magnesium sulfate): 1 tbsp per hole (optional boost for nutrient-deficient soil). Mix into planting soil.
- ● Fertilizer (balanced 10-10-10 or organic options like fish emulsion): 1 small bag (apply lightly 3 months after planting). Over-fertilizing can burn roots!
- ● Row cover or frost cloth: 1 (for young trees in USDA Zones 5–6 to protect from late frosts). Remove during the day once sprouts appear.
- ● Garden gloves: 1 pair (to protect hands from thorns and rough soil). Look for nitrile-coated for durability.
Step-by-Step guide to planting cold-hardy pawpaw trees
Here's how to get your pawpaw trees thriving with the right spacing and care.
🌱 Step 1: Choose the Right Location and Planting Time
Pawpaws need a spot with partial shade to full sun and well-draining soil—they hate soggy roots. I always plant mine in early spring (March-April) when the soil is workable but before new growth starts. This gives roots time to establish before summer heat arrives. If you're in a colder zone, wait until after the last frost date.
Dig a hole twice as wide as the root ball but only as deep—pawpaws don’t like being buried too deep. Loosen the sides of the hole to encourage root spread. Here's the thing—pawpaws grow best in USDA zones 5-9, so if you're outside that range, pick a cold-hardy variety like 'Sunflower' or 'Pennsylvania Golden'.
🪴 Step 2: Prepare the Soil and Plant With Care
Mix the excavated soil with 2-3 inches of compost to improve drainage and fertility. Pawpaws prefer slightly acidic to neutral soil (pH 6.0-7.0). I skip fertilizer at planting—too much can burn tender roots. Instead, spread a 1-inch layer of mulch (like wood chips) around the base, keeping it 3 inches away from the trunk to prevent rot.
Place the tree in the hole so the top of the root ball sits level with the surrounding soil. Backfill gently, tamping down lightly to remove air pockets. Water deeply until the soil is evenly moist to 12 inches deep. You'll know it's right when water pools slightly but doesn’t puddle. Avoid compacting the soil too much—pawpaws need room for their roots to breathe.
☀️ Step 3: Space Trees Properly for Future Growth
Pawpaws grow 20-30 feet tall with a 15-20 foot spread, so space them 25-30 feet apart for full-sized trees. If you're planting a small orchard, arrange trees in a grid pattern to maximize sunlight exposure. I always plant mine in groups of 3-4—this encourages cross-pollination, which is key for fruit production. Pawpaws are self-pollinating but produce more fruit with neighbors.
Watch for suckers (shoots growing from the base) in the first few years—remove them to direct energy into the main trunk. Thin out any crowded branches as they grow to maintain an open canopy. Pawpaws are slow to mature (5-10 years for fruit), so patience is key. Mark planting spots with stakes to avoid disturbing roots during lawn care.
💧 Step 4: Water and Maintain Through the First Year
Water deeply once a week during the first growing season, aiming for 1-2 inches of water per week. Pawpaws are drought-tolerant once established, but young trees need consistent moisture. You’ll know they’re getting enough when the soil feels damp 4-6 inches down—stick your finger in to check. Overwatering is worse than underwatering, so let the top 2 inches dry out between waterings.
Fertilize lightly in early spring with a balanced 10-10-10 fertilizer (½ cup per tree). Avoid heavy nitrogen—it promotes leafy growth at the expense of fruit. Prune only to remove dead or crossing branches. Pawpaws are low-maintenance once planted, but keeping the area weed-free within the drip line helps them thrive. Mulch annually to maintain soil moisture and temperature.
⏰ Step 5: Monitor for Pests and Seasonal Changes
Pawpaws are relatively pest-free, but watch for Japanese beetles or pawpaw moths—handpick larvae or use neem oil if needed. In colder zones, young trees may need winter protection (like burlap wraps) for the first few years. You’ll see new growth in spring—this is your cue that the tree is settling in. By year 3, you might spot small flower buds (they look like maroon candles)—this is the first sign of future fruit!
Real talk: Pawpaws take time, but the payoff is worth it. A mature tree produces 50-100 pounds of fruit per season. Share your location with a neighbor—pawpaws are rare, and everyone loves fresh, tropical-tasting fruit in summer. Enjoy the process; these trees are a long-term investment in flavor and shade.
Tips & tricks for perfect pawpaw tree planting
Here's what I've learned from years of planting these unique trees—avoid these common pitfalls and set your pawpaws up for success.
Location is Everything: In Step 1, don't just pick any sunny spot! Pawpaws thrive in partial shade to full sun, but they absolutely despise wet feet. If your yard has heavy clay soil, consider planting on a slight mound or slope to improve drainage. I've seen trees planted in low spots literally drown after heavy rains—this is one mistake you can't come back from. Test your soil first: dig a hole, fill it with water, and if it doesn't drain within 24 hours, you'll need to amend the soil heavily with compost or sand.
Root Ball Handling: When you're preparing the hole in Step 2, pay special attention to the root ball. Gently loosen the outer edges of the root ball before planting to encourage roots to spread into the surrounding soil. I've made the mistake of planting trees with tightly bound roots that took years to adjust—your tree will thank you for this 10-minute extra step. Also, make sure the root flare (where the roots meet the trunk) is visible above the soil line after planting. Burying this area can lead to rot and poor growth.
Mulching Matters: The 1-inch layer of mulch mentioned in Step 2 is non-negotiable for young trees. Use wood chips or straw, but avoid mulching too close to the trunk—keep it 3 inches away as instructed. This mulch layer helps maintain consistent soil moisture and temperature, which is especially important during those hot summer months. I've noticed that properly mulched trees establish faster and handle drought periods better. Just refresh the mulch layer annually to maintain its effectiveness.
Planting Groups Pay Off: In Step 3, the recommendation to plant trees in groups of 3-4 isn't just about aesthetics—it's about fruit production. Pawpaws are self-pollinating, but having multiple trees increases cross-pollination opportunities. This can mean the difference between a few fruits and a bountiful harvest. If you're planting just one tree, consider placing it near other fruit trees that bloom at similar times to maximize pollination chances. The 25-30 foot spacing gives trees room to grow while still allowing for this beneficial cross-pollination.
Pro Tips for Pawpaw Tree Planting Guide
- Here's what I've learned from years of planting these unique trees—avoid these common pitfalls and set your pawpaws up for success.
- Location is Everything: In Step 1, don't just pick any sunny spot!
- Root Ball Handling: When you're preparing the hole in Step 2, pay special attention to the root ball.
Frequently asked questions
Got questions about pawpaw trees?
You’re not alone! Whether you’re a first-time planter or a seasoned gardener, these answers will help you grow a thriving pawpaw orchard with confidence.
How far apart should I plant pawpaw trees?
Space pawpaw trees 20–30 feet apart for optimal airflow and sunlight. If growing in a small yard, 15–20 feet works, but expect slightly lower yields. Pawpaws thrive in clusters, so grouping 3–5 trees improves pollination and fruit production. Avoid overcrowding—they’ll compete for nutrients!
When is the best time to plant pawpaw trees?
Plant bare-root saplings in early spring (March–April) or container-grown trees in fall (September–October). Spring planting gives roots time to establish before summer heat, while fall planting avoids drought stress. Pro tip: If planting in summer, keep soil moist and mulch heavily to protect roots.
Can pawpaws grow in containers or small spaces?
Pawpaws prefer the ground but can grow in large containers (20+ gallons) for 2–3 years. Use well-draining soil and repot every 2–3 years. For small spaces, choose dwarf varieties like ‘Sunflower’ (matures at 12–15 feet). Just know: container-grown trees may produce fewer fruits and need extra care in winter.
What pests or diseases should I watch for?
Pawpaws are mostly pest-resistant, but watch for:
- Borers: Tiny holes in bark? Prune and treat with neem oil.
- Fungal spots (like powdery mildew): Improve airflow and apply copper fungicide.
- Deer/rabbits: Young trees need protection (fencing or repellents).
How long does it take for pawpaw trees to bear fruit?
Patience is key! Pawpaws typically take 3–5 years to produce fruit, with peak yields at 10–15 years. Young trees focus on root growth first. Boost success: Plant multiple trees (they’re self-pollinating but cross-pollinate better), and fertilize lightly with compost in early spring. →
Wrapping up and next steps
Planting a pawpaw tree is a rewarding journey that brings unique flavors and beauty to your landscape! 🌱 From selecting cold-hardy varieties like Sunflower or Overleese to ensuring proper spacing (15–20 feet apart), each step sets the stage for a thriving fruit tree.
With patience and care—especially during the first few years—you’ll enjoy shade, wildlife benefits, and delicious harvests for decades.
Ready to get started? Mark your calendar for early spring or fall planting, gather your supplies, and dig in! Your future pawpaw grove awaits—let’s make it grow! 🌿✨