
Pruning
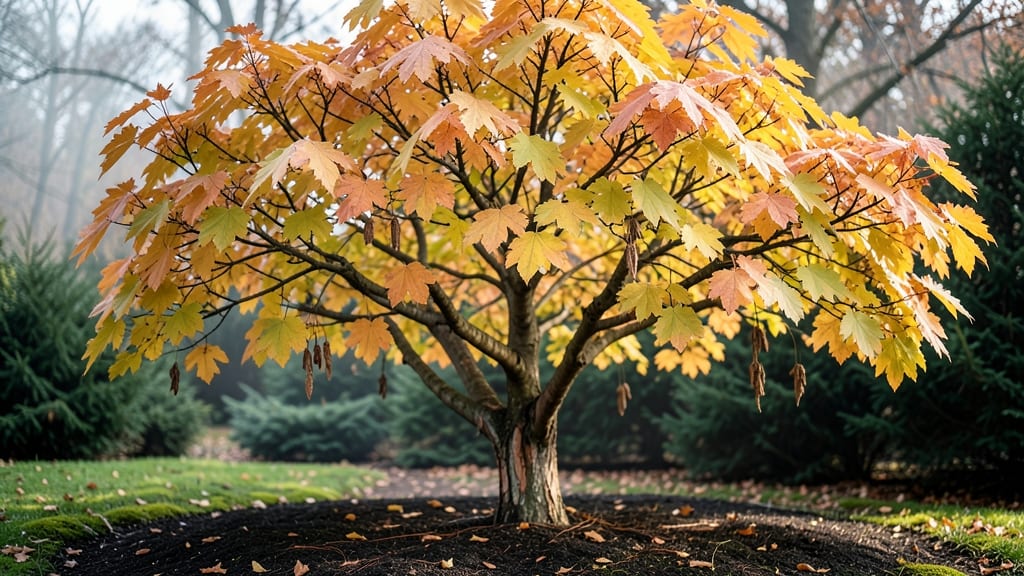
Winter pruning your katsura tree isn't just about shaping—it's about setting the stage for next year's shockingly lush spring foliage and fragrant blooms. ✨ I've learned the hard way that dormant-season cuts reveal the tree's natural structure, so you can remove dead wood and encourage new growth without stressing the plant.
This tree is a winter wonderland in its own right: exfoliating bark adds texture, while persistent seed pods hold interest long after the leaves fall. The key is timing—prune after the first hard frost but before late winter's worst cold snaps, when the tree is fully dormant but still resilient.
You'll end up with a cleaner silhouette, better air circulation, and fewer surprises when spring arrives. The bark's cinnamon tones and delicate seed clusters make winter pruning feel like an art project, not just maintenance. Works for both young trees and mature specimens.
Here's how to do it right—before the sap starts flowing again.
📚 In This Guide
- What you need
- Instructions
- Tips and common mistakes
- Wrapping up and next steps
What you need
- ● Pruning shears – Bypass pruners (sharp, 6-8 inch blades) for small branches (1/4"–3/4" diameter). Anvil pruners are a budget option but can crush stems.
- ● Loppers – Bypass loppers (20-24 inch, 1-2 inch cutting capacity) for medium branches (3/4"–2" diameter). Look for ratcheting handles for leverage.
- ● Pruning saw – Curved-tooth pruning saw (12-18 inch) for thick branches (2"–4" diameter). Avoid handsaws—they tear wood.
- ○ Extension pole saw (optional) – For high branches (10+ feet). A foldable aluminum pole with a sharp saw head works best.
- ● Work gloves – Heavy-duty, cut-resistant (e.g., Mechanix or Filson) to protect against thorns and rough bark.
- ● Safety glasses – ANSI-rated to shield eyes from debris.
- ● Ladder – Sturdy, non-slip (e.g., aluminum extension ladder, 20+ feet). Never stand on wobbly or overhanging ladders!
- ● Disinfectant – 70% isopropyl alcohol or bleach solution (1 part bleach : 9 parts water) to sterilize tools between cuts (prevents disease spread).
- ○ Pruning sealant (optional) – Tanglefoot Tree Wound Pruning Seal for large cuts (2"+ diameter) to reduce sap oozing.
- ● Heavy-duty trash bags – For collecting debris (2–3 large bags). Knot them tightly to avoid spilling.
- ● Rake or broom – To clear fallen leaves/branches from the base.
- ○ Marking twine or spray paint (optional) – For tagging branches to remove (use water-based paint to avoid harming the tree).
- ● First-aid kit – Just in case (bandages, antiseptic wipes, tweezers for splinters).
- ● Timing – Prune during the tree’s dormant season (late winter, before buds swell, ideally in February or early March). Avoid pruning in frost or rain.
- ● Weather – Choose a dry, calm day (50–65°F). Humidity can spread fungal diseases.
- ● Tree health check – Inspect the tree for dead, diseased, or crossing branches before starting. Never prune in wet or stormy conditions!
Step-by-Step guide for pruning katsura trees in winter
Winter’s the perfect time to refresh your katsura tree—here’s how to prune for stronger spring growth.
✂️ Step 1: Assess the Tree’s Structure and Health
Start by examining the tree’s branches from all angles. Look for dead, crossing, or diseased limbs—these are your first targets. Katsura trees naturally grow with a rounded canopy, so aim to maintain that shape while removing anything that disrupts airflow or blocks sunlight from the center.
Run your hand along the bark of each branch. If it feels rough, cracked, or oozes sap, it’s likely dead or damaged. Healthy branches should have smooth bark and a firm grip. Mark these branches with a flagging tape or small piece of twine so you don’t miss them during pruning.
✂️ Step 2: Remove Dead, Diseased, or Weak Branches First
Use clean, sharp pruning shears to cut out any dead or diseased wood at the branch collar—the swollen area where the branch meets the trunk. Cut just outside the collar at a 45-degree angle to prevent water from pooling and rotting the wound. Avoid leaving stubs, as they invite pests and disease.
Next, tackle weak or crossing branches. These compete for nutrients and can create entry points for fungal infections. If two branches rub together, remove the smaller one or the one growing inward. For larger branches, use loppers and make your cut on the underside of the branch to avoid tearing the bark.
✂️ Step 3: Thin Out the Canopy for Better Airflow
Katsura trees benefit from selective thinning to improve light penetration and airflow. Focus on removing branches that grow straight up or down—these rarely contribute to the tree’s natural shape. Aim to thin the canopy by no more than 25% in a single season to avoid stressing the tree.
Step back frequently to visualize the tree’s silhouette. You’re looking for an open, balanced shape that lets sunlight reach the inner branches. Avoid over-pruning the outer edges, as this can expose the tree to harsh winter winds and sun scald.
✂️ Step 4: Shape the Tree for Spring Growth
Now’s the time to refine the tree’s form. Use your pruning shears to trim back any branches that are growing too close together or disrupting the tree’s natural round shape. For larger branches, make your cuts just above a bud or lateral branch to encourage new growth in the right direction.
If you notice any water sprouts—those fast-growing, vertical shoots—remove them entirely. These saplings drain energy from the tree and rarely contribute to its beauty. For stubborn sprouts, use hand pruners and cut them at the base to prevent regrowth.
🪴 Step 5: Clean Up and Protect the Tree
After pruning, gather all the debris and dispose of it in a sealed bag. Never leave cuttings on the ground, as they can harbor pests and diseases that will infect the tree next season. Sterilize your pruning tools with rubbing alcohol to prevent spreading pathogens between cuts.
Apply a wound sealant to any large cuts over ½ inch in diameter to protect the tree from decay. While sealants aren’t always necessary for small cuts, they help larger wounds heal faster in cold climates. Finally, water the base of the tree deeply to help it recover from the pruning stress.
Tips & tricks for perfect katsura tree winter pruning
Winter pruning transforms your katsura tree into a spring beauty—here’s how to do it right the first time.
Visualize the Final Shape: Before making any cuts, step back and observe your tree’s natural rounded silhouette. Katsura trees thrive with an open, airy canopy, so imagine how sunlight will filter through after pruning. In Step 3, when you’re thinning the canopy, use a string or garden twine to outline the shape you want—this helps you see what to remove without over-thinking it.
Tool Sharpness is Non-Negotiable: Dull pruning shears create jagged cuts that invite disease. Test your tools by cutting through a piece of paper—if it tears instead of cleanly slicing, sharpen them. In Step 2, when removing diseased branches, sterilize your shears with rubbing alcohol between cuts to prevent spreading pathogens. I keep a small bottle of 70% isopropyl alcohol in my tool belt for this exact purpose.
Watch for Hidden Buds: In Step 4, when shaping the tree, look for dormant buds along the branch. These little nubs indicate where new growth will emerge in spring. Make your cuts just above a bud angled away from the center—this encourages outward growth that maintains the tree’s natural form. I always run my fingers along branches to feel for these hidden clues before making any cuts.
Seasonal Timing Matters: The instructions mention winter pruning, but the exact timing within the dormant season makes a difference. Prune on a day when temperatures are above freezing but below 40°F—this reduces stress on the tree. Early winter (December-January) is ideal for most regions, but avoid pruning during extreme cold snaps or late winter when buds begin to swell.
Pro Tips for Katsura Tree Winter
- Winter pruning transforms your katsura tree into a spring beauty—here’s how to do it right the first time.
- Visualize the Final Shape: Before making any cuts, step back and observe your tree’s natural rounded silhouette. Kats...
- Tool Sharpness is Non-Negotiable: Dull pruning shears create jagged cuts that invite disease. Test your tools by cutt...
Frequently asked questions
Got questions about winter pruning your katsura tree? You’re not alone! Here are some of the most common concerns—and straightforward answers—to help you prep for a stunning spring revival.
When is the exact best time to prune a katsura tree in winter?
The ideal window is late winter, after the last hard frost but before new growth starts—typically February to early March in most U.S. zones (4–8). Pruning too early risks damaging frost-tender buds, while waiting too late may encourage early leaf-out, stressing the tree. Check your local frost dates for precision!
How much can I safely trim off a katsura tree in one season?
For mature katsura trees, aim to remove no more than 25–30% of the canopy per year. Over-pruning can shock the tree and reduce spring blooms. Focus on dead, diseased, or crossing branches first, then lightly shape for airflow. Young trees (under 5 years) can handle lighter cuts—just 5–10%—to avoid stunting growth.
What if I missed winter pruning? Can I still trim in early spring?
Yes, but act fast! Prune in very early spring (before buds swell) to minimize stress. Avoid heavy cuts—stick to light shaping or removing deadwood. If you wait until full bloom, you’ll risk pruning off next year’s flowers. Pro tip: Mark branches to prune now so you’re ready when the window opens!
Are there any branches I should never cut on a katsura tree?
Avoid pruning these critical branches:
- Water sprouts (fast-growing vertical shoots)—they drain energy.
- Lower branches if they’re healthy (they provide winter interest!).
- More than ⅓ of a branch’s length in one cut (use gradual thinning instead).
- Branches with buds that haven’t yet swollen (you’ll prune off next year’s blooms!).
What’s a good alternative if I don’t have pruning shears?
No shears? No problem! Use these DIY tools:
- Hand pruners (for branches up to ½-inch thick).
- Loppers (for ¾- to 2-inch branches).
- A sharp saw (for thicker branches—sterilize with rubbing alcohol first!).
- Garden gloves + a sturdy stick (for snapping small dead branches—though this isn’t ideal for shaping).
Wrapping up and next steps
The Katsura tree’s winter charm isn’t just about its dormant beauty—it’s a strategic opportunity to shape its future. By mastering dormant-season pruning, you’re not just tidying up; you’re inviting a burst of vibrant spring blooms and a healthier canopy.
Whether you’re a seasoned gardener or a curious beginner, every careful cut brings you closer to a thriving tree.
Ready to transform your Katsura’s winter slumber into a spring spectacle? Grab your tools, schedule your pruning session on a calm winter day, and watch your tree reward you with lush, fragrant foliage come spring! 🌸✂️