
Pruning
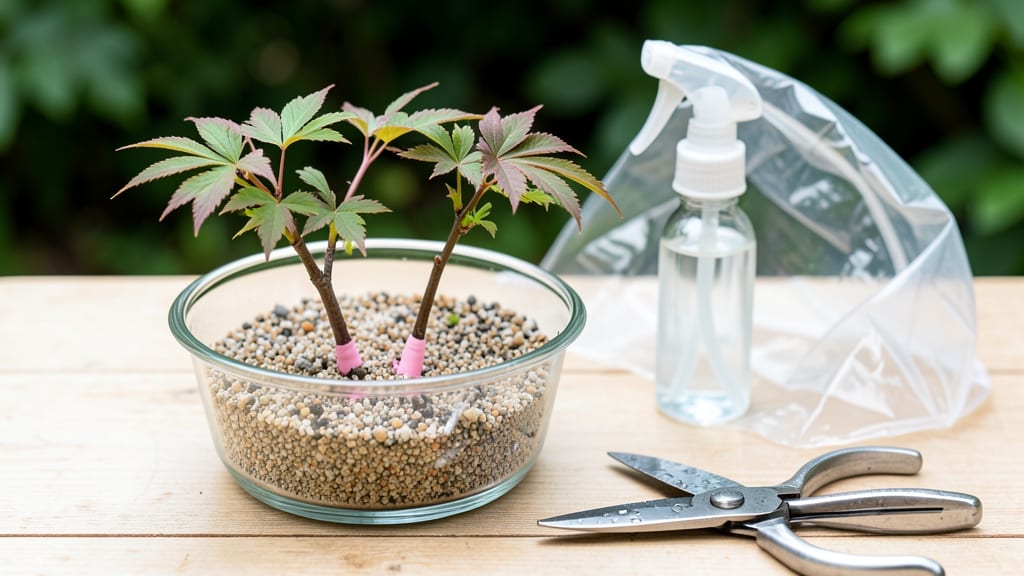
Taking Japanese maple cuttings in early summer gives you layered roots in 6 weeks—the secret to growing new trees without losing the delicate lace leaves you love.
I’ve propagated my own from 4-inch stems, and the key is timing: wait until new growth hardens off but hasn’t started woodifying yet. That’s when the roots form fastest, even in humid climates where rot is a risk.
The process is simpler than it looks: clean cuts at a 45-degree angle, dip in rooting hormone (optional but helpful), and either bury in moist perlite or float in water with a clear jar to track progress.
Mine always root faster in soil because it mimics their natural forest-floor conditions. Just keep humidity high with a plastic bag—no fancy greenhouse needed.
By week 6, you’ll see fine roots clustering at the cut end, ready to transplant. The real magic happens when you pot them up in well-draining mix and shield them from harsh sun.
These new trees stay true to the parent’s color and form, so you’re not just growing a maple—you’re multiplying your favorite variety. Patience pays off with 90% success rates if you avoid these three rookie mistakes.
Fair warning: Japanese maples are finicky about heat and drought once rooted. I learned that the hard way when my first batch wilted after moving them too soon. The fix?
Wait until roots fill the pot before hardening off, and keep them in dappled shade for their first year. That’s how you turn cuttings into thriving trees that’ll outlive you.
📚 In This Guide
- What you need
- Instructions
- Tips and common mistakes
- Wrapping up and next steps
What you need
- ● Japanese maple cuttings: 6-8 healthy, semi-hardwood cuttings (4-6 inches long, pencil-thick, with 2-3 leaf nodes each).
- ● Rooting hormone: 1 small bottle (powder or gel) to boost root growth.
- ● Well-draining potting mix: 1 bag (5-10 quarts) of a mix like perlite, vermiculite, or a 50/50 blend of peat moss and sand.
- ● Small pots or trays: 6-8 individual 4-inch pots or a single shallow tray with drainage holes.
- ● Clear plastic bags or domes: To create a humid environment (e.g., a gallon-sized zip-top bag or a propagation dome).
- ● Spray bottle: For misting cuttings and maintaining humidity.
- ● Pruning shears: Sharp, clean shears to take cuttings and trim leaves.
- ○ Labeling tags: Small stakes or tags to mark each cutting (optional but helpful!).
- ○ Bottom heat mat: (Optional) A heat mat (70-75°F range) to speed up rooting.
- ● Fertilizer: A diluted, balanced liquid fertilizer (e.g., 10-10-10) for post-rooting care.
- ● Grow lights: If natural light is limited, a small LED grow light can help.
- ● Mulch or moss: Sphagnum moss or coconut coir to retain moisture around cuttings.
How to root Japanese maple cuttings using layering
Here's the simple, proven method to grow new Japanese maples from existing branches—no fancy tools required.
Select and Prepare Healthy Branches
Choose last year's growth that's about ¼ to ½ inch thick—thicker branches root slower, while pencil-thin ones often fail. Look for branches with 3-5 leaf buds and no signs of disease. I always pick ones on the lower half of the tree where they're slightly shaded, as these tend to root more reliably.
Using clean, sharp pruning shears, make a 45-degree cut just below a leaf node. This angled cut gives you more surface area for roots to form. Immediately strip off all but the top 2-3 leaves—fewer leaves mean less water demand while roots establish. Wipe the cut end with a damp cloth to remove sap, which can inhibit root growth.
Create the Layering Trench
Dig a shallow trench about 2-3 inches deep along the ground where the branch will naturally bend. The trench should be just wide enough to accommodate the branch comfortably without forcing it. I like to make it slightly curved to match the branch's natural arc—this reduces stress on the wood.
Fill the trench with a mix of moistened peat moss and perlite (equal parts). This lightweight blend holds moisture while allowing air to reach developing roots. Gently press the branch into the trench so the cut end is fully buried, leaving only the top leaves exposed. Secure the branch with a small U-shaped wire or bent piece of rebar to keep it in place.
Maintain Moisture and Monitor Growth
Water the soil around the trench thoroughly until moisture reaches 4-6 inches deep. After that, keep the area consistently damp—never soggy. I check daily in summer and every other day in cooler months by pressing a finger into the soil. If it feels dry, water again. Japanese maples root best when the soil stays 60-70°F.
In about 6-8 weeks, you'll see new growth at the cut end—this means roots are forming. Once the rooted section has 3-4 inches of new growth and feels firm when gently tugged, it's ready to separate. I wait until early fall for best results, as the new plant will have time to establish before winter.
Separate and Transplant the New Plant
Using your pruners, cut just below the rooted section to free the new plant. Be gentle—you want to keep as many roots intact as possible. Dig a hole for the transplant that's twice as wide and deep as the root ball. This gives roots room to spread without crowding.
Fill the hole halfway with a mix of garden soil and compost, then place the cutting in at the same depth it grew at. Backfill with the remaining soil, tamping lightly to remove air pockets. Water deeply to settle the soil and encourage root contact. Mulch around the base with 2-3 inches of organic mulch to retain moisture and protect roots.
Tips & tricks for perfect Japanese maple tree cuttings
Here's what I learned after propagating dozens of Japanese maples—these little details make all the difference between success and failure.
Branch Selection Wisdom: In Step 1, focus on branches with a slight bend—they're more flexible and less likely to snap when you create the trench. I've found that branches with 4-5 leaf buds (instead of the minimum 3) give you a better success rate, as they have more energy reserves to fuel root development. Avoid branches with any signs of disease or insect damage, even if they look otherwise healthy.
The Angle Matters: When making that 45-degree cut in Step 1, think of it like slicing a piece of pie—you want a clean, smooth surface. A dull blade crushes the wood fibers, which can inhibit root growth. I use my pruners to make the cut, then immediately wipe away any sap with a damp cloth. This step might seem minor, but it's critical for preventing bacterial growth at the cut end.
Soil Mix Secrets: The equal parts peat moss and perlite mix in Step 2 is key for keeping moisture balanced. If you don't have perlite, you can substitute it with coarse sand or even small gravel, but be prepared to water more frequently. I've had the best results when the mix feels like a damp sponge—squeeze it gently and it should hold its shape but not drip water.
Transplanting Tip: In Step 4, when digging your transplant hole, make it twice as wide as the root ball but only as deep as the root ball itself. Many beginners over-deepen the hole, which can cause the cutting to rot. After planting, water thoroughly until you see moisture emerge from the drainage holes of your pot (if using containers) or until the soil around the base is completely saturated.
Pro Tips for Japanese Maple Tree Cuttings
- Here's what I learned after propagating dozens of Japanese maples—these little details make all the difference betwee...
- Branch Selection Wisdom: In Step 1, focus on branches with a slight bend—they're more flexible and less likely to sna...
- The Angle Matters: When making that 45-degree cut in Step 1, think of it like slicing a piece of pie—you want a clean...
Frequently asked questions
Got questions about propagating Japanese maple cuttings?
You’re not alone! Here are answers to the most common queries—from timing to troubleshooting—to help your cuttings thrive.
When is the best time to take Japanese maple cuttings?
The ideal time is late winter to early spring (February–March in most regions), just before new growth begins. This gives roots time to establish before summer heat. Avoid taking cuttings in extreme heat or cold—dormant but not frozen branches work best! For container-grown trees, you can also try softwood cuttings in summer (June–July), but success rates vary.
How do I know if my cutting is healthy enough to root?
A healthy cutting should have 3–4 mature buds, 1/4-inch thick stems, and no signs of disease (like spots or wilting). Look for green bark (not brown or cracked) and flexible, not brittle wood. If the stem snaps cleanly when bent, it’s too young—wait for next year!
Why are my cuttings rotting or turning mushy?
Overwatering or poor airflow are the top culprits! Ensure your cutting mix is moist but not soggy (think damp sponge, not swamp). Use a well-draining mix (perlite + peat moss) and avoid sealing the cutting in plastic for too long. If you see mold or a foul smell, remove the cutting immediately and adjust humidity levels.
Can I root Japanese maple cuttings in water instead of soil?
While possible, water rooting is riskier for Japanese maples. They prefer the aeration and stability of soil or a rooting hormone mix. If you try water, change it every 2–3 days and expect roots in 4–8 weeks. For better success, use a hormone gel or soil-based medium—your future tree will thank you!
How long does it take to see roots, and when can I transplant?
With patience, you’ll spot tiny roots in 3–4 weeks and a root ball in 6–8 weeks. Once roots are 1–2 inches long (gently tug to test), it’s safe to transplant to a pot with well-draining soil. Wait until spring to plant outdoors—hardening off (gradual sun exposure) over 2 weeks minimizes shock.
What if my cutting doesn’t root? Can I try again?
Don’t give up! Japanese maples can be finicky, but persistence pays off. Try these fixes:
- Use a clean, sharp tool to avoid damaging the stem.
- Adjust humidity with a clear plastic bag (remove daily for airflow).
- Test different rooting hormones (powder or gel).
- Take cuttings from younger, healthier branches next time.
Wrapping up and next steps
Growing Japanese maple tree cuttings through layering is a rewarding way to expand your garden with minimal effort! 🌿 With the right tools, patience, and a few weeks of care, you’ll soon have thriving new plants rooted and ready to transplant.
Whether you’re a seasoned gardener or a beginner, this method proves that even the most delicate trees can flourish with a little love.
Now that you’re equipped with the knowledge, take the first step—grab those cuttings and start layering! Keep an eye on your progress, and before you know it, you’ll be admiring a lush, homegrown Japanese maple. Happy gardening! 🌱