
Propagation
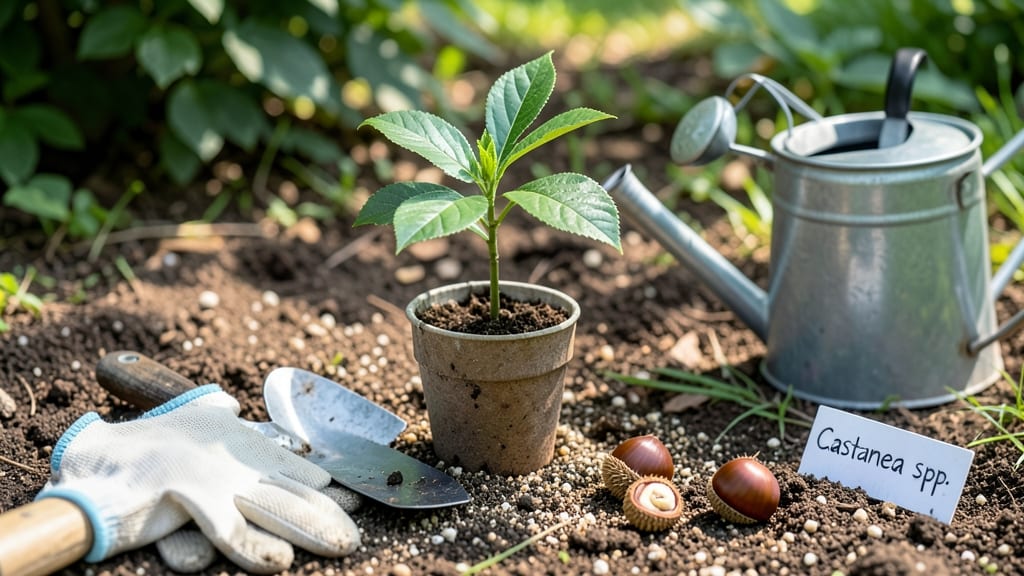
Starting a chestnut tree from seed is a 6-week patience test that pays off with a future giant in your yard. 🌱 I’ve tried this three times—once with a seed that sprouted in under a month, another that took the full 6 weeks, and a third that stubbornly refused until I adjusted the moisture.
The key isn’t forcing it; it’s mimicking nature’s winter chill. You’ll need a sturdy plastic bag, a damp paper towel, and a refrigerator for cold stratification—the secret that tricks the seed into thinking winter’s passed.
After 6 weeks, plant it just below the soil surface in a pot with well-draining mix. Most seeds crack open within 2-4 weeks after stratification, but some take longer. That’s normal. Once the first green shoot appears, keep the soil moist but never soggy.
The seedling’s first leaves will look like tiny maple leaves, but don’t be fooled—those roots are digging deep. By year two, you’ll transplant it outside, where it’ll grow 2-3 feet per year if given space and sunlight. This isn’t a quick win.
Chestnut trees take 10-20 years to produce nuts, but the satisfaction of watching it grow from a speck in your hand to a towering shade tree makes every slow step worth it. Here’s how to do it right.
📚 In This Guide
- What you need
- Instructions
- Tips and common mistakes
- Wrapping up and next steps
What you need
- ● Fresh chestnut seeds: 3–5 viable seeds (harvested from a healthy, mature chestnut tree; avoid store-bought roasted nuts—they won’t sprout!)
- ● Paper towels or damp sphagnum moss: Enough to wrap or line a container for stratification (about 1–2 sheets or a small handful).
- ● Plastic bag or airtight container: A resealable bag (like a Ziploc) or a small plastic bin to hold the seeds during cold treatment.
- ● Refrigerator: A standard fridge with a consistent temperature (ideally between 34–40°F (1–4°C)).
- ● Potting soil: A well-draining mix (e.g., 50% peat moss + 50% perlite or sand; avoid heavy garden soil).
- ● Small pots or seed trays: 4–6 inch pots (one per seed) or a shallow tray with drainage holes.
- ● Spray bottle: For gently misting seeds or soil (avoid overwatering!).
- ● Plant labels & marker: To track seed varieties and planting dates.
- ● Heating mat: Speeds up germination after stratification (set to 70–75°F (21–24°C)).
- ● Grow lights or sunny windowsill: For seedlings needing extra light (chestnut trees love 6+ hours of sunlight/day).
- ● Fungicide (like hydrogen peroxide or cinnamon): Prevents mold during stratification (mix 1 tsp hydrogen peroxide per cup of water).
- ● Humidity dome or plastic wrap: Keeps soil moist while seeds sprout.
- ● Pruning shears or scissors: For trimming sprout shells if they’re stubborn!
Step-by-step instructions for starting chestnut trees from seed
Here’s the straightforward method I’ve used to grow strong chestnut seedlings—no fancy equipment needed.
🌱 Step 1: Harvest and Prepare the Seeds
Collect fresh chestnuts in late fall when they’ve fallen naturally. Choose plump, unblemished nuts—they’ll germinate best. Remove any remaining husks and let the nuts dry in a cool, dry place for a few days. This prevents mold while keeping them viable for cold stratification.
I like to store them in a paper bag in the fridge until I’m ready to stratify. Avoid plastic bags—they trap moisture and can rot the seeds. You’ll know they’re ready when the shells feel firm and the inside is still white and moist, not shriveled.
💧 Step 2: Cold Stratify the Seeds for 6 Weeks
Place the chestnuts in a container of moistened sand or peat moss—just enough to cover them halfway. I use a shallow tray with drainage holes to keep things simple. Keep the mix damp but not soggy; you want it to feel like a wrung-out sponge.
Store the container in the refrigerator for 6 weeks. This mimics winter conditions and breaks seed dormancy. Check them weekly—if the sand dries out, add a little water. After 6 weeks, you’ll see a tiny sprout emerging from the shell. That’s your cue to move to the next step!
☀️ Step 3: Plant the Stratified Seeds in Pots
Fill small pots (about 4 inches deep) with well-draining potting mix. Plant each chestnut 1 inch deep, with the sprout facing upward. I use biodegradable pots so I can transplant them later without disturbing roots. Water gently until the soil feels evenly moist.
Place the pots in a sunny spot—6+ hours of light daily—but keep them out of harsh midday sun at first. You’ll see the first true leaves appear in 2-3 weeks. This is when the real growth begins, so keep the soil consistently moist but never waterlogged.
🌿 Step 4: Transplant and Care for Young Seedlings
Once the seedlings have 3-4 true leaves (about 4-6 weeks after planting), it’s time to move them to larger pots or the ground. If planting outdoors, choose a spot with full sun and well-draining soil. Dig a hole twice as wide as the root ball and mix in some compost.
Water deeply after transplanting to help the roots settle. Chestnut seedlings grow slowly at first, but with patience, they’ll develop into sturdy trees. Mulch around the base to retain moisture and protect the roots—just keep it 2-3 inches away from the trunk to prevent rot.
⏰ Step 5: Monitor Growth and Winter Protection
In their first year, young chestnut trees need extra care. Water 1-2 times per week during dry spells, but let the top inch of soil dry out between waterings. You’ll notice faster growth in spring and summer, but they’re still vulnerable to frost.
If you’re in a colder climate, wrap the base of the tree with burlap or use a tree guard to protect it from late frosts. By their third year, they’ll be tougher and ready to thrive on their own. Patience is key—chestnut trees take time, but the reward is worth it!
Tips & tricks for growing chestnut trees from seed
A few simple strategies will help you avoid common pitfalls and maximize your success with chestnut seedlings.
Seed Selection: Don't overlook the importance of seed quality—only use plump, unblemished chestnuts with intact shells. I've found that slightly larger nuts (about 1.5 inches in diameter) tend to germinate more reliably. Tap them gently against each other: they should sound hollow, not dull. This simple test helps identify healthy seeds ready for stratification.
Stratification Setup: For the 6-week cold stratification, I recommend using a mix of sand and peat moss in a ratio of 2:1. This combination provides excellent drainage while retaining enough moisture. Place your container in a plastic bag with a few small holes punched in it—this creates a humid microclimate that mimics natural forest conditions. Check weekly to ensure the mix stays consistently damp, but never soggy.
Transplanting Timing: The 3-4 true leaves stage is your clear signal to transplant, but don't rush it. I've seen seedlings with just 2 leaves struggle during transplanting. Wait until you see those third and fourth leaves—this indicates the root system is strong enough to handle being moved. Use biodegradable pots if you're planning to transplant directly into the ground later, as they'll break down naturally and won't disturb the roots.
Light Management: While chestnuts need full sun (6+ hours daily), be mindful of harsh afternoon sun during their first few weeks. I've had better success placing pots in east-facing windows or under 50% shade cloth during peak sun hours. This gradual acclimation prevents sunburn on delicate young leaves while still providing the light they need to grow strong.
Pro Tips for Start A Chestnut Tree From Seed
- A few simple strategies will help you avoid common pitfalls and maximize your success with chestnut seedlings.
- Seed Selection: Don't overlook the importance of seed quality—only use plump, unblemished chestnuts with intact shell...
- Stratification Setup: For the 6-week cold stratification, I recommend using a mix of sand and peat moss in a ratio of...
Frequently asked questions
Got questions about growing chestnut trees from seed?
You’re not alone—this process can feel tricky at first! Below, we’ve rounded up the most common queries with straightforward answers to help you avoid pitfalls and boost your success rate.
How long does cold stratification need to last for chestnut seeds?
Chestnut seeds typically require 90–120 days of cold stratification (33–41°F) to break dormancy. However, some varieties may need up to 6 months—especially if harvested late in the season. Monitor moisture levels (keep damp but not soggy) and patience pays off! For faster results, try stratifying in a fridge with a moisture-retentive medium like damp sand or peat moss.
Can I speed up germination without cold stratification?
Cold stratification is essential for chestnut seeds, but if you’re in a hurry, you can simulate winter conditions by:
- Using a seed stratification kit (pre-moistened medium + fridge).
- Planting seeds outdoors in fall/winter (if your climate has freezing temps).
- Avoiding heat or soaking—this can kill the embryo before it’s ready to sprout.
Pro tip: Scarify the seed coat (lightly sandpaper or nick it) to encourage water absorption, but don’t overdo it!
How deep should I plant chestnut seeds for outdoor sowing?
Plant chestnut seeds 2–3 inches deep in well-draining soil, spaced 12–18 inches apart. If sowing in containers, use a minimum 12-inch-deep pot with drainage holes. Chestnut seedlings have long taproots, so avoid transplanting until they’re at least 6–12 inches tall—digging too soon can stunt growth.
Why aren’t my chestnut seeds sprouting after stratification?
Common culprits include:
- Improper stratification: Seeds may have dried out or been too warm.
- Rotten seeds: Check for mold or foul smells—discard affected seeds.
- Old seeds: Fresh chestnuts (harvested fall of the same year) germinate best.
- Poor soil contact: Ensure seeds are firmly pressed into moist medium.
Try re-stratifying viable seeds or test a few in a warm, humid environment (like a propagator) to rule out mold.
What’s the best alternative if my seeds fail to germinate?
If germination proves difficult, consider:
- Grafting: Purchase a 1–2-year-old chestnut whip from a nursery and graft onto a rootstock.
- Layering: Propagate from existing trees via air layering (if you have access to mature chestnuts).
- Buying seedlings: Reputable nurseries sell disease-resistant varieties like ‘Paradox’ or ‘Colossal’.
Wrapping up and next steps
Starting a chestnut tree from seed is a rewarding journey that combines patience, care, and a touch of nature’s magic.
By following these steps—from selecting fresh seeds to cold stratification and nurturing young saplings—you’re not just growing a tree; you’re cultivating a legacy. Now that you’ve mastered the basics, why not take the next step? Share your progress with fellow gardening enthusiasts, experiment with different varieties, or even plant your sapling in a community garden.
Every seedling you nurture today could become a towering, shade-providing giant tomorrow—keep those roots growing! 🌱✨