
Planting
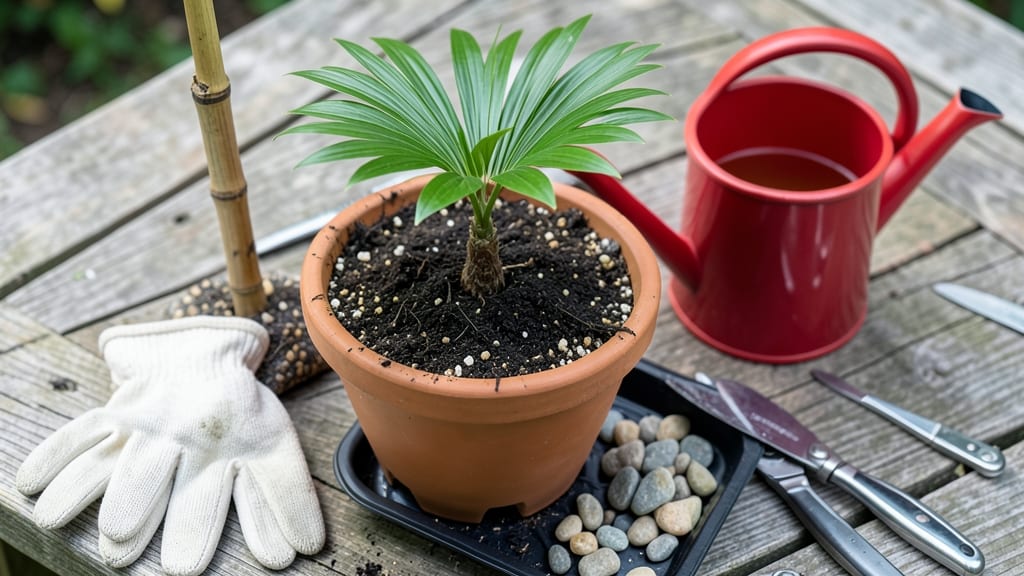
Repotting a palm tree plant isn’t just about moving it to a bigger pot—it’s about giving its roots the space and conditions they need to thrive. 🌿 I’ve learned the hard way that rushing this process or skipping key steps can set a palm back for months, but when done right, you’ll see new fronds unfurling within weeks.
The secret lies in timing, soil, and a gentle approach that mimics how palms grow in their natural habitats.
You’ll need a pot just 2 inches larger in diameter than the current one, a well-draining mix of peat, perlite, and sand (or a pre-formulated palm mix), and basic tools like gloves, pruners, and a watering can.
Most palms signal they’re ready when roots circle the pot’s bottom or push through drainage holes—usually every 2-3 years for mature plants. Spring or early summer is ideal, when warmth encourages recovery.
After loosening the root ball and placing your palm in its new home, backfill with soil while gently firming it around the edges—never pack it down too tightly, as palms hate suffocation.
Water thoroughly but avoid soggy soil, and keep humidity high for the first 2 weeks by misting daily or grouping plants together. The right care here means fewer brown fronds and more vigorous growth.
Common mistakes like overwatering or choosing a pot too large can stall your palm’s recovery, but with the right approach, you’ll have a plant that looks healthier than ever in just a few months.
This method works for Areca, Kentia, and other popular palms—just adjust soil acidity slightly for species like Calamus, which prefer a more neutral mix.
📚 In This Guide
- What you need
- Instructions
- Tips and common mistakes
- Wrapping up and next steps
What you need
- ● New pot: Choose one 2–4 inches larger in diameter than the current pot (e.g., if your palm is in a 12-inch pot, opt for a 14–16-inch one). Ensure it has drainage holes at the bottom.
- ● High-quality potting mix: Use a well-draining palm/succulent mix (avoid garden soil—it compacts and causes root rot!). A 50/50 blend of peat moss or coconut coir and perlite/pumice works well.
- ● Garden trowel or spade: For digging and loosening roots.
- ● Pruning shears or sharp knife: To trim dead or rotting roots (sterilize with rubbing alcohol first!).
- ● Watering can or hose with gentle spray: For hydrating the plant before and after repotting.
- ● Saucer or tray: To catch excess water during watering.
- ○ Mulch (optional but helpful): A layer of orchid bark or pine fines on top of the soil to retain moisture and deter pests.
- ● Root stimulator: A fungicide or mycorrhizal powder to protect roots and encourage growth (apply to fresh cuts).
- ● Support stake or bamboo pole: If your palm is tall and top-heavy, secure it temporarily to prevent tipping.
- ● Garden kneeler or stool: For comfort if your palm is large or heavy.
- ● Old towel or newspaper: To clean up spills and protect surfaces.
Step-by-Step instructions for repotting a palm tree plant
Here’s how I repot palms with minimal stress—keeping roots happy and growth steady.
🪴 Step 1: Choose the Right Pot and Timing
Palms need 1-2 inches more diameter than their current root ball. I pick terracotta or fiberglass pots—they breathe better than plastic and prevent root rot. Check for drainage holes (at least 3) and a sturdy base to support the plant’s weight as it grows.
Timing matters most: spring or early summer is ideal. Avoid repotting during winter dormancy or extreme heat. You’ll know it’s time when roots circle the pot’s bottom or poke through drainage holes. Water the palm 24 hours before repotting—this keeps roots pliable and reduces shock.
🌱 Step 2: Prepare the New Pot and Fresh Soil
Line the pot’s base with 2-3 inches of fresh potting mix (I use a well-draining blend with perlite or orchid bark). This layer prevents root rot by keeping the bottom from staying soggy. Avoid garden soil—it compacts and suffocates palm roots.
Mix in a slow-release palm fertilizer (follow package rates) into the top 2 inches of soil. This gives roots a nutrient boost right when they’re most vulnerable. If your palm is over 5 feet tall, use a heavier pot—top-heavy palms tip easily after repotting.
💧 Step 3: Remove the Palm Gently and Inspect Roots
Water the plant again 2 hours before repotting to soften the root ball. Turn the pot on its side and gently squeeze the sides while lifting. If the plant resists, tap the pot’s base firmly—never yank or twist. Loosen circled or matted roots with your fingers (don’t cut them unless they’re black or mushy—those are rotten).
Trim only dead roots with sterilized scissors. Healthy roots are white or tan and firm to touch. If you see yellowing fronds, that’s a sign of overwatering—adjust your care routine after repotting. Place the palm in the new pot and fill gaps with fresh potting mix, pressing lightly to secure it.
☀️ Step 4: Water and Acclimate for Recovery
Water lightly after repotting—just enough to moisten the soil, not drench it. Palms hate soggy roots post-transplant. Place the pot in bright, indirect light (no direct sun for 2 weeks). If your home has low humidity, mist the fronds daily to mimic tropical conditions.
Wait 4-6 weeks before fertilizing again. You’ll know it’s recovering when new fronds unfurl and old ones stay bright green. Avoid moving the pot during this time—roots need stability to establish. If the palm drops leaves, it’s stressed from root disturbance, but new growth will return in 3-4 weeks with proper care.
⏰ Step 5: Long-Term Care After Repotting
Resume regular watering when the top 2 inches of soil dry out (stick your finger in—if it’s dry, water). Palms in larger pots need less frequent watering because the soil holds moisture longer. Rotate the pot quarter-turn weekly so the plant grows straight, not leaning toward light.
After 3 months, check the roots again. If they’re circling the pot’s bottom, it’s time to repot once more. I’ve found palms repotted this way double in size within a year—proof it works. The key? Patience and proper drainage—skip those, and you’ll end up with a sad, root-bound plant.
Tips & tricks for repotting a palm tree plant
Real talk: Repotting palms can feel intimidating, but these little tricks will help you avoid common pitfalls and keep your plant thriving.
Pot Size Matters: That 1-2 inch increase in diameter isn't just arbitrary—it gives roots room to spread without becoming root-bound too quickly. If you're unsure about size, measure your current root ball and add 1.5 inches for optimal growth. For tall palms, consider a pot that's slightly wider rather than deeper to maintain stability.
Root Inspection Secret: In Step 3, when you're loosening those circled roots, look for the "white to tan" color as your guide. If you see any roots that feel mushy or smell funky, trim them immediately with sterilized scissors. Healthy roots should spring back slightly when gently pressed—they're like tiny rubber bands! This inspection is your chance to give your palm a fresh start.
Recovery Environment: That 2-week period of bright, indirect light is crucial for recovery. I've found that placing palms near an east-facing window gives them perfect conditions without harsh afternoon sun. If your home is particularly dry, invest in a small humidifier or group your palms together to create a microclimate that mimics their tropical origins. This simple step can make the difference between a struggling plant and one that thrives.
Pro Tips for Repot A Palm Tree Plant
- Real talk: Repotting palms can feel intimidating, but these little tricks will help you avoid common pitfalls and kee...
- Pot Size Matters: That 1-2 inch increase in diameter isn't just arbitrary—it gives roots room to spread without becom...
- Root Inspection Secret: In Step 3, when you're loosening those circled roots, look for the "white to tan" color as yo...
Frequently asked questions
Got questions about repotting your palm tree? You’re not alone! Here are some common concerns and quick answers to keep your plant happy and healthy.
When is the best time to repot a palm tree?
The ideal time is early spring when the plant is entering its active growth phase. Avoid repotting in winter or extreme heat—palms are sensitive to stress. If you’re dealing with root-bound conditions (roots circling the pot), don’t wait too long, but aim for mild weather to help recovery.
How often should I repot my palm tree?
Most palm trees need repotting every 2–3 years, or when roots start crowding the pot (check by gently removing the plant). Young palms may need more frequent repotting, while mature palms can go longer. Always use a pot only slightly larger—oversized containers cause moisture issues.
What if my palm tree looks stressed after repotting?
Yellowing leaves or wilting are normal for a few weeks, but don’t overwater—wait until the top 1–2 inches of soil are dry. Provide bright, indirect light and avoid drafts. If leaves brown and droop persistently, check for root rot (smelly, mushy roots) and adjust care.
Can I repot a palm tree in a decorative pot without drainage?
No—drainage is non-negotiable! Without holes, roots suffocate, leading to rot. If you love the pot’s look, place it inside a cache pot (a larger container with drainage) or drill holes discreetly. For outdoor palms, ensure the pot elevates slightly to prevent water pooling.
What’s the difference between repotting a dwarf palm vs. a tall palm?
Dwarf palms (like Parlor or Ponytail) repot easily—they tolerate smaller pots and frequent changes. Tall palms (like Canary Island or Majesty) need extra support: use a sturdy pot, secure the trunk with ties if needed, and repot gradually over years to avoid toppling. Always lift with care!
Still unsure? Drop your specific palm type in the comments—we’re happy to help!
Wrapping up and next steps
Repotting your palm tree doesn’t have to be stressful—just follow these steps to give your plant a fresh start! Remember, the key is patience, proper timing, and gentle care to help those roots thrive.
With the right soil, container, and a little love, your palm will reward you with lush, healthy growth for years to come. 🌿✨
Now that you’re ready to tackle the task, why not share your progress? Snap a photo of your repotted palm and tag us—we’d love to see your green thumb in action!
Or, if you’re feeling inspired, explore our guide on palm tree care tips to keep your tropical beauty flourishing.