
Container Gardens
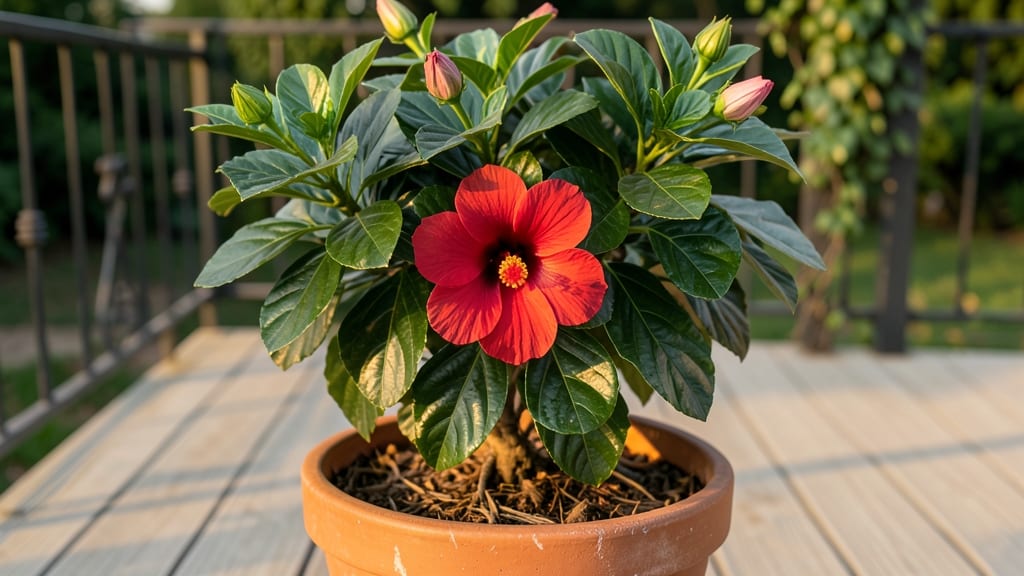
Growing a hibiscus tree in a container lets you enjoy its bold blooms anywhere—balcony, patio, or even indoors. 🌺 I’ve nurtured mine for five years, and the secret to its year-round grace isn’t just sunlight and water—it’s mastering the pruning rhythm that keeps it compact and flowering like crazy.
Most people overlook how container hibiscus need different care than their in-ground cousins, and that’s where the magic (and mistakes) happen.
The right setup makes all the difference: a 15-gallon pot with drainage holes, well-draining soil, and a spot where it bakes in 6+ hours of sun daily.
My hibiscus throws out 3-inch blooms from early summer through frost if I fertilize monthly and prune back by one-third after each flush of flowers. The key? Never let it dry out completely—container roots have no room for drought stress.
By winter, you’ll see how pruning transforms your hibiscus from a leggy mess into a neat, bushy powerhouse ready to burst back into bloom. The first flush of flowers after pruning is always the most dramatic—deep reds, pinks, or whites that make neighbors do a double-take.
And the best part? You avoid the root-binding issues that turn container plants into sad, stunted shadows.
Whether you’re dealing with aphid outbreaks or yellowing leaves from overwatering, this guide covers the fixes—plus how to overwinter your hibiscus if you live in a chilly zone. Let’s get that container hibiscus thriving like the showstopper it’s meant to be.
📚 In This Guide
- What you need
- Instructions
- Tips and common mistakes
- Wrapping up and next steps
What you need
- ● Container: A large, well-draining pot (at least 18–24 inches in diameter and 12–18 inches deep) with drainage holes. Terracotta or fiberglass works best for heat retention.
- ● Hibiscus plant: A dwarf or patio hibiscus (Hibiscus rosa-sinensis or Hibiscus syriacus) suitable for containers. Look for healthy, 1–2 year-old plants with vibrant foliage.
- ● Potting mix: A well-draining, acidic mix (pH 6.0–6.5). Use a blend of 50% peat moss or coconut coir, 30% perlite/pumice, and 20% compost.
- ○ Fertilizer: A balanced, water-soluble fertilizer (10-10-10 or 20-20-20) for blooming plants. Slow-release granules are optional but convenient.
- ● Pruning tools: Bypass pruners (for clean cuts)
- ● Disinfectant (rubbing alcohol or bleach solution) to sterilize tools
- ● Mulch: Organic mulch (e.g., pine bark or shredded leaves) to retain moisture and regulate soil temperature.
- ○ Support (optional but helpful): A small stake or trellis if your hibiscus grows tall or leggy.
- ● Self-watering system: A wicking pot or moisture meter to prevent over/under-watering.
- ● Epsom salt: 1 tablespoon per gallon of water monthly for magnesium boost (great for vibrant blooms!).
- ● Container cache: Decorative stones, saucers, or weatherproof paint to customize your pot.
- ● Grow lights: If indoors, a full-spectrum LED grow light (12–16 hours/day) for low-light spots.
- ● Pest control: Neem oil or insecticidal soap for aphids, spider mites, or whiteflies.
Step-by-Step instructions for cultivating a thriving container hibiscus
Here's how to coax vibrant blooms from your potted hibiscus year after year.
🪴 Step 1: Select the Right Container and Drainage System
Choose a container at least 18-24 inches in diameter with multiple drainage holes—hibiscus roots need oxygen, and soggy soil will rot them within weeks. I prefer glazed ceramic or fiberglass because they retain moisture better than terra cotta but don't crack in winter freezes. Place a 2-inch layer of gravel or broken pottery at the bottom before adding soil.
This drainage layer prevents root suffocation while allowing excess water to escape. If your container lacks holes, drill them yourself—hibiscus roots will rebel against waterlogged conditions by dropping leaves and refusing to bloom. Test your setup by filling the empty pot with water; it should drain completely within 5-10 minutes.
🌱 Step 2: Prepare the Soil Mix for Optimal Growth
Fill your container with a blend of 60% high-quality potting mix, 20% perlite or pumice, and 20% compost. Hibiscus roots crave aeration but also need nutrients to fuel those dramatic flowers. I avoid garden soil—it compacts in containers and smothers roots.
Moisten the mix thoroughly before planting, but don't create a swamp. The soil should feel like a damp sponge—squeeze it gently, and it should hold its shape without dripping. Add a slow-release fertilizer (10-10-10 works well) mixed into the bottom inch of soil. This gives your hibiscus a nutrient boost right when it needs it most during root establishment.
☀️ Step 3: Plant and Position for Maximum Sun Exposure
Dig a hole in the center of the container twice as wide as the root ball but no deeper. Gently remove your hibiscus from its nursery pot and loosen any circling roots with your fingers. Place it in the hole so the top of the root ball sits 1 inch below the container rim—this prevents water from pooling at the base during heavy rains.
Backfill with your soil mix, pressing lightly to eliminate air pockets. Water deeply until it runs freely from the drainage holes. Position your container in a spot that gets full sun (6-8 hours daily)—hibiscus flowers need intense light to open fully. If you're in a hot climate, provide afternoon shade to prevent leaf scorch, but morning sun is non-negotiable for blooming.
💧 Step 4: Establish a Consistent Watering Routine
Water your hibiscus when the top 2 inches of soil feel dry—stick your finger in the soil to check. During summer, this might mean watering every 2-3 days, while winter care drops to once a week. Always water until it drains from the bottom; hibiscus hate sitting in saucers of standing water.
I use a soaker hose or drip irrigation for containers to deliver water directly to the roots without wetting the leaves—this prevents fungal diseases that thrive in damp foliage. In winter, reduce watering significantly; hibiscus enter semi-dormancy and need far less moisture. Yellowing leaves often signal overwatering, while crispy edges mean it's thirsty.
✂️ Step 5: Prune for Shape and Encourage Continuous Blooms
Prune your hibiscus right after flowering (late fall/winter) to shape the plant and encourage new growth. Cut back one-third of the oldest stems to the nearest leaf node—this stimulates fresh, vigorous shoots. Remove any dead, diseased, or crossing branches first; hibiscus respond beautifully to strategic cuts.
Throughout the growing season, pinch back the tips of new growth to promote bushiness. When you see flower buds forming, avoid heavy pruning—these buds need energy to open. I always sterilize my pruners with rubbing alcohol between cuts to prevent bacterial infections. With proper pruning, your hibiscus will reward you with continuous blooms from spring through fall.
Tips & tricks for perfect hibiscus tree in container
These game-changing strategies will help you transform your container hibiscus into a blooming powerhouse.
Drainage Test: Before planting, always perform the 5-10 minute drainage test with water. This simple check prevents root rot by confirming your container's ability to expel excess moisture. I've seen hibiscus roots rot within days when containers fail this basic test—don't skip it! The gravel layer you add in Step 1 works best when combined with this drainage verification.
Soil Moisture Secret: The "damp sponge" test in Step 2 is more important than you might think. After mixing your 60-20-20 soil blend, squeeze a handful—it should hold its shape but not drip. Too wet? Add more perlite. Too dry? Sprinkle in water gradually. This balance prevents both overwatering and nutrient leaching that can stunt growth.
Sunlight Strategy: For the 6-8 hours of daily sun required, position your container where it gets morning sun and afternoon shade if temperatures exceed 90°F. I've noticed hibiscus in full afternoon sun often develop brown leaf edges—this simple adjustment prevents heat stress while maintaining that critical light exposure for blooming.
Pruning Precision: When cutting back one-third of oldest stems in Step 5, look for stems that are thicker than a pencil—these are your plant's energy vampires. Make cuts just above a leaf node at a 45-degree angle to maximize water absorption. This technique ensures your hibiscus puts energy into new growth rather than maintaining old wood.
Pro Tips for Hibiscus Tree In Container
- These game-changing strategies will help you transform your container hibiscus into a blooming powerhouse.
- Drainage Test: Before planting, always perform the 5-10 minute drainage test with water. This simple check prevents r...
- Soil Moisture Secret: The "damp sponge" test in Step 2 is more important than you might think. After mixing your 60-2...
Frequently asked questions
How big can a hibiscus tree grow in a container?
A hibiscus in a container typically stays 6–10 feet tall (or smaller with pruning), but growth depends on the pot size, variety, and care. Dwarf varieties like Hibiscus rosa-sinensis ‘Lil’ Pink’ max out around 3–5 feet. Use 15–25 gallon pots for mature trees to prevent root-binding. Pro tip: Prune annually to control size and encourage bushier growth!
When is the best time to prune a potted hibiscus?
Prune your hibiscus twice a year: late winter/early spring (before new growth) for shaping, and right after flowering (summer) to remove dead blooms and leggy stems. Avoid heavy pruning in fall—it can stress the plant before winter. Use sterilized shears to prevent disease!
How do I protect my container hibiscus in winter?
Most hibiscus are tender perennials—they need winter care! Move pots to a sheltered spot (like a garage or under eaves) where temps stay above 40°F (4°C). Reduce watering and stop fertilizing. For extra protection, wrap the pot in burlap or use a frost cloth. Hardy varieties (like Hibiscus syriacus) may tolerate colder temps with mulch.
Why aren’t my container hibiscus blooms lasting long?
Short-lived blooms often mean stress or poor care! Check these fixes:
- Water consistently—hibiscus hate soggy or dry soil.
- Feed monthly with balanced fertilizer (or hibiscus-specific food) during growing season.
- Prune spent blooms to encourage new flowers.
- Ensure 6+ hours of sunlight—low light = fewer blooms.
Can I grow a hibiscus in a small pot, like a 5-gallon bucket?
While possible, small pots limit growth and drainage. A 5-gallon pot works for tiny dwarf varieties (like ‘Mini Pink’) but may stunt root development. For most hibiscus, aim for at least 10–15 gallons with drainage holes. Avoid plastic pots—they trap heat and rot roots faster!
Wrapping up and next steps
Growing a hibiscus tree in a container is a rewarding journey that brings vibrant blooms and lush greenery to your space year-round—with a little pruning mastery! 🌸 By choosing the right pot, soil, and care routine, you’ll keep your hibiscus thriving and full of life.
Remember, consistent pruning is key to encouraging healthy growth and stunning flowers.
Now that you’re armed with tips and tricks, roll up your sleeves and give your hibiscus the love it deserves! Start by inspecting your tree today—check out our pruning guide for a refresher. Happy gardening! ✂️🌿