
Pruning
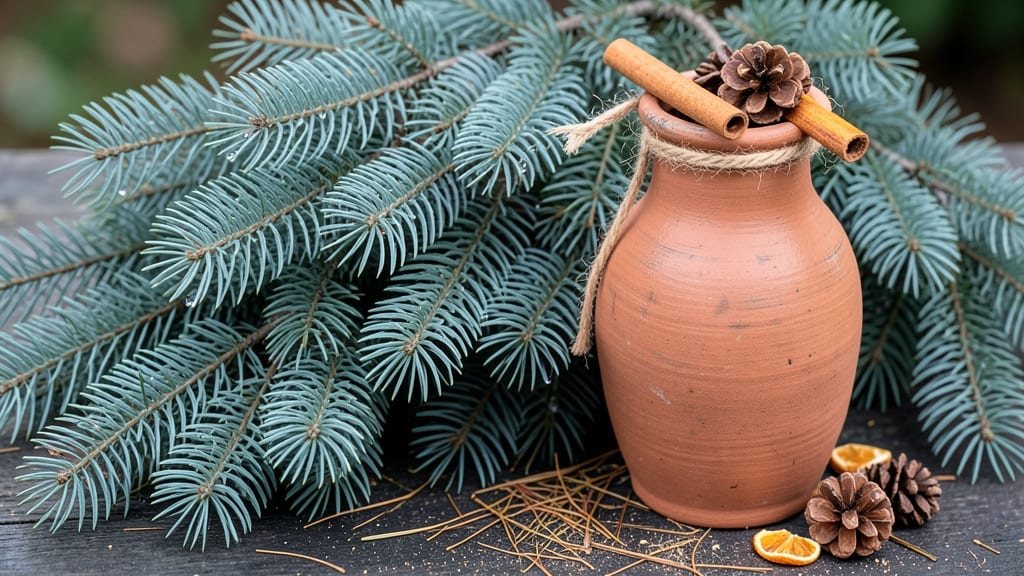
Transforming leftover Christmas tree branches into a vase centerpiece is the most underrated holiday decor hack. ✨ The best part? You already have the main ingredient—those fragrant evergreen branches that would otherwise end up in the trash.
Start by cutting branches into 12-18 inch lengths, stripping any needles from the bottom inch to prevent waterlogging. A simple arrangement of 3-5 branches in a wide-mouthed vase creates instant texture and height.
Add a few sprigs of eucalyptus or pine cones for extra dimension—it’s like stealing a piece of the forest for your table. The result is a fresh, rustic look that lasts 2-3 weeks with proper care.
Change the water every 3-4 days and trim the stems at an angle to keep them hydrated. Bonus: The scent of pine fills your home like a cozy mountain lodge. This works for any holiday theme—rustic, glam, or farmhouse.
Try adding cranberries, dried orange slices, or even tiny fairy lights for extra magic. Here’s how to make it last!
📚 In This Guide
- What you need
- Instructions
- Tips and common mistakes
- Wrapping up and next steps
What you need
- ● Christmas tree branches: 3–5 medium-sized branches (8–12 inches long), freshly pruned and free of needles (or use pre-cut branches from a local florist). Pro tip: Look for branches with a mix of textures—some with needles and some bare—for depth!
- ○ Vase: A clear glass or ceramic vase (6–8 inches tall, 4–6 inches wide) to showcase the branches. Optional: Add a decorative ribbon or paint for extra flair!
- ● Floral preservative: 1 packet (or 1 tsp of sugar + 1 drop of bleach per quart of water) to extend freshness.
- ● Scissors or pruning shears: Sharp tools to trim branches at a 45° angle for better water absorption.
- ● Water: Enough to fill the vase halfway (2–3 cups).
- ● Decorative elements: Pinecones, berries, dried oranges, or cinnamon sticks for texture and scent.
- ● Ribbon or twine: For wrapping branches or tying around the vase.
- ● Spray paint or gold leaf: To add a metallic or rustic touch to branches.
- ● LED string lights: For a magical glow (ensure they’re waterproof!).
Step-by-Step instructions for creating stunning Christmas tree branches in a vase
Here’s how to transform simple evergreen branches into a fragrant, long-lasting centerpiece that captures the holiday spirit.
🪴 Step 1: Select and Prepare Your Branches
Choose fresh-cut evergreen branches from a pine, spruce, or fir tree—look for vibrant green needles that release a fresh scent when crushed. Cut 4-6 inch sections with clean, sharp pruners, ensuring each has a natural taper for easy placement in the vase. Avoid branches with brown needles or sap oozing from cuts, as these won’t last long.
Strip the branches of any remaining small twigs or needles to create a cleaner look. For a fuller arrangement, bundle 3-5 branches per vase—this ensures density without overcrowding. I like to mix branch lengths slightly (some shorter, some longer) so the arrangement feels organic rather than uniform.
💧 Step 2: Condition the Branches for Longevity
Before arranging, soak the cut ends in lukewarm water for 15-20 minutes. This hydrates the branches and helps them absorb water more readily once placed in the vase. While soaking, trim ½ inch off each cut end at a slight angle—this increases the surface area for water uptake and prevents air pockets that block absorption.
For extra longevity, add 1 teaspoon of floral preservative (or a mix of ½ teaspoon sugar + ¼ teaspoon bleach) to the vase water. This slows bacterial growth and keeps the branches fresh for 3-4 weeks. Avoid using plain water alone—evergreens dry out quickly without preservatives.
☀️ Step 3: Arrange Branches for Balance and Texture
Fill your vase ⅓ full with water (too much water weighs down branches, too little dries them out). Start by placing the thickest branch in the center as your focal point, then weave thinner branches around it in a triangular or asymmetrical pattern. Step back occasionally to check balance—aim for a natural, slightly uneven look rather than symmetry.
Tuck branches into the vase at different angles to create depth. For a lush effect, overlap branches slightly where they cross. If using a clear glass vase, arrange branches so they fan out elegantly—this lets light shine through the needles. For opaque vases, focus on creating a full, rounded silhouette.
✂️ Step 4: Trim and Secure for Stability
Once arranged, trim any branches that extend too far beyond the vase’s rim—long, trailing branches look messy and can dry out faster. Use floral tape or clear fishing line to secure branches together at the base if they’re unstable. This keeps the arrangement intact without visible wires.
For added texture, sprinkle pinecones, berries, or cinnamon sticks among the branches. These elements add color and contrast while keeping the natural woodland theme. Avoid heavy decorations—evergreens are delicate, and too much weight can cause branches to sag or break.
🌿 Step 5: Maintain Freshness and Extend Display Life
Change the water every 3-4 days and trim ¼ inch off the cut ends each time to prevent clogging. Keep the arrangement in a cool, draft-free spot—direct heat (like near a fireplace) or cold drafts (like near a window in winter) cause branches to dry out faster. A bathroom or hallway with moderate humidity works best.
Mist the branches lightly with water once a week to refresh the needles and maintain their vibrant green color. If needles start browning at the tips, it’s a sign the branches are drying out—trim the affected sections and refresh the water immediately. With proper care, your centerpiece will stay lush and fragrant throughout the holiday season.
Tips & tricks for perfect Christmas tree branches in a vase
Here's what nobody tells you about creating a show-stopping evergreen centerpiece that lasts the entire holiday season.
Selection Tip: When choosing branches, focus on the scent test—crush a few needles between your fingers. Fresh evergreens should release an immediate, vibrant pine aroma. Avoid branches with yellowing needles or excessive sap, as these are signs of poor quality that will shorten your centerpiece's lifespan. I've learned this the hard way after buying "fresh" branches that turned brown within days!
Cutting Technique: The 15-20 minute soak in Step 2 is non-negotiable for proper hydration. While soaking, trim the cut ends at a 45-degree angle—this creates more surface area for water absorption. I use a sharp knife and make the cut just before placing branches in the vase to prevent premature drying. This simple technique can extend your branches' freshness by nearly a week compared to straight cuts.
Arrangement Secret: For a truly balanced look, use the "thirds rule" when placing branches. Divide your vase mentally into three vertical sections and place one main branch in each third. This creates visual interest while maintaining stability. When working with clear glass vases, arrange branches so they fan out from the center—this allows light to create beautiful shadows through the needles, adding depth to your arrangement.
Preservation Hack: The floral preservative mixture (½ teaspoon sugar + ¼ teaspoon bleach) works wonders, but there's a trick to using it effectively. After adding the mixture to your vase water, let it sit for 5 minutes before inserting branches. This gives the preservative time to fully dissolve and distribute evenly, maximizing its effectiveness. I've found this small adjustment makes a noticeable difference in how long my branches stay fresh and fragrant.
Pro Tips for Christmas Tree Branches In Vase
- Here's what nobody tells you about creating a show-stopping evergreen centerpiece that lasts the entire holiday season.
- Selection Tip: When choosing branches, focus on the scent test—crush a few needles between your fingers. Fresh evergr...
- Cutting Technique: The 15-20 minute soak in Step 2 is non-negotiable for proper hydration. While soaking, trim the cu...
Frequently asked questions
Got questions about using Christmas tree branches in a vase? Here are some common ones—and their answers—to help you create the perfect festive centerpiece!
Can I use any type of Christmas tree branch?
Most evergreen branches work, but fresh-cut pine, spruce, or fir (like those from a real tree) are ideal for their scent and durability. Avoid branches with needles that shed excessively or feel brittle—these won’t hold up well in water. If you’re using artificial trees, opt for high-quality, needle-retainer branches for a natural look.
How long will the branches last in a vase?
With proper care, fresh-cut branches can last 7–14 days! Trim the ends at an angle before placing them in water, and change the water every 2–3 days. For longer-lasting displays, add a flower preservative (like what you’d use for cut flowers) to the vase. Artificial branches? They’ll stay fresh indefinitely—just dust them occasionally!
Do I need to add water, or can I display them dry?
Adding water is highly recommended for fresh branches—it keeps them hydrated, prevents wilting, and even enhances their piney fragrance. For a dry arrangement, use branches that are completely dry and free of sap (like those from a pre-pruned tree). Just ensure they’re pest-free and well-ventilated to avoid mold.
How do I trim the branches for the best vase display?
Use sharp pruning shears or scissors to cut branches at a 45-degree angle about 6 inches from the base. This helps them absorb water better. For a fuller look, mix branch lengths—some long for height, others shorter for texture. Remove any brown needles or twigs before arranging to keep your vase looking polished.
What’s the best way to style them with other decorations?
Get creative! Pair branches with pinecones, berries, or dried oranges for a rustic vibe. Add fairy lights, ribbon, or even small ornaments for a holiday touch. For a modern look, contrast them with metallic vases, candles, or gold accents. Pro tip: Odd numbers work best—try 3, 5, or 7 branches for balance!
How do I keep bugs or mold away?
Fresh branches can attract pests, but you can prevent this by:
- Inspecting branches for eggs or larvae before bringing them inside.
- Using a vinegar-water mix (1:1 ratio) in the vase to deter bugs.
- Avoiding overcrowding—leave space between branches for airflow.
- Discarding branches if you spot mold or excessive sap buildup.
Wrapping up and next steps
Transforming your Christmas tree branches into a vase centerpiece is a simple yet magical way to extend the holiday spirit long after the season ends. With just a few tools and a little creativity, you’ve got a stunning, eco-friendly decoration that adds warmth and charm to any space.
Now that you’re armed with tips and answers, why not give it a try? Grab those branches, follow your intuition, and let your home shine with festive elegance! 🌿✨