
Pruning
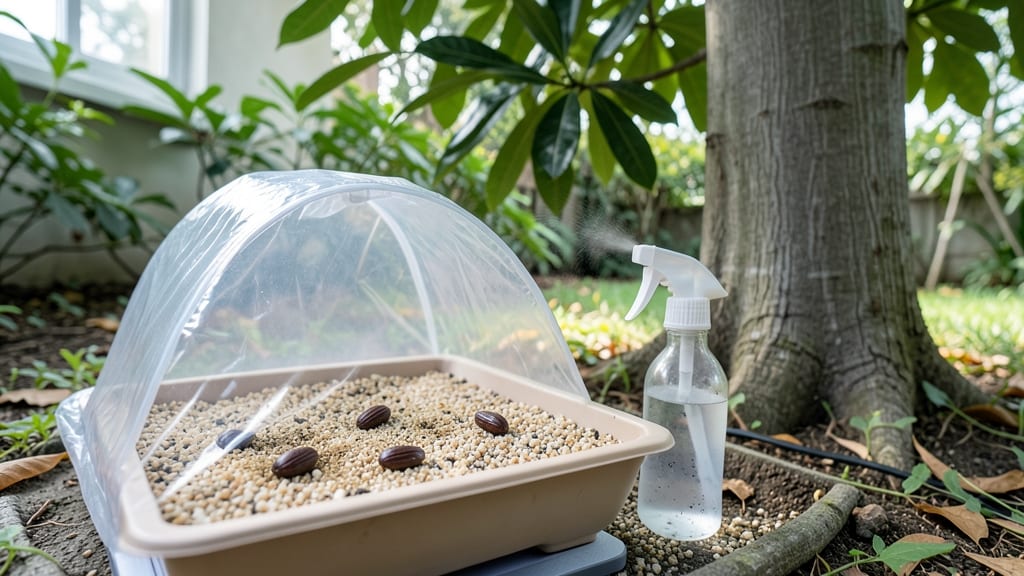
Growing camphor trees from seeds starts with cold-stratified germination—my 8-week method transforms stubborn seeds into strong saplings. 🌱 These aromatic giants need patience, but the process is simpler than you’d think, and the reward is a fragrant shade tree that outlives most gardeners.
The secret lies in mimicking winter’s chill: seal seeds in a damp paper towel, refrigerate for 6-8 weeks, then plant in well-draining soil. Camphor trees thrive in warm climates but germinate best with this cold trick—skip it, and you’ll wait months (or never) for sprouts.
I’ve germinated dozens this way, and the key is consistency in moisture and temperature. Once sprouted, keep seedlings in bright, indirect light until they’re 4-6 inches tall, then transplant outdoors after the last frost. They’ll grow 3-5 feet per year once established, but watch for scale insects—their biggest foe.
The first year is critical; give them space to breathe and avoid overwatering. This method works for USDA zones 8-11, but even cooler climates can try it in containers. The payoff? A tree that lives for centuries and smells like a forest after rain. Ready to start?
📚 In This Guide
- What you need
- Instructions
- Tips and common mistakes
- Wrapping up and next steps
What you need
- ● Camphor tree seeds: 10–20 fresh, viable seeds (ensure they’re plump and free of cracks or mold).
- ● Well-draining potting mix: 1–2 gallons of a blend of peat moss, perlite, and sand (ratio: 2:1:1).
- ● Small seedling pots or trays: 6–12 individual pots (3–4 inches deep) or a seed tray with drainage holes.
- ● Plastic zip-top bags: 2–4 large bags (for cold stratification).
- ● Refrigerator or cold stratification setup: A space at 35–45°F (2–7°C) for 6–8 weeks.
- ● Spray bottle: For gentle watering.
- ● Grow lights or sunny windowsill: To provide 12–14 hours of light daily after stratification.
- ● Seed scarification tool: Sandpaper (100–120 grit) or a knife to lightly nick seeds if dormancy is stubborn.
- ● Humidity dome or plastic wrap: To retain moisture during germination.
- ● pH test kit: To ensure soil pH is 5.5–6.5 (ideal for camphor seeds).
- ● Fertilizer (balanced, low-nitrogen): 1 tsp of 5-5-5 or 10-10-10 per gallon of soil (after sprouts appear).
- ○ Heat mat (optional): For faster germination once seeds are removed from cold storage.
How to cold-stratify camphor tree seeds for reliable germination
Cold stratification mimics winter's natural dormancy—here's how to break camphor seeds' stubbornness in just 8 weeks.
🌱 Step 1: Prepare Seeds for Stratification
Start by soaking camphor seeds in warm water for 24 hours to soften the hard outer shell. This step is critical—dry seeds can take months or never sprout. After soaking, place them between two damp paper towels and fold them into a loose bundle. The towels should feel damp but not dripping—squeeze gently to test moisture.
Wrap the bundle in plastic wrap to maintain humidity, then place it in a resealable plastic bag. Label the bag with the date and variety if known. Store it in your refrigerator's crisp drawer where temperatures hover around 35-40°F. This cold, moist environment mimics the winter conditions camphor seeds need to break dormancy.
⏰ Step 2: Monitor and Maintain Conditions for 8 Weeks
Check the seed bundle every 2 weeks to ensure the paper towels remain damp. If they've dried out, mist them lightly with room-temperature water and reseal the bag. You'll see nothing happening at first—that's normal. Camphor seeds are notoriously slow to respond, but consistency is key here.
After 6 weeks, begin checking weekly for signs of sprouting. Look for tiny white roots emerging from the seeds or the seed coat splitting slightly. This is your signal that stratification is working. If you see mold developing, unwrap the seeds immediately, rinse them with hydrogen peroxide solution (1 part peroxide to 10 parts water), and rewrap with fresh damp towels.
☀️ Step 3: Transition to Warm Germination
Once you see roots or the first signs of sprouting, remove the seeds from cold stratification and place them in a seed-starting mix (not garden soil). Use small pots or a seed tray with drainage holes. Plant each seed ½ inch deep—deeper planting can delay germination further. Gently firm the soil around the seeds but don't compact it.
Move the pots to a warm location (70-75°F), like on top of your refrigerator or near a sunny window. Keep the soil consistently moist but never soggy. You'll see the first true leaves emerge in 2-4 weeks after transferring to warmth. This is when the seedlings become self-sufficient and can handle regular care.
🌿 Step 4: Provide Optimal Growing Conditions
Camphor seedlings need bright, indirect light to prevent legginess. A south-facing window works well, but supplement with a grow light if natural light is insufficient. Keep the light 4-6 inches above the seedlings and adjust as they grow. You'll know the light is right when the seedlings grow upright with dark green leaves.
Water gently from the bottom by placing the pots in an inch of water for 10-15 minutes to encourage deep root growth. Avoid wetting the leaves to prevent fungal diseases. Once seedlings have 3-4 sets of true leaves (about 3-4 months total), they're ready to transplant into individual pots or the garden. Choose a spot with full sun to partial shade for best growth.
Tips & tricks for perfect camphor seed germination
Real talk: Camphor seeds are stubborn little things, but these tricks will help you crack their dormancy like a pro. The key is patience and precision—two things that pay off big time when those first roots appear.
Soaking Strategy: That 24-hour warm water soak isn't just a suggestion—it's non-negotiable for breaking camphor seeds' tough outer shells. I've tried skipping it, and let me tell you, the results are disappointing. Use warm (not hot) water to avoid shocking the seeds, and change the water halfway through if it starts to cool. The goal is to soften the seed coat without damaging the embryo inside. After soaking, gently squeeze the paper towels to check moisture—if water drips out, they're too wet.
Temperature Precision: The 35-40°F refrigerator range is critical for mimicking winter conditions, but not all fridges are created equal. If your fridge's crisp drawer runs cooler (say, 30°F), move the bag to the main compartment where temps are slightly warmer. You're aiming for a steady, cold environment—not a freezer-like shock. Pro tip: Place the bag on a shelf rather than the door where temperatures fluctuate wildly when you open it. Consistency is everything with camphor seeds.
Mold Prevention: That hydrogen peroxide solution (1:10 ratio) is your secret weapon against mold, which can happen faster than you think. If you spot any fuzzy growth, don't panic—just act fast. Unwrap the seeds immediately, rinse them in the peroxide solution for 30 seconds, then pat them dry with fresh paper towels before rewrapping. This step is what saved my first batch from total failure. The peroxide kills mold spores without harming the seeds, and the fresh towels prevent moisture buildup that fuels mold growth.
Light Transition: When moving seeds from cold stratification to warmth in Step 3, don't rush the light adjustment. Start with bright, indirect light for the first week to avoid shocking the seedlings. I've seen new growers place them under direct sun too soon, and the leaves turn crispy before they even get a chance to establish. Gradually increase light exposure over 3-4 days while monitoring for signs of stress like yellowing or wilting. A south-facing window with sheer curtains works perfectly for this gradual transition.
Pro Tips for Camphor Tree Seeds
- Real talk: Camphor seeds are stubborn little things, but these tricks will help you crack their dormancy like a pro. ...
- Soaking Strategy: That 24-hour warm water soak isn't just a suggestion—it's non-negotiable for breaking camphor seeds...
- Temperature Precision: The 35-40°F refrigerator range is critical for mimicking winter conditions, but not all fridge...
Frequently asked questions
Got questions about growing camphor tree seeds? You’re not alone! Here are some of the most common queries—and their answers—to help you succeed with cold-stratified germination.
How long do camphor tree seeds take to germinate after cold stratification?
With proper cold stratification (4–8 weeks in moist peat/sand at 35–40°F), most camphor seeds sprout within 2–4 weeks after removing them from the fridge. Patience is key—some may take up to 8 weeks total from stratification start. Keep soil warm (70–75°F) and moist during this phase for best results.
Can I skip cold stratification for camphor seeds?
While possible, skipping stratification drastically reduces germination rates. Camphor seeds have a hard seed coat that benefits from the cold-moisture treatment to break dormancy. If you’re in a hurry, try scarification (lightly sanding the seed coat) as an alternative, but combine it with warmth (80°F+) for better success.
What’s the best soil mix for germinating camphor seeds?
Use a light, well-draining mix like:
- 50% peat moss or coconut coir
- 30% perlite or coarse sand
- 20% vermiculite (for moisture retention)
Why aren’t my camphor seeds sprouting after stratification?
Check these common culprits:
- Improper stratification: Ensure seeds stayed consistently moist (not soggy) and cold (35–40°F).
- Wrong temperature post-strat: Seeds need warmth (70–75°F) to germinate—move them to a seedling heat mat if your home is cooler.
- Old or damaged seeds: Camphor seeds lose viability over time; test a few with a float test (sink = viable).
- Light exposure: Most camphor seeds need darkness to germinate—cover the tray with a damp paper towel until sprouts appear.
How do I care for camphor seedlings after germination?
Once sprouted, keep seedlings in bright, indirect light (avoid harsh sun). Water gently at the soil base—never let them dry out or sit in water. Transplant to individual pots (2–3 inches deep) when they have 2–3 true leaves. Camphor trees grow slowly; give them 6+ hours of light daily and humidity (50%+) to thrive.
Wrapping up and next steps
Growing camphor tree seeds through cold stratification is a rewarding journey that unlocks the potential of these fragrant beauties in just 8 weeks! 🌱 With the right materials, patience, and a little care, you can nurture these seeds into thriving saplings.
Whether you're a gardening enthusiast or a beginner, this method makes it easier than ever to cultivate your own camphor tree.
Now that you’re equipped with the knowledge, take the next step—grab your seeds, set up your stratification station, and watch nature work its magic! Share your progress with fellow gardeners or even gift a sapling to a friend. Happy growing! ✨