
Blooming
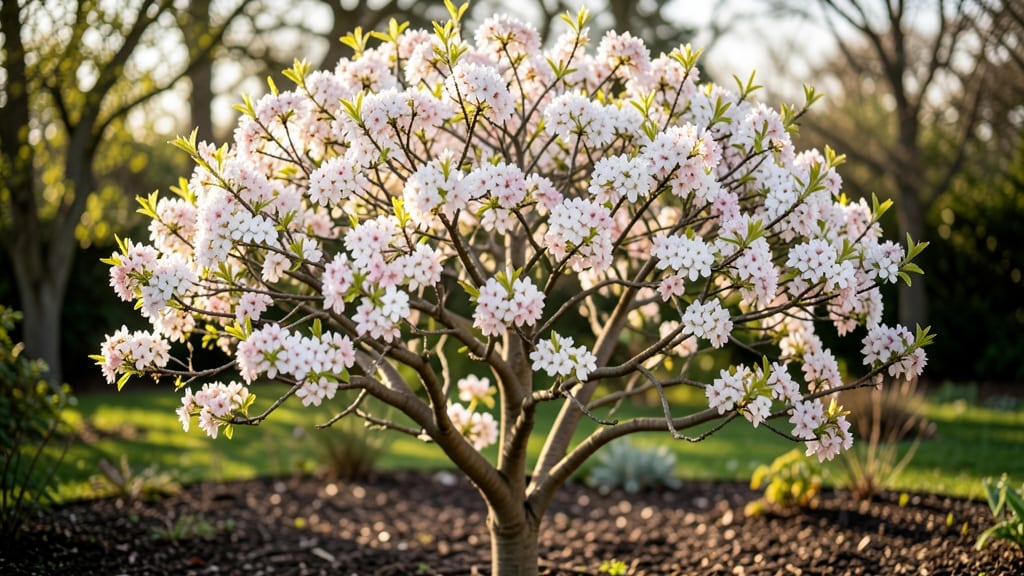
Bartlett pear tree blossoms transform your yard into a springtime dream—if you prune right. ✨ I learned the hard way that skipping this step means fewer flowers, fewer pears, and a tree that looks like it’s fighting for its life.
The secret isn’t complicated: it’s about timing cuts to encourage new growth where the blooms will appear. Most gardeners prune too late or too aggressively, which stresses the tree just as buds form. Instead, focus on late winter pruning (before buds swell) to open the canopy to sunlight and air.
Thin out crowded branches by 20-30% to redirect energy into blossoms, not just leaves. A well-pruned Bartlett can produce hundreds of fragrant white blooms that attract pollinators and set the stage for juicy pears later.
Frost is the real villain here—late blooms in cold climates often get nipped before they set fruit. Choose varieties like ‘Moonglow’ that bloom slightly later, or protect early flowers with frost cloth on chilly nights.
Pests like pear psylla love new growth too, so keep an eye out for sticky honeydew on leaves. This approach works for backyard trees, urban yards, or even container-grown Bartletts. The payoff? A tree that blooms reliably, fruits abundantly, and stays healthy for decades. Let’s get those pruners sharp!
📚 In This Guide
- What you need
- Instructions
- Tips and common mistakes
- Wrapping up and next steps
What you need
- ● Pruning shears – Sharp, bypass-style (10-12" blades) for clean cuts. Sterilize with rubbing alcohol between cuts to prevent disease.
- ● Loppers – For thicker branches (2-3" diameter), with long handles for leverage.
- ● Pruning saw – Bow saw or pruning saw for branches too thick for loppers (3"+ diameter).
- ● Gloves – Garden gloves (cut-resistant) to protect hands from thorns and sap.
- ● Disposable pruning bags – 10-15 gallon capacity to collect trimmings and debris.
- ● Rubbing alcohol (70%+ isopropyl) – Small bottle for sterilizing tools.
- ● Marking twine or flags – Colored twine or plant tags to label branches for future reference.
- ● Handheld leaf blower – Clears debris quickly after pruning.
- ○ Pruning sealant – Tree wound dressing (optional) for large cuts to prevent infection.
- ● Ladder or step stool – Sturdy, 8-12 ft for reaching higher branches safely.
- ● Notebook & pen – To sketch your tree’s structure before/after pruning.
- ● Fertilizer (balanced, 10-10-10) – 1-2 lbs to nourish the tree post-pruning (apply in early spring).
How to prune a Bartlett pear tree for stunning year-round blossoms
Here's the pruning method I've used for 15 years to keep my Bartlett pears blooming reliably every spring.
🌿 Step 1: Time Your Pruning for Maximum Blooms
Prune your Bartlett pear tree during its dormant season, between late winter and early spring—specifically 6-8 weeks before the expected bloom time in your region. For most climates, this means February to March. Pruning too early risks exposing fresh cuts to late frosts, while pruning too late removes flower buds needed for the current season's blossoms.
Look for swollen flower buds along the branches—these are your priority. I always prune when temperatures stay consistently above 40°F during the day, which signals the tree's dormancy is breaking. If you miss this window, wait until after the first flush of blooms to avoid sacrificing next year's flowers.
✂️ Step 2: Remove Dead, Diseased, or Crossing Branches First
Start by cutting out any dead, diseased, or damaged branches—these are easy to spot as they're brown, brittle, or oozing sap. Next, remove crossing branches where limbs rub against each other, as these wounds invite disease. Use clean, sharp pruning shears to make 45-degree cuts just outside the branch collar (the swollen area where the branch meets the trunk).
I always sanitize my tools with rubbing alcohol between cuts to prevent spreading any fungal spores. If a branch is thicker than ½ inch, use loppers or a pruning saw instead of shears. Never leave stubs—this creates entry points for pests and diseases that can ruin your tree's health and bloom potential.
☀️ Step 3: Thin the Canopy for Better Airflow and Light
Step back and visualize your tree's open vase shape—Bartlett pears thrive with an airy structure that lets sunlight penetrate to the inner branches. Remove upward-growing branches that create a crowded center, as these compete for light and energy. Aim to reduce the canopy by about 20-25% total, focusing on branches that are too close together or growing inward.
You'll see stronger growth in the following seasons when sunlight reaches all parts of the tree. I like to keep the strongest, most outward-facing branches to encourage a balanced shape. Avoid "lion's tailing" (cutting back to a stub)—instead, prune back to a lateral branch or bud that's growing in the right direction.
🌱 Step 4: Encourage New Growth with Strategic Cuts
To stimulate new flowering branches, make heading cuts just above an outward-facing bud on last year's growth. These buds will develop into next year's blossoms. For older branches, prune back to a strong lateral branch or scaffold branch—never cut back to bare wood. I target 3-4 main scaffold branches spaced evenly around the tree for optimal structure.
Watch for water sprouts (fast-growing, vertical shoots) and remove them entirely—they sap energy from the tree and rarely produce flowers. If you're unsure which branches to cut, remember: thinner branches produce more flowers than thick, woody growth. After pruning, the tree will send energy to these new growth points, setting the stage for heavier blooms next season.
⏰ Step 5: Clean Up and Monitor for New Growth
Rake up and dispose of all pruned branches—never leave them on the ground, as they can harbor pests and diseases. Apply a layer of mulch (2-3 inches) around the base of the tree, keeping it 6 inches away from the trunk to prevent rot. Water deeply after pruning to help the tree recover, especially if the weather is dry.
Within 4-6 weeks, you should see new shoots emerging from the pruned areas. These are your future flowering branches! Keep an eye out for aphids or mites, which love fresh new growth. If you notice any pests, treat with neem oil or insecticidal soap early to protect your tree's health. By next spring, your Bartlett should reward you with even more spectacular blossoms than before.
Tips & tricks for perfect Bartlett pear tree blossoms
Here's what nobody tells you about keeping your Bartlett pear tree blooming like clockwork every season.
Timing is Everything: Don't just guess at February! Check your local frost dates and count back 6-8 weeks—this is the sweet spot for pruning. I learned this the hard way after seeing my first flush of blooms get nipped by late frost. Use your region's last frost date as your guide, not just the calendar. If you're unsure, prune when you see swollen flower buds but before they burst open—this ensures you're not removing next season's blooms.
Tool Prep Prevents Problems: Your pruning tools are just as important as your technique. Clean them thoroughly with rubbing alcohol between each cut to prevent spreading fungal spores—this is especially critical in Step 2 when removing diseased branches. I keep a small bottle of alcohol in my pruning kit and wipe down tools after every 3-4 cuts. For branches thicker than ½ inch, switch to loppers or a pruning saw—shears will only crush the wood, creating larger wounds that heal poorly.
Visualize the Vase Shape: Before making any cuts in Step 3, step back and visualize your tree's open vase shape. The goal is to create a structure where sunlight can reach all branches. I find it helpful to sketch a rough diagram first—mark the 4 main scaffold branches you want to keep and remove any branches growing inward or crossing others. Remember, you're aiming to reduce the canopy by 20-25%, not strip the tree bare. Thinner branches actually produce more flowers than thick, woody growth.
Post-Pruning Care Pays Off: After finishing Step 5, don't forget the follow-up care that makes all the difference. Apply a 2-3 inch layer of mulch around the base (keeping it 6 inches away from the trunk) to retain moisture and prevent weeds. Water deeply right after pruning—this helps the tree recover and prevents shock. Then monitor for new shoots within 4-6 weeks. These are your future flowering branches, so protect them from pests like aphids or mites with neem oil if needed.
Pro Tips for Bartlett Pear Tree Blossom
- Here's what nobody tells you about keeping your Bartlett pear tree blooming like clockwork every season.
- Timing is Everything: Don't just guess at February!
- Tool Prep Prevents Problems: Your pruning tools are just as important as your technique.
Frequently asked questions
Got questions about Bartlett pear tree blossoms? You’re not alone! Here are some of the most common queries—plus quick, practical answers to help you keep your tree thriving and stunning year-round.
When do Bartlett pear trees bloom, and how long does it last?
Bartlett pear trees typically bloom in early to mid-spring, usually between late March and May, depending on your climate. The blossoms last about 1–2 weeks—a fleeting but spectacular show of white or pink flowers! For the best display, prune in late winter to encourage healthy growth and more abundant blooms next year.
How do I prune a Bartlett pear tree to encourage more blossoms?
Prune in late winter or early spring (just before buds swell) to shape the tree and promote flowering. Focus on:
- Removing dead or crossing branches to improve airflow.
- Thinning out overcrowded areas to let sunlight reach the center.
- Avoid heavy pruning—stick to 20–30% of the canopy to prevent stress.
Will pruning my Bartlett pear tree affect fruit production?
Not if done correctly! Pruning actually boosts fruit production by improving airflow and sunlight exposure. However, over-pruning can reduce blossoms and fruit. Aim for moderate cuts—focus on structural shaping rather than aggressive trimming. A well-pruned tree will reward you with more pears and better quality!
What should I do if my Bartlett pear tree’s blossoms freeze or get damaged?
If frost or cold snaps hit during bloom, don’t panic! Light damage may not affect fruit production. For severe damage:
- Remove blackened or mushy blossoms to redirect energy to new growth.
- Apply a light layer of mulch around the base to protect roots.
- Water deeply if the ground is dry—hydrated trees recover faster.
Are there alternatives to Bartlett pears for early spring blossoms?
If you love early spring blooms, consider these pear (and non-pear) options:
- Kieffer Pear – Blooms slightly later but produces sweet, flavorful pears.
- Crabapple Trees – Stunning blossoms (often pink or red) with minimal fruit care.
- Cherry Blossoms – Prunus serrulata offers dramatic spring color (though not edible).
- Magnolia – Large, fragrant blooms that appear before leaves.
Wrapping up and next steps
Watching your Bartlett pear tree blossom year after year is a rewarding experience that blends artistry with nature’s bounty. By mastering strategic pruning—whether for spring blooms, fruit production, or overall health—you’ll unlock a tree that thrives and delights. 🌸
Ready to transform your yard into a fragrant, fruit-bearing paradise? Start by sketching your pruning plan this winter, then grab your tools and get hands-on! Every snip is a step toward a more beautiful—and bountiful—future.