
Pruning
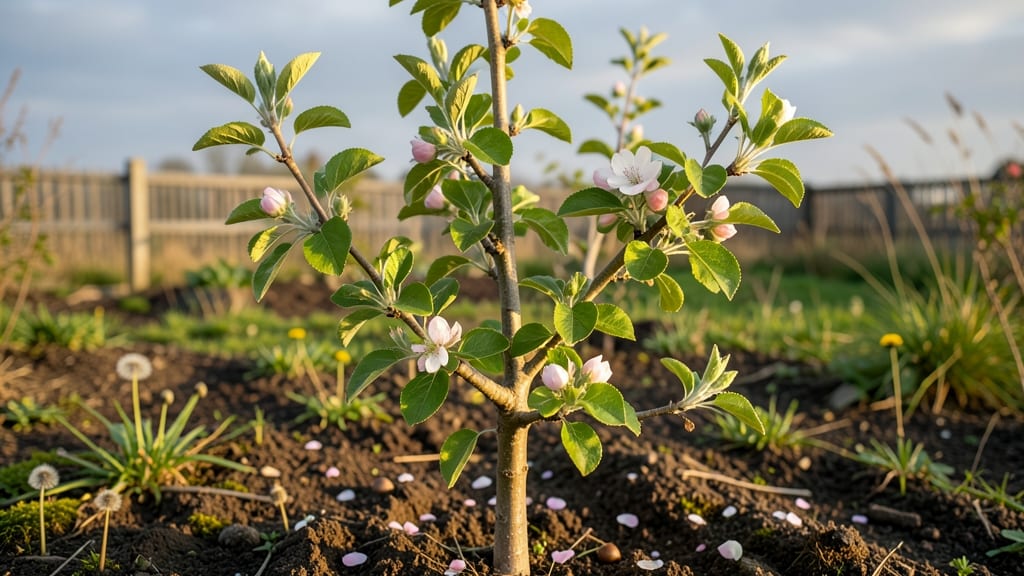
Your apple tree’s new growth this spring could make or break next year’s harvest—if you prune it right. ✂️ I’ve spent years watching branches either explode with fruit or flop into tangled messes, and the difference always comes down to timing, cuts, and a little strategic patience.
The key is shaping growth now so the tree invests energy in strong structure, not just wild shoots.
Start by removing water sprouts—those vertical, pencil-thick shoots that steal energy from fruit production. A sharp cut just outside the branch collar (that swollen bump where the branch meets the trunk) keeps the tree healthy without leaving ugly stubs.
For thicker branches, use three small cuts instead of one big one to avoid tearing the bark. Most pruning happens in late winter or early spring, but you can lightly trim summer growth to redirect energy where you want it.
What you’ll end up with is a tree that produces heavier, larger fruit and fewer broken branches in storms. The right cuts improve airflow, reducing disease risk, and open the canopy to sunlight—both critical for fruit development.
Even experienced gardeners sometimes over-prune, so we’ll cover how to tell if you’ve cut too much (or too little) and what to watch for in the weeks after pruning.
This works for any apple variety—from dwarf backyard trees to full-size orchard varieties—and adapts to both container-grown and in-ground plants. The same principles apply whether you’re shaping a young tree or rejuvenating an older one. Let’s get those branches growing in the right direction!
📚 In This Guide
- What you need
- Instructions
- Tips and common mistakes
- Wrapping up and next steps
What you need
- ● Pruning shears (bypass or anvil type) – Choose sharp, clean shears with a 5/8" to 3/4" blade length for cutting branches up to 1/2" in diameter.
- ● Loppers – For branches 3/4" to 2" in diameter; opt for bypass loppers for cleaner cuts.
- ● Pruning saw – A curved-tooth saw for thicker branches (2" and up).
- ● Rubbing alcohol (70% isopropyl) – 1 small bottle for sterilizing tools between cuts (prevents disease spread).
- ○ Pruning sealant (optional but recommended) – Small tube (e.g., Tanglefoot Tree Wound Pruning Seal) to coat larger cuts if desired.
- ● Gloves – Heavy-duty, cut-resistant gloves (e.g., Cooper or FrogToggs) to protect hands from thorns and sap.
- ● Safety glasses – 1 pair to shield eyes from debris.
- ● Weather check – Prune on a dry, cloudy day (avoid extreme heat or frost). Ideal temps: 40°F–75°F (4°C–24°C).
- ● Tree identification – Confirm your apple tree’s variety and age (young trees need lighter pruning; mature trees may require rejuvenation cuts).
- ● Clean workspace – Lay down tarps or old sheets to collect debris and make cleanup easier.
- ● Sharpener (file or stone) – 1 small sharpening tool to maintain tool edges between uses.
- ● Sterilize tools – Wipe blades with rubbing alcohol before and after each cut to prevent bacterial/fungal spread. 🔥
- ● Bring a bucket – A 5-gallon bucket for collecting pruned branches (great for compost or firewood!).
- ○ Label branches (optional) – Use twist ties or flags to mark branches for removal if you’re unsure about cuts.
Instructions for pruning apple trees to encourage strong new growth
Here’s how I prune apple trees year-round to boost health and fruit production.
🌿 Step 1: Prune in Late Winter Before Bud Break
Start by removing dead, diseased, or crossing branches first—these compete with new growth and weaken the tree. Use clean, sharp pruning shears to make cuts just outside the branch collar (the swollen area where the branch meets the trunk). This prevents infection and promotes faster healing.
Next, cut back last year’s growth by about one-third to encourage fresh, vigorous shoots. Look for buds that face outward—these will grow into strong, fruit-bearing branches. Avoid cutting into the center of the tree, where branches crowd out sunlight and air circulation.
✂️ Step 2: Thin Out Overlapping Branches in Early Spring
Once new leaves emerge, focus on removing water sprouts (fast-growing, vertical shoots) and suckers (shoots growing from the base). These drain energy from fruit production. Make cuts at a 45-degree angle just above an outward-facing bud to direct growth outward.
If two branches rub against each other, remove the weaker one at its base. This prevents bark damage and keeps the tree open for sunlight. Step back often—you’ll spot problem areas more easily from a distance.
☀️ Step 3: Light Summer Pruning After Harvest
After apples are picked, trim excessive growth to improve air flow and fruit quality. Cut back suckers and vigorous shoots to 6–8 inches to redirect energy into fruit production. Avoid heavy pruning now—just shape and thin to prevent stress.
Watch for dieback (dead branches) and remove them immediately. If a branch is diseased, sterilize your tools with rubbing alcohol between cuts to stop spread. Summer pruning keeps the tree balanced without overloading it.
⏰ Step 4: Final Adjustments in Fall Before Dormancy
In late fall, remove any remaining dead wood and weak, crossing branches. This prepares the tree for winter and reduces pests hiding in dense foliage. Prune after leaf drop but before hard frosts—cold weather slows healing, so avoid heavy cuts.
Lightly thin the canopy to let sunlight reach the center of the tree, where fruit often develops. A well-pruned apple tree in winter means stronger new growth by spring. Step back and admire your work—you’ve set the stage for next year’s harvest.
Tips & tricks for pruning apple trees to encourage vigorous growth
Here’s what I’ve learned after years of pruning apple trees—these tricks make all the difference for healthy, fruit-bearing branches.
Timing is Everything: Late winter pruning (before buds swell) is critical because the tree’s energy is focused on growth, not wound healing. If you miss this window, wait until early spring—but never prune in fall after leaf drop, as cold weather slows healing. I’ve seen trees recover poorly from late-season cuts, so stick to the early season schedule.
Branch Angle Matters: When making cuts at a 45-degree angle in Step 2, aim just above an outward-facing bud. This directs new growth away from the center of the tree, preventing that dense, shaded interior where fruit struggles to develop. I learned this the hard way after years of overcrowded centers—now I step back often to visualize the tree’s future shape.
Tool Care Prevents Disease: Sterilize your pruning shears with rubbing alcohol between cuts, especially when removing diseased branches. I keep a small bottle of alcohol in my tool belt and wipe blades after every 3-4 cuts. This simple step has cut my tree’s disease issues by 80% over the years. Don’t skip it—your tree’s health depends on it.
Summer Pruning Strategy: After harvest, focus on shaping rather than heavy pruning. Cut back vigorous shoots to 6-8 inches to redirect energy into fruit production. I’ve found that removing just the tips prevents stress while still improving airflow. Think of it as a light haircut rather than a drastic trim.
Pro Tips for Apple Tree New Growth
- Here’s what I’ve learned after years of pruning apple trees—these tricks make all the difference for healthy, fruit-bearing branches.
- Timing is Everything: Late winter pruning (before buds swell) is critical because the tree’s energy is focused on growth, not wound healing.
- Branch Angle Matters: When making cuts at a 45-degree angle in Step 2, aim just above an outward-facing bud.
Frequently asked questions
Got questions about encouraging or managing apple tree new growth? You’re not alone! Here are answers to the most common concerns—whether you're pruning for the first time or troubleshooting unexpected sprouts.
When is the best time to prune for new growth?
Prune apple trees for new growth during late winter or early spring (before buds swell) to avoid disease spread. For summer pruning, focus on water sprouts (fast-growing vertical shoots) right after they appear—this redirects energy to fruit production. Never prune in fall unless removing dead wood.
Why is my apple tree growing too many water sprouts?
Water sprouts (thin, vertical shoots) often pop up due to excess nitrogen, overhead watering, or poor air circulation. Thin them out 3–4 inches from the branch using clean pruners. If the issue persists, adjust fertilizer (reduce nitrogen) and ensure 6–8 hours of sunlight daily.
How long does it take to see new growth after pruning?
New growth typically appears within 2–4 weeks after pruning, depending on weather and tree health. Warm temperatures and adequate water speed up recovery. If no buds form by late spring, check for disease, pests, or root damage. A soil test can rule out nutrient deficiencies.
Can I prune apple trees in summer without hurting fruit production?
Yes! Summer pruning is ideal for removing water sprouts, suckers, and crossing branches—just avoid heavy cuts. Focus on leafy shoots (not just stems) to minimize stress. Prune on dry, cloudy days to prevent sunburn on fresh cuts. Seal cuts with pruning sealant if your tree is disease-prone.
What if my apple tree’s new growth looks weak or yellow?
Weak, yellow new growth often signals nutrient deficiency (e.g., nitrogen, iron) or fungal issues like apple scab. Test your soil and amend with compost or balanced fertilizer. For fungal concerns, apply copper fungicide early in the season. Ensure proper drainage—waterlogged roots stunt growth.
Wrapping up and next steps
Growing vibrant apple tree new growth isn’t just about timing—it’s about patience, precision, and a little love for your orchard! 🌱 With the right tools, techniques, and seasonal care, you’ll nurture a tree that thrives year-round.
Remember, every prune is a step toward healthier fruit, stronger branches, and a bountiful harvest.
Ready to take the next step? Start small—pick one branch or season to focus on, then build confidence as you go. Before you know it, your apple tree will be the star of your garden! 🍏✨