
Container Gardens
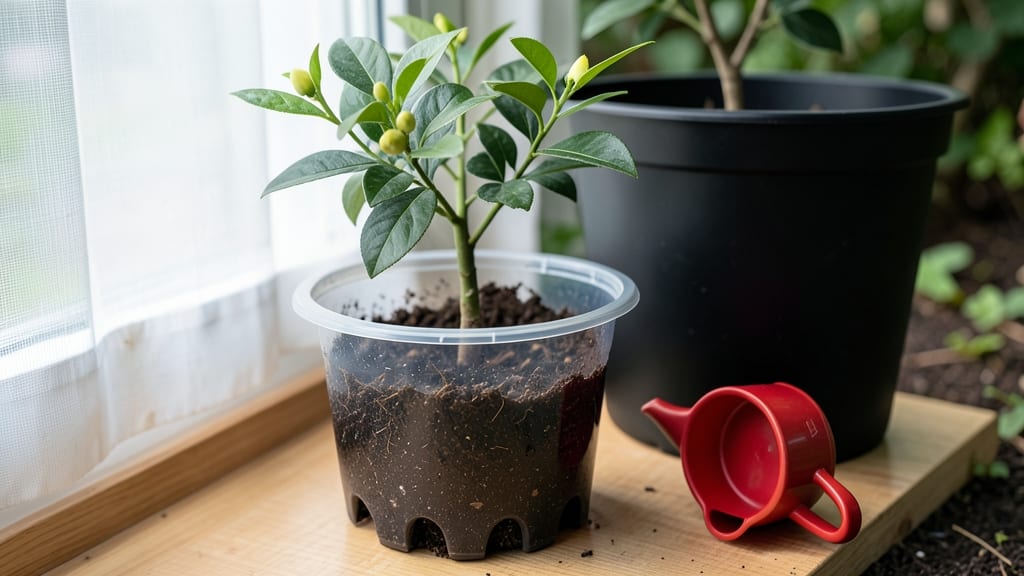
Growing trees in plastic pots changed my game—no more struggling with heavy clay or cracking ceramic. 🌳 These lightweight containers hold moisture better than you'd think, and their durability means I can move seedlings without breaking them.
The key is choosing the right size and drainage, plus a soil mix that won’t compact over time.
Start with pots at least 12 inches wide for small trees, but plan for upgrades as roots grow. Black or dark gray pots absorb heat (good for warm climates), while white reflects sunlight (better for hot summers). Drainage holes are non-negotiable—root rot is the silent killer of container trees.
Your first year focuses on root development, not trunk size. Water deeply when the top inch of soil feels dry, and fertilize lightly every 6-8 weeks with a balanced tree formula. The goal? A sturdy root system that transitions smoothly to the ground when planting day comes.
Common pitfalls include overwatering (check soil moisture!) and skipping pot upgrades (roots circle = stunted growth). With the right setup, your container-grown trees will outperform nursery stock—stronger, healthier, and ready for their permanent home.
📚 In This Guide
- What you need
- Instructions
- Tips and common mistakes
- Wrapping up and next steps
What you need
- ● Tree plastic pots – Choose 1-10+ (depending on your garden size), sized to fit your plants (e.g., 5-15 gallon capacity). Look for UV-resistant, lightweight, and durable options.
- ● Potting soil – 1-2 bags (1-2 cubic feet per pot) of high-quality, well-draining mix. Consider adding perlite or vermiculite for extra aeration.
- ○ Drainage materials (optional but recommended) – 1-2 inches of gravel, pebbles, or broken pottery to prevent root rot.
- ● Fertilizer – Slow-release granules or liquid fertilizer to nourish your plants.
- ○ Mulch (optional) – 1-2 inches of bark or straw to retain moisture and suppress weeds.
- ● Gloves – Heavy-duty gardening gloves to protect your hands.
- ● Trowel or shovel – For digging and mixing soil.
- ● Watering can or hose – With a gentle spray nozzle to avoid displacing soil.
- ● Measuring tape or ruler – To ensure proper spacing between pots.
- ○ Drill (optional) – If your pots lack drainage holes, a 1/4-inch drill bit can add them.
- ● A sunny or partially shaded outdoor space (check your plants’ light requirements!).
- ● Access to water – A nearby hose or water source for regular hydration.
- ● Basic knowledge of plant care – Research your chosen plants’ water, sunlight, and soil needs!
- ● Weather-appropriate clothing – Sun hat, sunscreen, or light layers for comfort.
Step-by-step guide to using tree plastic pots for container gardening
Here's how I transform these sturdy pots into a year-round gardening powerhouse.
🪴 Step 1: Select the Right Size and Style for Your Plants
Tree plastic pots come in various sizes, and choosing correctly prevents root-bound plants. For small shrubs or herbs, opt for 5-7 gallon pots—they provide enough room for root development without overwhelming small spaces. Larger trees or woody perennials need 15-25 gallon pots to support their growth for at least a season.
Look for pots with multiple drainage holes—this is non-negotiable. If you find a pot without them, drill ¼-inch holes along the bottom edge using a power drill. I always check for sturdy handles or reinforced sides, especially for larger pots, because you'll be moving them frequently. The thicker the plastic, the longer the pot lasts under sunlight and weight.
☀️ Step 2: Prepare the Pots for Planting
Start by cleaning the pots thoroughly with a 10% bleach solution (1 part bleach to 9 parts water) to kill any lingering bacteria or fungi from previous use. Rinse them well and let them dry completely in the sun. This step is critical—skipping it can lead to damping-off disease in seedlings or root rot in mature plants.
Next, line the bottom of each pot with 2-3 inches of gravel or expanded clay pebbles. This creates a reservoir for excess water while keeping roots dry. Fill the pot ⅓ full with high-quality potting mix, fluffing it gently to remove compaction. The reason we don’t fill it completely now is that roots need air pockets to establish themselves properly.
🌱 Step 3: Plant and Stabilize Your Container Garden
Place your plant in the center of the pot, ensuring the root ball sits just below the rim. For bare-root plants, spread the roots gently outward before positioning them. Fill the remaining space with more potting mix, pressing lightly around the edges to eliminate air gaps. Tap the pot gently on a hard surface to settle the soil—this helps roots make immediate contact with the mix.
Water deeply until it drains freely from the bottom holes, then let the pot sit for 10-15 minutes to absorb excess moisture. If the soil settles, add a little more mix to keep the root ball covered but not buried. For windy locations, secure the pot with stakes or weights—tree plastic pots are lightweight, and top-heavy plants can tip over easily.
💧 Step 4: Establish a Watering and Fertilizing Routine
Tree plastic pots dry out faster than traditional containers because their lightweight design allows air to circulate more freely. Check the soil daily during hot weather—stick your finger 1-2 inches deep. If it feels dry, water thoroughly until it runs out the drainage holes. In cooler months, you can stretch this to every 2-3 days, but always adjust based on your plant’s needs.
Feed your plants with a balanced liquid fertilizer (10-10-10 or 20-20-20) every 4-6 weeks during the growing season. I like to mix it with water and apply it directly to the soil, avoiding the leaves to prevent burns. For slow-release options, top-dress with granular fertilizer once at planting time—this ensures a steady supply of nutrients without overloading the roots.
✂️ Step 5: Maintain and Rotate for Optimal Growth
Rotate your pots quarter-turn weekly to ensure even sunlight exposure. You’ll notice plants leaning toward the light if you skip this—it’s a clear sign they’re stretching. Prune leggy growth or overcrowded foliage to encourage bushier, healthier plants. For woody perennials, trim back any dead or crossing branches in early spring to promote new growth.
By late fall, reduce watering gradually as temperatures drop. Most container plants go semi-dormant in winter, but a light layer of mulch (like shredded bark) helps retain moisture and insulate roots. If you’re growing tender perennials, move pots to a sheltered spot or bring them indoors before the first frost. Tree plastic pots make this easy—they’re lightweight enough to carry or roll to a garage or patio cover.
Tips & tricks for perfect container gardening with tree plastic pots
These practical insights will help you maximize your lightweight containers for thriving plants all year.
Size Matters: When selecting your 5-7 gallon pots for small plants or 15-25 gallon pots for larger specimens, remember that roots need room to breathe. For herbs like basil or thyme, the 5-7 gallon range is perfect—they won't outgrow it in a season, but you won't waste space either. I've learned the hard way that cramming a rosemary bush into a 5-gallon pot leads to root competition and stunted growth within months.
Drainage is Non-Negotiable: The ¼-inch holes you drill (or that come pre-made) aren't just for show—they're the secret to preventing root rot. I always double-check with a ruler to ensure even spacing around the pot's circumference. For extra insurance, consider adding a layer of landscape fabric over the gravel reservoir to keep soil from clogging those drainage holes over time.
Watering Wisdom: Those 10-15 minutes you let your pot sit after watering are crucial—they allow excess moisture to fully drain while preventing soggy bottoms. I've found that using a moisture meter (about $15 at garden centers) takes the guesswork out of determining when to water again. Stick it in the soil—when it reads dry at 1-2 inches deep, that's your cue to water thoroughly.
Winter Prep: Before the first frost hits tender perennials, move your tree plastic pots to a sheltered location or bring them indoors. Their lightweight design makes this easy—no heavy lifting! I like to wrap the pots in bubble wrap for extra insulation, then place them on a saucer filled with pebbles. This creates a microclimate that protects roots while still allowing airflow. The mulch layer you add helps too, but don't overdo it—too much can suffocate roots during winter dormancy.
Pro Tips for Tree Plastic Pots
- These practical insights will help you maximize your lightweight containers for thriving plants all year.
- Size Matters: When selecting your 5-7 gallon pots for small plants or 15-25 gallon pots for larger specimens, remember that roots need room to breathe.
- Drainage is Non-Negotiable: The ¼-inch holes you drill (or that come pre-made) aren't just for show—they're the secret to preventing root rot.
Frequently asked questions
Got questions about tree plastic pots?
You’re not alone! Here are answers to the most common concerns—from setup to long-term care—so you can garden with confidence.
Are tree plastic pots better than terracotta or ceramic for large trees?
Tree plastic pots are far lighter than terracotta or ceramic, making them easier to move and less risky for your back. Plus, they won’t crack in freezing temps or break under heavy loads. Just ensure they have drainage holes to prevent root rot.
Can I leave tree plastic pots outside year-round?
Yes, but with a few tweaks. Most high-quality plastic pots are UV-stabilized and frost-resistant. In winter, add a layer of mulch around the base to insulate roots, and avoid overwatering (soil stays wetter longer in cold weather). Empty pots in harsh winters if you’re in Zone 3 or colder.
Are plastic tree pots more expensive than other container options?
Not necessarily! While premium plastic pots may cost more upfront, they last longer than terracotta (which cracks) or fabric grow bags (which degrade). Look for budget-friendly fiberglass-reinforced options—they’re durable, lightweight, and often cheaper than ceramic.
How do I prevent plastic pots from warping or cracking under tree weight?
Warping usually happens from uneven weight distribution or poor-quality plastic. Choose pots labeled “tree-specific” or “heavy-duty”, and place them on a stable, level surface. For extra support, use pot feet or a wide, shallow saucer to distribute weight. Avoid overfilling with soil—leave 2–3 inches from the rim.
What’s the easiest way to clean and reuse plastic tree pots?
Rinse with soapy water and a stiff brush to remove debris, then disinfect with a 10% bleach solution (1 part bleach to 9 parts water) to kill pests/diseases. Let them dry in the sun—UV rays help sanitize! Avoid harsh scrubbers that can scratch the plastic.
Will plastic pots overheat roots in hot summer weather?
Plastic can trap heat, but it’s manageable. Light-colored pots reflect sunlight better, and wrapping the base with aluminum foil or using a pot shade cloth helps. For extreme heat, move pots to a dappled-shade area or bury them halfway in the ground (if using fabric pots).
Wrapping up and next steps
Tree plastic pots are a game-changer for container gardening—offering lightweight durability, eco-friendly versatility, and year-round growing potential. Whether you're a seasoned gardener or just starting out, these pots make it easy to nurture plants with minimal hassle and maximum results. 🌱
Ready to elevate your gardening game? Start small: pick a sunny spot, grab a few tree pots, and plant your favorite herbs, veggies, or flowers today! Your future self (and your plants) will thank you. 🌿✨