
Pruning
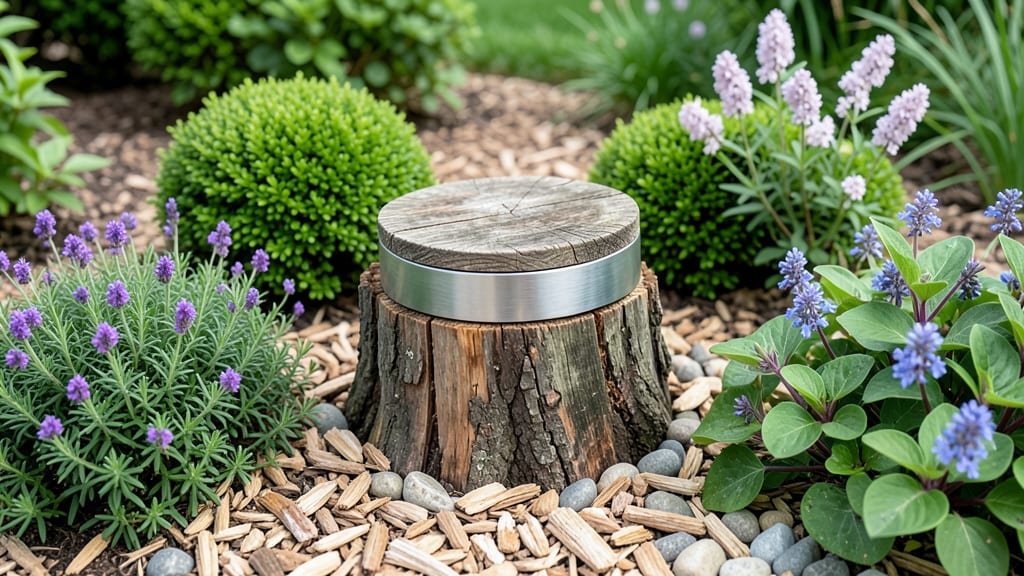
That ugly tree stump in your front yard isn't going anywhere—unless you turn it into a design feature instead of an eyesore. 🌳 I've hidden stumps with everything from fast-growing shrubs to clever hardscaping, and the right approach makes it vanish in weeks, not years.
The key is matching your solution to the stump's size and your yard's style. A small stump? Mulch and shade-loving perennials will do the trick in a season. A large one? Consider a decorative planter or stone border that turns it into a focal point.
Most solutions require just a few hours of work and minimal ongoing maintenance. By the end of this, your front yard will look intentional, not like you're hiding something. The best part? You'll save money on professional landscaping while creating a space that actually impresses neighbors.
Let's make that stump disappear.
Start with what you've got: measure the stump's diameter and note your yard's sunlight patterns. A north-facing stump needs shade-tolerant plants, while a sunny spot can handle bold annuals or drought-resistant ground covers.
I recommend keeping it simple—my favorite solutions use 3-5 plants or materials you can find at any hardware store. For a natural look, try a "stump garden" with hostas, ferns, or ornamental grasses. If you prefer clean lines, a simple wooden box filled with mulch and seasonal flowers works wonders.
The goal is to create visual interest that draws the eye away from the stump itself.
Think long-term: the best solutions require minimal upkeep once established. Mulch breaks down over time, so plan to refresh it every 1-2 years. Plants may need occasional pruning, but nothing too demanding. A well-chosen hardscaping element—like a stone border or metal planter—can last a decade or more with basic cleaning.
The secret is blending functionality with aesthetics. Your front yard should feel welcoming, not like a DIY project. With the right approach, that stump will become part of the landscape instead of a reminder of what used to be there.
📚 In This Guide
- What you need
- Instructions
- Tips and common mistakes
- Wrapping up and next steps
What you need
- ● Measuring tape – For precise stump and planting area measurements.
- ● Shovel or spade – A sturdy, heavy-duty version (12–18 inches wide) for digging.
- ● Garden fork or mattock – Helps break up compacted soil or roots.
- ● Wheelbarrow or large bucket – For hauling dirt, mulch, or fill materials.
- ○ Stump grinder (rental recommended) – Optional but ideal for reducing stump size before planting. Check local rental stores for availability.
- ● Saw (hand saw, chainsaw, or reciprocating saw) – If you’re cutting the stump down manually.
- ● Work gloves & safety goggles – Non-negotiable for protection!
- ● Topsoil or garden soil – At least 2–3 cubic yards (depending on stump size).
- ● Compost or organic matter – 1–2 bags to enrich the soil.
- ● Mulch (cypress, pine straw, or shredded bark) – 3–5 bags (3 cubic feet each) for a polished look.
- ● Large shrub, bush, or small tree – Choose a fast-growing variety like bamboo, boxwood, or a crepe myrtle (check local climate suitability).
- ○ Landscape fabric (optional) – 1 roll to suppress weeds before planting.
- ○ Garden stones or pavers – Optional for a clean, modern border.
- ● Outdoor paint or stain (if camouflaging with a planter) – 1–2 gallons for a cohesive look.
- ● Hose with spray nozzle – For watering and settling soil.
Step-by-Step guide to disguising an eyesore tree stump
Transform that unsightly stump into a seamless part of your landscape with these proven techniques.
🪴 Step 1: Assess the Stump and Choose Your Approach
First, examine your stump's size, shape, and surrounding terrain. A small, flat stump (under 12 inches tall) responds best to quick cover-ups, while larger, raised stumps need structural solutions. Measure the diameter and height—this determines whether you'll need a mulch volcano, decorative planter, or landscaping fabric base. I always sketch a rough outline of the area to visualize how the finished look will blend with your yard.
Here's the thing—if the stump is still fresh (less than a year old), it might still have residual moisture. Wait until it's completely dry and stable before proceeding. You'll know it's ready when tapping the surface produces a solid thud rather than a hollow thunk. This prevents your chosen cover from shifting or sinking over time.
✂️ Step 2: Prepare the Base for Stability
For any covering method, you'll need a stable foundation. Start by removing any loose bark or debris from the stump's surface. Use a hand tamper or plate compactor to firm the soil around the base, creating a 4-inch thick platform. This prevents your chosen cover from settling unevenly.
I like to add a 2-inch layer of coarse sand over the compacted soil—it drains well and provides a level surface for planting or installing containers. For stumps over 18 inches tall, consider building a wooden frame around the perimeter before adding soil. This keeps mulch or plants from spilling over the edges and maintains a clean look.
🌿 Step 3: Select and Install Your Covering Method
Choose your approach based on your stump's size and your yard's style. For quick, low-cost solutions, fill the stump with 3-4 inches of mulch (like shredded bark) and plant fast-growing ground covers such as creeping thyme or moss. These options work best for stumps under 10 inches tall and create a natural, disappearing effect within 2-3 months.
For a more permanent solution, install a pre-formed stump cover or build a wooden planter box around the stump. Fill with soil and ornamental grasses or succulents for a modern look. Here's where it gets fun—mix in slow-release fertilizer when planting to give your new greenery a strong start. Water deeply after planting to settle the soil and encourage root growth.
☀️ Step 4: Maintain and Refresh Your Stump Camouflage
Your chosen cover won't last forever, so plan for seasonal refreshes. Mulch breaks down and needs replenishing every 6-12 months, while planted solutions may require weeding or pruning to keep them looking tidy. I schedule a quick check every spring to top off mulch or trim overgrown plants before they become eyesores themselves.
Watch for moss or algae growth on wood covers—this signals excess moisture. If you notice dark, slimy patches, it's time to clean with a 50/50 water-vinegar solution and let it dry completely in the sun. This keeps your stump disguise looking crisp and intentional rather than neglected.
🪴 Step 5: Integrate With Surrounding Landscaping
The secret to a seamless look is making your stump cover harmonize with existing plants in the area. Choose foliage colors and textures that match nearby shrubs or perennials. For example, if your yard features silver-blue foliage, pair it with lavender or lamb's ear in the stump planter. This creates visual continuity and makes the stump disappear into the landscape.
Don't forget vertical elements! Add ornamental grasses or small trees near the stump to draw the eye upward and away from the base. A well-placed solar-powered landscape light can also highlight the area at night, turning what was once an eyesore into a deliberate design feature. Real talk: this is where many people stop short—they cover the stump but forget the surrounding space. Pay attention to the full picture.
Tips & tricks for perfectly disappearing tree stumps
A few strategic moves can turn that stump from an eyesore into a seamless landscape feature. Here's what I've learned from years of transforming front yards:
Stump Stability is Everything: In Step 1, when assessing your stump's readiness, I can't stress enough how critical that "solid thud" test is. Fresh stumps with residual moisture will cause your entire disguise to fail within weeks. If you're unsure, wait an extra week—it's better than starting over. For particularly damp climates, consider adding a landscape fabric layer beneath your mulch or soil to prevent future moisture issues. This creates a barrier that keeps the stump dry while allowing water to drain properly through the 2-inch coarse sand layer mentioned in Step 2.
The Right Mulch Makes All the Difference: When using the 3-4 inches of mulch solution for stumps under 10 inches, choose cypress or cedar mulch over pine bark. These varieties resist compaction better and last longer between refreshes (those 6-12 month intervals). For larger stumps, I've found that hardwood mulch holds its shape better when layered with orchard floor for added stability. Pro tip: Spread mulch in a volcano shape—thicker in the center and tapering at the edges—to prevent erosion during watering.
Plant Selection Strategy: The fast-growing ground covers mentioned in Step 3 deserve special attention. While creeping thyme and moss are excellent choices, don't overlook ajuga or sweet woodruff for their vibrant foliage and ability to spread quickly. For stump planters, pair ornamental grasses like fountain grass with succulents such as sedum—this combination thrives in the same conditions and creates stunning visual contrast. Remember to incorporate that slow-release fertilizer directly into the soil when planting; it makes all the difference in establishing healthy roots that can handle the stump's unique microclimate.
Lighting as the Finishing Touch: The solar-powered landscape light suggestion in Step 5 is a game-changer. I recommend positioning it slightly off-center from the stump to create depth and draw attention to your new feature. For a more dramatic effect, use warm-white LED bulbs (2700K-3000K) that complement your existing outdoor lighting. This not only enhances the area at night but also makes your stump disguise stand out as an intentional design element rather than an afterthought.
Pro Tips for Hide A Tree Stump In Front Yard
- A few strategic moves can turn that stump from an eyesore into a seamless landscape feature. Here's what I've learned...
- Stump Stability is Everything: In Step 1, when assessing your stump's readiness, I can't stress enough how critical t...
- The Right Mulch Makes All the Difference: When using the 3-4 inches of mulch solution for stumps under 10 inches, cho...
Frequently asked questions
Got questions about transforming that eyesore into a seamless part of your yard? Here are some of the most common concerns—and their answers—to help you plan like a pro.
What’s the fastest way to hide a tree stump without digging?
If you’re avoiding heavy excavation, try mulching or covering it with decorative rocks. For a quick fix, use a stump cover (like a hollow tree stump planter) or plant fast-growing vines (e.g., ivy or wisteria) around it. These options require minimal effort and deliver instant curb appeal!
How long does it take for a stump to fully decompose if I just leave it?
A stump left untreated can take 5–10 years to decompose naturally, depending on climate and wood type. In the meantime, it’ll attract pests, rot, and look unsightly. For a faster (and cleaner) solution, opt for grinding or covering methods—they work in days, not decades!
Is it cheaper to grind the stump or cover it up?
Costs vary, but grinding typically runs $100–$300 (depending on size), while DIY covers (like mulch or plants) cost $20–$100. If you’re handy, covering is budget-friendly. For a permanent fix, grinding + filling the hole with soil is a smart mid-range investment.
Can I plant flowers or shrubs directly over a stump?
Yes! Use a stump planter or hollow out the top (if small) to create a living garden. Choose shallow-rooted plants like hostas, ferns, or ornamental grasses. Just ensure the stump is stable and treated (if rotting) to avoid pests. Pro tip: Add compost to boost soil quality!
What if the stump keeps sprouting new shoots?
Sprouts happen when roots stay alive. To stop them, apply herbicide (like glyphosate) to the stump’s surface or drill holes and inject it. For organic methods, salt or vinegar can work (but test on a small area first). If grinding isn’t an option, smothering with cardboard + mulch can suppress regrowth over time.
Do I need special tools to hide a stump myself?
Basic tools like a shovel, wheelbarrow, and gloves are enough for mulching or planting. For grinding, rent a stump grinder ($50–$100/day) or hire a pro. If using a decorative cover, you might need a level and landscape fabric. Most methods are beginner-friendly!
Wrapping up and next steps
Hiding a tree stump in your front yard doesn’t have to be a daunting task—with the right approach, you can transform that eyesore into a seamless part of your landscape.
Whether you choose a natural look with mulch or plants, a functional upgrade like a bench or planter, or a creative solution such as a fire pit or garden bed, the key is picking a method that fits your style and maintenance level. 🌿
Ready to take the next step? Pick your favorite idea from this guide, gather your supplies, and get started! Your front yard will thank you—and so will your curb appeal. Happy landscaping! ✨