
How To
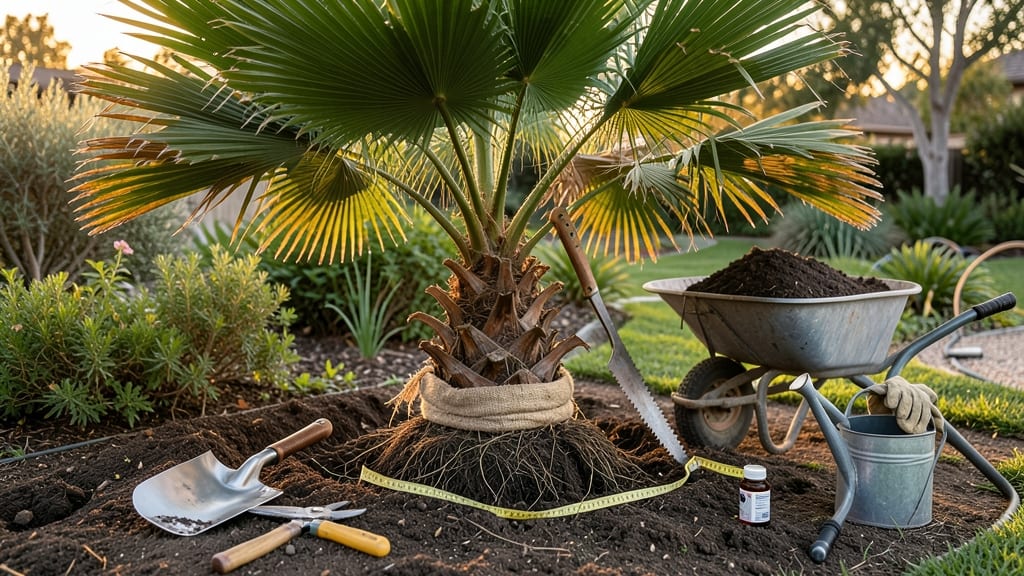
Digging up a palm tree without killing it requires patience and the right approach—because one wrong move can leave you with a sad, brown frond pile instead of a thriving transplant. 🌴 I’ve moved palms twice and learned that timing, tools, and technique make all the difference between success and failure.
The key is to work during cooler months when the tree isn’t actively growing, and to handle the massive root ball like it’s a fragile treasure, not a stubborn stump.
Start by gathering your gear: a circular saw for clean cuts, a shovel for digging, burlap or landscape fabric to wrap the root ball, and pruning shears for trimming fronds. You’ll also need a wheelbarrow, rope, and gloves—palm roots can be tougher than they look.
The real trick is exposing the root system carefully, lifting the entire mass intact, and keeping it moist until replanting. Even the hardiest palms like Majesty or Canary Island palms need this tender treatment to survive the shock.
📚 In This Guide
- What you need
- Instructions
- Tips and common mistakes
- Wrapping up and next steps
What you need
- ● Shovel or digging spade – A heavy-duty, flat-edged shovel (24–30 inches long) for clean cuts and deep digging.
- ● Matchet or pruning saw – For trimming roots and cutting through thick root balls (a pruning saw with a 12–16-inch blade works best).
- ● Wheelbarrow or tarp – To transport soil and the root ball (a large, sturdy wheelbarrow or a 10x10 ft. tarp for dragging).
- ● Garden hose or watering can – A high-pressure nozzle or 5-gallon watering can to keep roots moist during digging.
- ● Burlap or landscape fabric – 3–4 feet wide, to wrap the root ball and protect it during transport.
- ● Rope or twine – 10–15 feet, for securing the burlap around the root ball.
- ● Gloves (heavy-duty) – To protect your hands from sharp roots and debris.
- ● Knee pads or work boots – For comfort and safety while digging.
- ● Measuring tape – To assess the root ball size and digging depth.
- ● Root stimulator or mycorrhizal fungi – Helps the palm recover faster after transplanting.
- ● Post-hole digger – For loosening compacted soil around the root ball.
- ● Tractor or ATV with a front loader – If the palm is very large (20+ feet tall), renting heavy equipment can save your back! 🚜
- ● Plastic sheeting – To line the hole and reduce soil loss during digging.
- ● Fertilizer (balanced, slow-release) – To nourish the palm post-transplant.
Step-by-step guide for safely digging up a palm tree
Here’s how to relocate your palm without damaging roots or stressing the plant.
🪴 Step 1: Gather Tools and Prepare the Site
Start by assembling your tools: a sharp shovel or spade, pruning shears, burlap or landscape fabric, rope or twine, and a wheelbarrow or dolly. I also recommend wearing heavy gloves—palm roots can be tough and sharp. Clear the area around the tree of debris and mark the new planting spot with stakes so you know where to move it.
Check the weather forecast and schedule the move on a cool, overcast day. Direct sunlight will dry out roots faster, while wind can topple the tree. Water the palm 2-3 days before digging to help loosen the soil and reduce transplant shock. You’ll know it’s ready when the soil feels damp but not soggy.
✂️ Step 2: Prune and Loosen the Roots
Before digging, trim any dead fronds or excessive growth with pruning shears—this reduces weight and stress on the tree. Cut back to the trunk or main stem only, leaving healthy fronds intact. Then, use your shovel to make a circular cut about 12-18 inches from the trunk, following the root ball’s natural shape. This creates a clean edge for lifting.
Work the shovel into the soil along this line, gently rocking it back and forth to loosen the roots without severing them. If the soil is hard-packed, use a root saw or pruning saw to carefully cut through tough roots. Stop when you feel resistance—you don’t want to tear the root ball. This step is where patience pays off; rushing leads to broken roots and a slower recovery.
💧 Step 3: Lift and Secure the Root Ball
Once the roots are loosened, position your wheelbarrow or dolly next to the tree. Wrap the root ball tightly in burlap or landscape fabric, securing it with rope or twine. This protects the roots from damage during transport and helps maintain moisture. Lift the tree straight up—don’t tilt it, or you’ll risk snapping the trunk or tearing roots.
If the root ball is too heavy to lift alone, slide the dolly underneath it and roll it out. Keep the tree upright at all times to prevent root damage. Cover the root ball with a damp towel or burlap if you’re moving it a long distance—this prevents the roots from drying out. You’ll know you’re doing it right when the root ball stays intact and the tree remains stable during transport.
🌱 Step 4: Transport and Replant Immediately
Drive or carry the tree to its new location as quickly as possible—ideally within 1-2 hours of digging. Avoid leaving it exposed to sun or wind, which can cause stress. Dig a hole in the new spot that’s twice as wide as the root ball and just as deep. Loosen the soil at the bottom with a fork to encourage root spread.
Lower the tree into the hole, ensuring the top of the root ball sits level with the ground—no deeper, or it’ll suffocate. Backfill with the removed soil, tamping it down lightly to remove air pockets. Water deeply right after planting to settle the soil and hydrate the roots. You’ll see new fronds emerging within 4-6 weeks if the transplant was successful.
☀️ Step 5: Post-Transplant Care for Recovery
Keep the transplanted palm well-watered for the first 2-3 weeks, giving it 1-2 inches of water weekly unless rain provides it. Avoid fertilizing for at least 3 months—the tree needs time to establish roots before taking in nutrients. Prune any damaged fronds that may have occurred during the move, but leave healthy growth intact to fuel recovery.
Monitor the tree closely for signs of stress, like yellowing fronds or wilting. If you see these, increase watering slightly and provide light shade for a few days. Most palms recover fully within 6-12 months, but some varieties take longer. Here’s the thing—transplanting a palm is a big job, but with careful prep and follow-through, your tree will thrive in its new home.
Tips & tricks for safe palm tree transplant success
Moving a palm tree without stressing it is all about preparation and patience—here's what I've learned from years of trial and error.
Tool Prep Matters: Rent a root saw if your palm has particularly tough roots—it's worth the investment for mature trees. I once tried digging a 15-year-old palm with just a shovel and ended up tearing half the root ball. The root saw makes clean cuts through compacted soil without damaging the roots. Also, bring extra rope—you'll need it both for securing the root ball and tying down the tree if wind becomes an issue during transport.
Timing is Everything: The 2-3 days of pre-watering before digging is non-negotiable for most soil types, but sandy soils may need only 1 day of watering. Test by pushing your finger into the soil—it should feel moist about 2 inches deep. Overwatering here creates muddy conditions that make digging difficult. For clay soils, water 3 days in advance—they hold moisture longer and need extra time to soften.
Root Ball Protection: When wrapping the root ball in burlap, leave a 2-inch gap at the top where the trunk emerges. This prevents moisture buildup against the trunk that can cause rot. I also recommend using landscape fabric with holes instead of solid burlap—it allows better airflow to the roots while still protecting them. The fabric should be 2-3 times wider than the root ball to provide full coverage during transport.
Transport Strategy: For the 1-2 hour transport window, keep the root ball covered with a damp towel or wet burlap and avoid placing it directly on pavement—heat transfer can cook the roots. If you're moving more than 30 minutes away, consider using a truck with a tarp to create shade. I learned this the hard way when a palm I moved to a sunny parking lot wilted completely by the time I reached the new site.
Pro Tips for Dig Up A Palm Tree For Transplant
- Moving a palm tree without stressing it is all about preparation and patience—here's what I've learned from years of trial and error.
- Tool Prep Matters: Rent a root saw if your palm has particularly tough roots—it's worth the investment for mature trees.
- Timing is Everything: The 2-3 days of pre-watering before digging is non-negotiable for most soil types, but sandy soils may need only 1 day of watering.
Frequently asked questions
Got questions about transplanting palm trees? You’re not alone—this process can feel tricky! Below are answers to the most common concerns, from timing to troubleshooting, so you can tackle your project with confidence.
When is the best time of year to dig up and transplant a palm tree?
The ideal window is late winter to early spring (before new growth starts) or early fall (when temperatures are mild). Avoid extreme heat or frost—palms are sensitive to stress, and cooler weather helps roots recover faster. For tropical palms, summer transplants can work if you keep the root ball moist and shaded.
How do I know if my palm tree is healthy enough to transplant?
Look for green fronds, minimal yellowing, and firm trunks—these are signs of good health. Avoid transplanting if you see brown, crispy fronds (drought stress), soft or oozing trunks (rot/fungal issues), or pests (like palm weevils). A healthy tree has a root ball at least 12–18 inches wide for stability.
Can I transplant a palm tree without a root ball? What’s the alternative?
While root balls are ideal, you can transplant bare-root palms in emergencies. Dig a wide trench around the tree, lift carefully, and wrap roots in burlap or a tarp to protect them. However, expect higher stress and slower recovery. For large palms, consider professional help—their equipment minimizes root damage.
What should I do if my palm tree’s roots are tangled or damaged during digging?
Don’t panic! Gently tease apart tangled roots (never force them) and trim only dead or broken sections with sterilized pruners. For severe damage, prune 10–20% of fronds to reduce water needs while the roots heal. Apply rooting hormone to cut roots and water deeply post-transplant to encourage regrowth.
How long does it take for a transplanted palm tree to recover?
Recovery time varies by size and species, but most palms show signs of stabilization in 4–8 weeks. Small palms (under 10 ft) bounce back faster, while mature trees may take 6 months to a year. Watch for new frond growth—this is the best indicator! Avoid fertilizing for 3 months to prevent stress.
| Quick Troubleshooting Guide |
|---|
| Problem: Yellow fronds after transplant |
| Solution: Likely transplant shock. Keep soil moist, avoid fertilizer, and prune only dead fronds. |
| Problem: Wilting or drooping |
| Solution: Check for root damage or overwatering. Reduce watering and stake the tree for support. |
| Problem: Slow or no new growth |
| Solution: May need patience or nutrient boost. Test soil pH (palms prefer 6.0–7.5) and add compost after 3 months. |
Wrapping up and next steps
Digging up a palm tree and transplanting it safely is a rewarding project that can breathe new life into your landscape—just remember: patience and preparation are key! 🌴 With the right tools, timing, and care, you’ll give your palm the best chance to thrive in its new home.
Now that you’re armed with step-by-step know-how, take the plunge—literally—and watch your green investment flourish.
Ready to get started? Mark your calendar for the ideal transplant season (spring or fall) and gather your crew—because two hands (or more!) make light work of this heavy lift. Happy digging! 🛠️