
Pruning
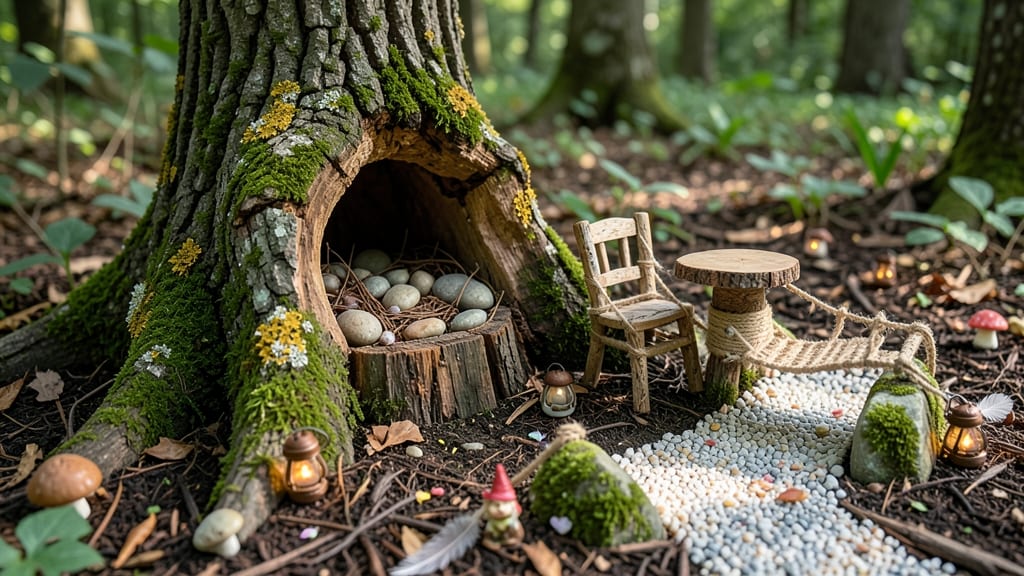
Building a fairy house out of a tree stump creates a charming garden focal point by carving out the center, incorporating tiny furnishings, and adorning it with organic materials like moss, stones, and branches for an enchanting forest aesthetic.
This project turns an ordinary tree stump into a magical hideaway for fairies by leveraging its natural shape and texture. 🌿 The key is starting with a stump that's already weathered—its rough bark provides perfect texture for climbing vines and miniature details.
I always recommend using a stump with a natural hollow or one you can safely carve by hand (no power tools needed!).
The real magic happens when you combine found materials like acorn caps for shingles or pinecones as decorative accents—these elements make the house feel like it belongs in the woods rather than being a manufactured decoration.
What makes this project so rewarding is how it blends crafting with nature. The stump's organic imperfections become design features—cracks can turn into doorways, and knots become built-in shelves. For extra durability, seal the wood with non-toxic outdoor varnish before adding any decor, especially if your climate gets wet.
This transformation works beautifully in both formal gardens and wild woodland settings, creating instant whimsy wherever you place it.
💡 In This Article
- How to Prepare a Tree Stump for Fairy House Construction
- Best Fairy House Decorating Materials for Tree Stumps
How to prepare a tree stump for fairy house construction
The first step in transforming a tree stump into a fairy dwelling is selecting the right specimen. Look for a stump with a natural hollow or one that's already partially decayed—this gives you a head start on creating the interior space.
A stump with a 12-18 inch diameter works best for most fairy house designs, as it provides enough surface area for details while remaining manageable to work with. The key is finding a stump that's stable enough to support carving but soft enough to shape with basic hand tools.
Safety comes first when preparing your stump. Start by removing any loose bark and debris with a wooden mallet and chisel—never use power tools that could splinter the wood dangerously.
For hollowing, begin with a small hand saw to create a starter hole (about 2-3 inches wide), then gradually widen it using a wooden spoon or curved chisel to shape the interior walls.
Work slowly to avoid creating sharp edges that could injure fingers. Moisture control is critical—if your stump is still damp, let it dry in the sun for 2-3 days before carving to prevent rot during construction.
The structural integrity of your fairy house depends on how you prepare the stump's base. Sand the exterior surface with 80-120 grit sandpaper to smooth rough areas where fairy furniture will sit, then seal the entire stump with a non-toxic outdoor varnish (like AFM Safecoat) to protect against weather.
This sealant also prevents the wood from absorbing moisture that could cause warping over time. For extra stability, consider placing the stump on a concrete base or large flat rock if you're in an area with heavy rainfall—this keeps it level and prevents sinking into soft ground.
Consider the natural features of your stump as design assets. A stump with existing cracks can become a charming doorway or window frame—simply clean out debris and accentuate the lines with a wood-burning tool for definition.
The grain patterns in the wood often suggest perfect locations for built-in shelves or ledges. For example, a prominent knot might become the perfect spot for a tiny mushroom cap or a fairy's front porch.
These organic details make your fairy house feel authentically part of the woodland rather than a manufactured decoration.
Lighting is another often-overlooked preparation element. If you want your fairy house to glow at night, embed a solar-powered LED light (like those used in garden paths) into the base before adding decor. Choose warm white lights (around 2700K) to create a magical ambiance without harshness.
For daytime visibility, position the stump where it receives dappled sunlight—this natural lighting enhances the textures of moss and lichen you'll add later. The interplay of light and shadow will make your fairy house appear alive and inviting to tiny visitors.
Finally, plan your stump's placement before you begin construction. Fairy houses work best when integrated into their surroundings—position yours near existing garden features like toadstools, boulders, or a small stream for maximum impact. The surrounding landscape should complement rather than compete with your creation.
For instance, a stump near a cluster of hosta plants creates a natural woodland scene, while one surrounded by lavender evokes a more cottage-garden aesthetic. This thoughtful placement transforms your fairy house from a standalone decoration into a focal point of the entire garden ecosystem. ✨